WhatsApp Desktop is a free programme that you may use on your Windows or Mac computer. Unlike the previous configuration, using WhatsApp on your desktop will provide you with the same experience as using it on your mobile device. That is, both sending texts and making phone calls.
However, there may be times when you encounter problems that impair the application’s usual functionality. For example, WhatsApp may fail to open, or even if it works, you may be unable to send voice notes or make phone calls due to the WhatsApp microphone not working with Windows 11.
Recommended Post:- How to Completely Flush & Reset DNS in Windows 11 – Complete Guide
Why isn’t the microphone working on WhatsApp Web?
There are a few possible causes for the WhatsApp microphone not working in Windows 11. The following are the most common reasons:
- Poor internet connection:- In Windows 11, an unstable or poor Wi-Fi connection may prohibit the application from using the microphone.
- Outdated version:- If you are using an out-of-date WhatsApp Web version, this could be why you are unable to access the microphone.
- Privacy settings:- Your WhatsApp Web settings may have been configured in such a way that you are unable to utilize the microphone when using WhatsApp Web.
- Close other apps:- The Whatsapp microphone not functioning issue could be caused by the microphone being in use on another app, rendering it unavailable for use in WhatsApp.
What can you do if the WhatsApp microphone on Windows 11 is not working?
While there are a few options you may try to resolve the WhatsApp microphone not working on Windows 11 issue, you can begin by quickly reviewing the following:
- Check to see if WhatsApp is down.
- Check your Internet speed to ensure it is at an optimal level.
- Log out of the application and then back in. If you are not connected to the internet, you may be unable to use WhatsApp’s microphone feature.
- Check to see if your microphone is working.
- Restart your device if necessary.
Solution 1: Unmute Incoming Desktop Calls
WhatsApp allows you to customize notifications, including the option to muffle all incoming desktop calls. If you mute desktop calls, you will not receive any incoming call notifications, creating the impression that you are not receiving any.
This article will show you how to modify and enable notifications for all incoming desktop calls.
- Step 1: Start the WhatsApp desktop application.
- Step 2: Select Settings from the three-dot menu in the top left corner.
- Step 3: Then, in the left pane, select the Notifications tab.
- Step 4: Check the choices for Incoming call ringtones and Mute all incoming desktop calls.
- Step 5: Exit and restart the WhatsApp desktop client to verify if you can receive calls normally.
Solution 2: Examine Your Internet Connection
A high-speed Internet connection is not required for WhatsApp voice calls. However, a stable connection is required to avoid frequent call drops and glitches. To assess your Internet speed, do a network speed test.
If you don’t detect any problems with your connection, try switching between the various networks. Switch, for example, from Wi-Fi 2.5GHz to a 5GHz network or your mobile hotspot.
Check your router’s network settings and firewall setup if WhatsApp calls operate when connected to a different network.
Solution 3: Keeping the WhatsApp App Open
The WhatsApp desktop app, unlike most instant messaging and team collaboration tools, closes when you exit it. As a result, it is critical that you minimize it rather than closing and exiting the app.
So, even if you’re not actively using the app, keep it running in the background to receive calls.
Solution 4: Check the Permissions for Your Camera and Microphone
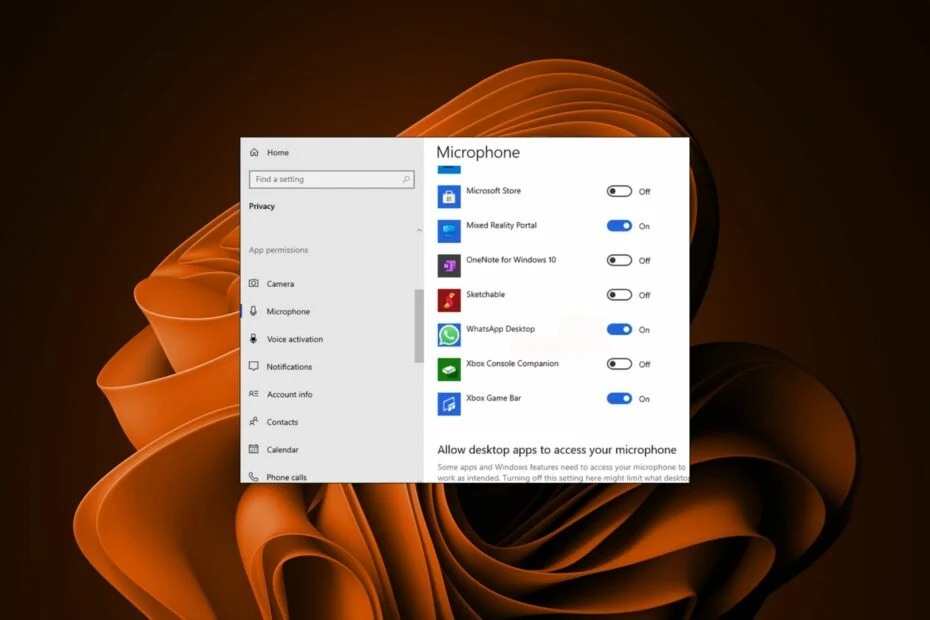
If you want to make video calls, WhatsApp needs access to your computer’s microphone and camera. Check that the app has the required permissions to access these devices.
To enable the microphone in the WhatsApp desktop app, follow these steps:
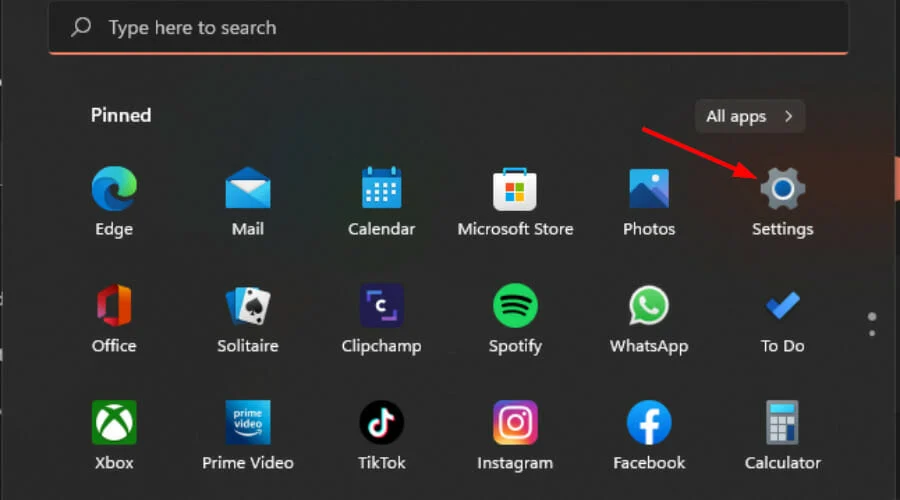
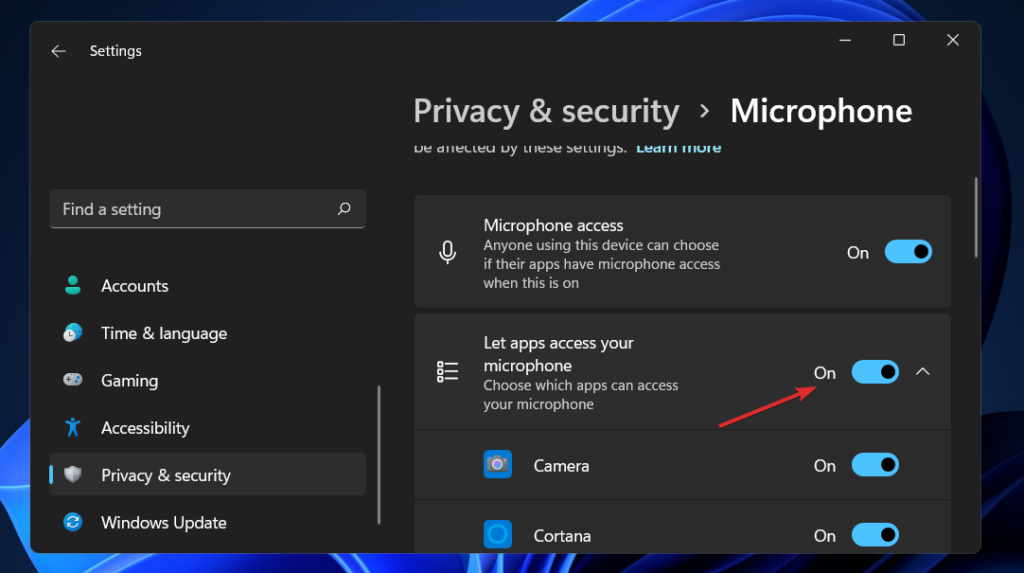
- Step 1: To open Settings, press Win + I.
- Step 2: In the left pane, click the Privacy & security tab.
- Step 3: Scroll down to the Apps permissions section.
- Step 4: Then, select Microphone.
- Step 5: Check that the Microphone access option is turned on.
- Step 6: Also, ensure that the Allow apps to access your microphone option is turned on.
- Step 7: Scroll down to find the WhatsApp app.
- Step 8: Then, activate the button to enable WhatsApp desktop app notifications.
You should be able to make WhatsApp calls from your PC now that microphone permission has been given.
If the problem is with video calls, ensure the app has access to your internal or external camera.
To enable WhatsApp’s camera permission in Windows, follow these steps:
- Step 1: To open Settings, press Win + I.
- Step 2: Then, in the left pane, click the Privacy & security tab.
- Step 3: Scroll down to the App permissions section and select the Camera option.
- Step 4: Make sure that both the Camera access and Let apps access your camera options are turned on.
- Step 5: Scroll down to find the WhatsApp app and click the button to enable camera access for the app.
Solution 5: Repair or uninstall WhatsApp Desktop
To repair faults with the app, use Windows’ built-in repair functionality. Here’s how to go about it.
- Step 1: To open Settings, press Win + I.
- Step 2: Then, in the left pane, select the Apps tab.
- Step 3: Select Apps & Features.
- Step 4: Locate WhatsApp, click the three-dot menu, and then choose Advanced Options.
- Step 5: Scroll down to the Reset section and press the Repair button. Once the fix is finished, look for any improvements.
- Step 6: If the problem persists, go to the WhatsApp Advanced Options page and select the Reset option.
- Step 7: Click Yes to confirm the operation and wait for the app to be reset to factory defaults.
Solution 6: Uninstalling and reinstalling the app
As a last resort, you can uninstall and reinstall the app. Here’s how to go about it.
- Step 1: Navigate to the Settings page.
- Step 2: Navigate to Apps and Features.
- Step 3: Find WhatsApp and select the three-dot menu.
- Step 4: Uninstall should be selected. To confirm the process, click Uninstall once again.
- Step 5: After uninstalling, restart your computer. The app can be reinstalled from the Microsoft Store.
Conclusion
We’ve finally arrived at the end of our article for today. You can resolve the problem by attempting any of the solutions listed above. However, due to insufficient permission to access your system’s microphone and camera, WhatsApp calls in the desktop app may cease operating. If the problem persists, check your WhatsApp notification settings and troubleshoot your Internet connection.


