The computer is a very necessary tool for every photographer, you can be a professional or a just for fun photographer, you need a computer to do a lot more with photos. Well, with more access to cameras and smart devices with cameras, photography has gained a new light and anyone with a camera device can take good and beautiful photographs. So, to support photographers, OS manufacturers and software developers have been flocking in with lots of innovative photography features to their respective products.
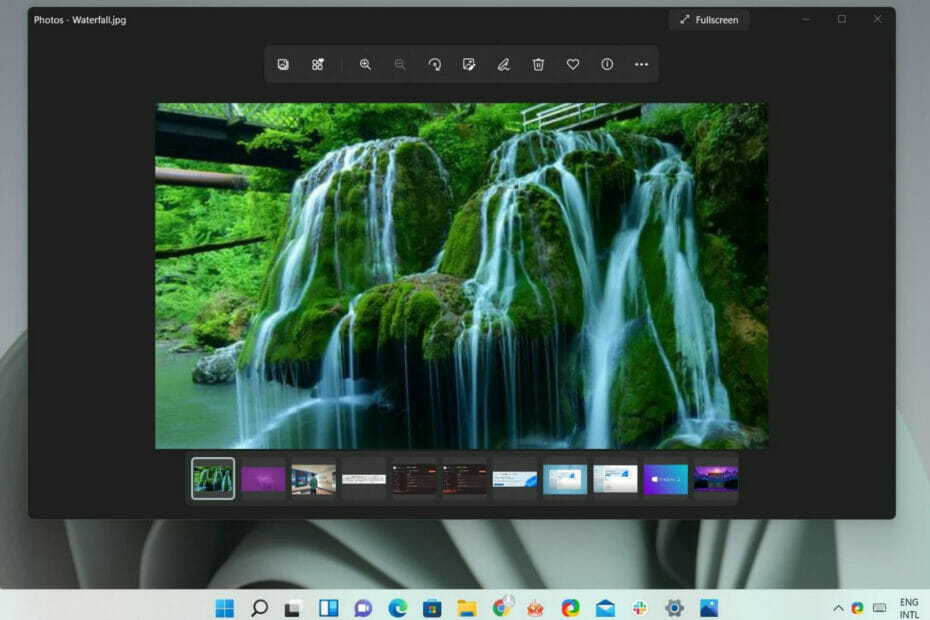
Mostly all OSes come with a basic or an advanced photo viewer, and this is pretty much enough to view and do simple edits to the photographs. Well, in Windows OS, the photo app has been a default one. And with Windows 11 coming up, the new photos application has got some upgrades. Here we will discuss what’s new in the photos application and how to stop it from automatically brightening the photo.
Windows 11 being a new and improved OS that is about to release soon, Windows users are hyped up and some have tried out the preview builds out of sheer intrigue. Well, so far preview builds are pretty promising and Microsoft is making progress with fixing the issues and errors in the builds to make the official OS release a fine one. It’s great news for many of you who run a computer that is compatible with Windows 11. So, the OS features a lot of great stuff like improved user interface, enhanced security and privacy settings, improvements to applications and features of the OS, and much more. Each Windows application is getting upgraded to make the OS look consistent and powerful. So to make the photo application effective, Microsoft has done some improvements.
Recommended Post:- Microsoft Your Phone App is Getting an Update for Windows 11
What’s Improved in the Photos Application
Well, as previously said, Microsoft has improved the photos app to provide better photo viewing features and also improved it with other basic editing features. Now, let’s see what’s improved in the application.
- Photos application is getting new user interface, well this change is necessary for the application to match with the OSes user interface.
- The application has got a new preview pane at the bottom, where you can view the previous and next images in the series and scroll through with ease.
- The tabs in the application have been upgraded, which holds all the editsa and other options to make it suit well with the OSes user interface.
- Now, with the new photos application, you can open your photograph with a third-party photo editing application like photoshop, affinity photos and other applications that have been installed on your computer. This makes it easier for you to select the photo you need to edit and edit it much efficiently.
Well, there are lots of upgrades to the application and you will find them out when you use it on your computer. But, there is an issue reported by some preview build users. The issue is that the photos application automatically increases the brightness of the image with low brightness and this annoyed some users.
So, with the issue in the photos application, the photo viewing experience has been ruined and this issue will be a major concern for professional photographers as they need to view the original photo to process it properly in the post-processing process.
Well, this feature has been developed to improve the effectiveness of the application by providing the users with a good image output but at some times this feature is just a mess and it needs to be fixed. Well, there is a fix for the issue and if you are looking for fixing the issue, you can jump right into the method and fix the photos application automatically increasing the brightness of the photographs.
Method to fix the Photos Application Automatically Adjusting Brightness on Windows 11
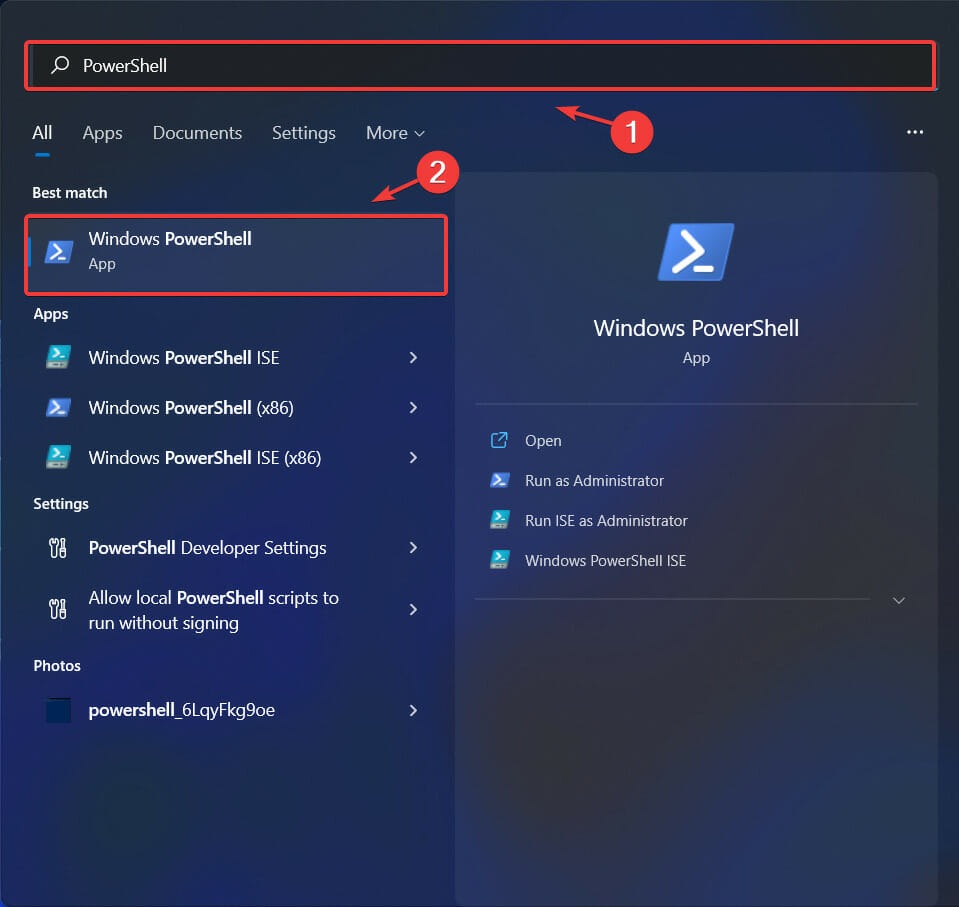
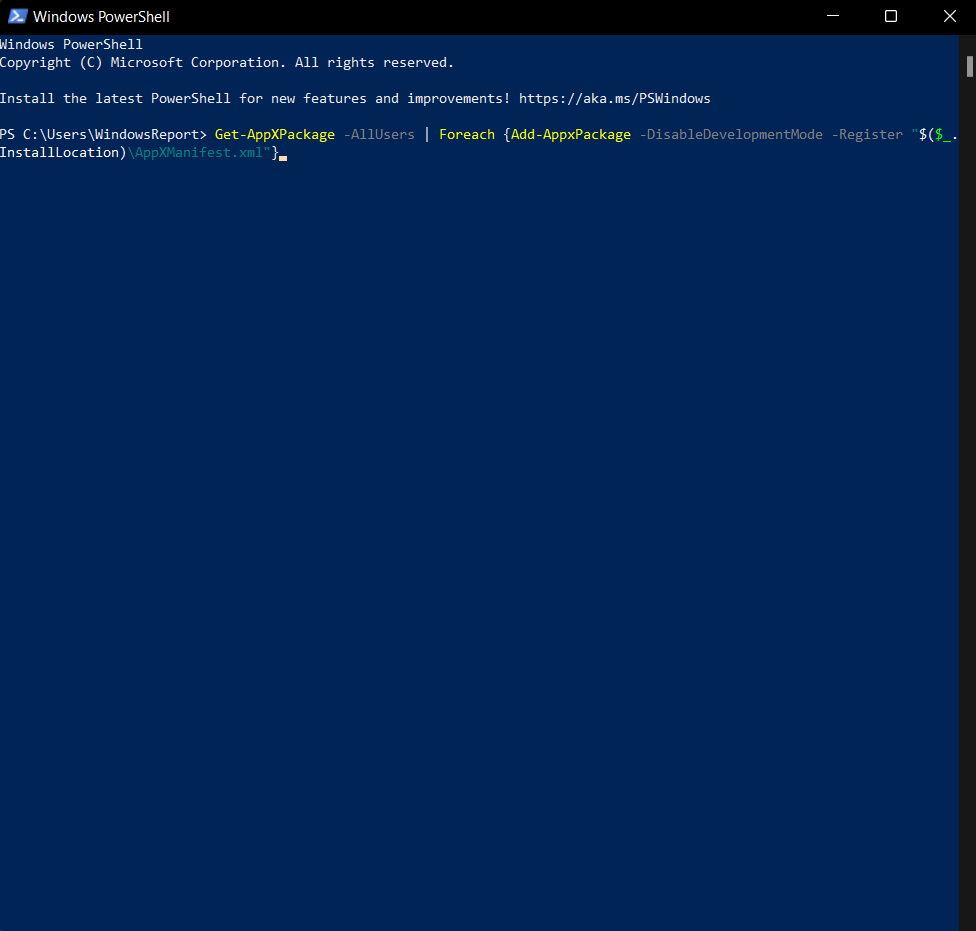
Well, the fixing process is pretty simple and you just have to copy and paste the command in the Windows PowerShell terminal and run it and restart the computer, so, here is the step-by-step solution for fixing the issue.
- Open the search option and then enter PowerShell.
- Now open the PowerShell with Run as an administrator.
- Here in the PowerShell terminal, copy and paste this command “Get-AppXPackage -AllUsers | Foreach {Add-AppxPackage -DisableDevelopmentMode -Register “$ ($ _. InstallLocation) AppXManifest.xml”}” (exclude the quotation marks “ “).
- Now, run the command by hitting the enter button.
- Once the command has been executed, exit the PowerShell.
- Now, restart your computer to make things right.
- Well, if you check the photos application the automatic brighten feature will be disabled.
Well, this method is pretty simple and if you are annoyed with the auto-to-brighten feature, you can easily fix the issue. Well, once the issue has been fixed you can view your photographs effectively and perform minor and major editing with the built-in editing tools or use an installed photo editor like photoshop and Affinity Photos for better results.
Hope the information and the step-by-step guide were useful and informative, once the auto brightens feature is disabled you can enjoy viewing the photos as they are without any enhancements.


