You might be wondering what happened to the network connection icon in your notifications tray. When this occurs, you normally have an internet connection but are unable to see the Wi-Fi signal bar, ethernet icon, or connection status icon. In some circumstances, you are unable to connect to the internet, and there is no icon to open the Network and Sharing Center.
This can be caused by several factors, including a missing network connection status icon, a network service that isn’t operating, or a Windows Explorer issue. The missing symbol can usually be restored by activating it in the notification tray settings.
Generally, the network or wireless symbol appears on your PC’s taskbar/notification panel (even when there is no internet connection or activity).
Nevertheless, for one reason or another, the icon may disappear from your Windows 7 and 10 taskbar and you will no longer be able to access it.
This article, you can try one of the other techniques described in this article.
Recommended Post:- Proxy Server Keeps Turning on in Windows 10: Disable it now
All About Windows 7 and Windows 10
If your machine is still running Windows 7, the time is running out. Beginning January 14, 2020, Microsoft will no longer provide any support including those crucial security upgrades. Upgrading to Windows 10 is the answer, but if you’ve been using Windows 7 for so long, you might not even be aware of the changes. We’ve put together a quick primer on the operating systems as well as the main distinctions between Windows 7 (launched in 2009) and Windows 10 to help you get up to speed (released in 2015).
Certain Live Tiles are pinned next to the list of your desktop programmes by default to provide you with rapid access to information like the weather, sports, and other topics at a glance. Furthermore, extensively tailored for more recent touchscreen devices are Windows 10’s Start menu and Live Tiles, and Microsoft has plans to enhance the user interface.
You can download Instagram, Twitter, Facebook, Netflix, and other services from the Microsoft Store to your PC, just like you can from the App Store on your iPhone. They speed up and simplify access to some of those well-liked services, and the user interface as a whole is slightly improved for more recent touchscreen devices. Windows 7 cannot in any way achieve that.

Windows 10 offers a distinct notification area known as the Action Center, which is identical to your iPad. Notifications on Windows 7 normally show in the taskbar, but Windows 10 takes it a step further by consolidating alerts into a single, clean, and succinct interface. In Windows 10, the Action Center will provide notifications regarding crucial system information and emails. It also contains simple toggle buttons for screen brightness, file sharing, network settings, and other functions.
The advent of Cortana is another big distinction between Windows 7 and Windows 10. This Windows 10 voice assistant is similar to Apple’s Siri in that it may help you with certain activities such as keeping track of sports scores, and weather, and sending emails. Cortana is a key feature of Windows 10 and is integrated with various core areas, including the Microsoft Edge web browser, which is exclusive to Windows 10. Its web browser is also more up-to-date than Internet Explorer 11, which came with Windows 7. It includes ad-blocking extensions, the ability to continue online pages from your phone, and other features.
In terms of file searching, Microsoft is separating Cortana from search in the current version of Windows 10. This makes Windows 10’s search experience more like Windows 7, but with the added benefit of searching the internet and the web for useful information in addition to your files.
How do you make the network symbol appear on the taskbar in Windows 10?
- Step 1: Open the ‘Start’ menu by clicking on the ‘Windows’ icon.
- Step 2: On the ‘Start’ menu, click the Settings icon.
- Step 3: In the ‘Settings’ window, select the System option.
- Step 4: Choose Notifications and actions.
- Step 5: Choose Add or delete fast activities.
- Step 6: Locate the Network option on the list of choices and toggle it to On.
- Step 7: Finally, close the window.
- Step 8: Verify that the network symbol is now visible on the taskbar.
How can You get the network symbol to appear on my taskbar in Windows 7?
If your network icon in Windows 7 is gone, you can quickly regain it by checking the hidden panel with minimized applications. If it’s still there, simply drag it back to the Taskbar.
If this is not the case, you can adjust the taskbar under System settings or restart Windows Explorer. Read on for more information on the solutions.
Solution 1: Look in the Taskbar’s Hidden Panel.
Most of the time, the network is simply hidden and not gone. When this occurs, the user (or a third party) likely pulls the network icon into the hidden bar.
To restore it, simply drag & drop the icon from the hidden panel back to its original spot.
Follow the steps below to accomplish this:
- Step 1: On your taskbar, expand the hidden panel. A triangle arrow is commonly used to represent it (facing up).
- Step 2: Look for the network/Wi-Fi symbol in the hidden bar.
- Step 3: Double-click the icon and drag it back to its original position in the taskbar.
- Step 4: Finally, you’re done!
This solution applies to both Windows 10 and Windows 7.
If the network icon does not appear on the taskbar or hidden panel, use the next step to resolve the problem.
Solution 2: Reconfigure the Taskbar to display the Network symbol
If the network icon does not appear on the Windows 7 taskbar, your system may have been modified to remove the item from the taskbar. This could have been done unintentionally by a third party or even by yourself.
In only a few steps, you may adjust your taskbar to re-enable the network icon, as seen below.
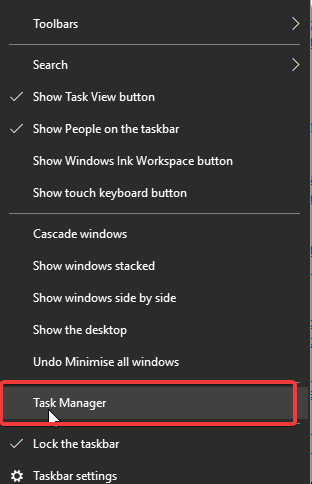
- Step 1: Go to the taskbar and right-click on it.
- Step 2: From the list of options, choose Properties.
- Step 3: Go to the Taskbar area and select Notification Area.
- Step 4: Choose Customize.
- Step 5: Click on Choose which icons and notifications appear on the taskbar in the right-hand box.
- Step 6: Go to Icons and look for the Network option.
- Step 7: Go to the Behaviors section (next to Icons) and select the Show icon and notifications drop-down choice next to ‘Network’.
- Step 8: From the options, choose On.
- Step 9: To complete the process, follow the on-screen instructions.
- Step 10: Quit the software and verify that the problem has been resolved. If not, proceed to the next method.
Solution 3: Restart Windows Explorer as a third option.
Follow the instructions below to run this procedure:
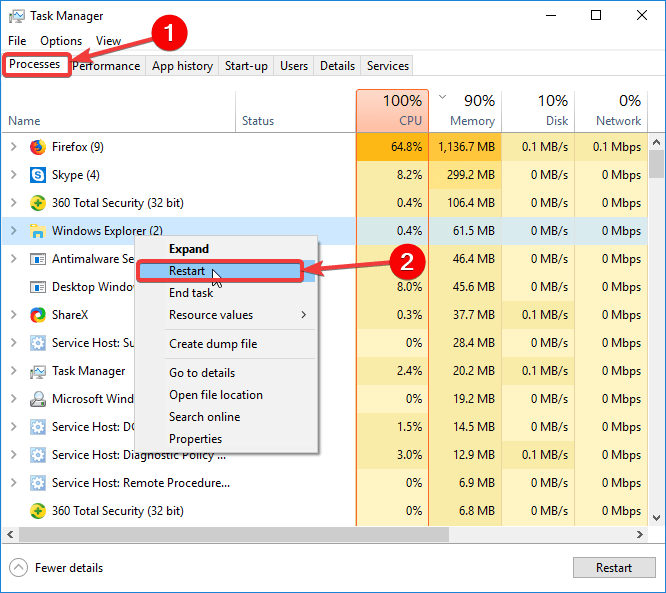
- Step 1: Right-click on your screen’s ‘taskbar’ area.
- Step 2: From the list of options, select Task Manager.
- Step 3: Go to the Processes tab in the ‘Task Management window.
- Step 4: Go to and right-click Windows Explorer/exe.
- Step 5: Choose Restart (on Windows 10) or End Process (on Windows 7).
- Step 6: Finish the process by following the prompt commands. This should resolve the problem.
If none of the previous techniques works, you can try reconfiguring the taskbar display in “Registry Editor (Regedit)” and/or “Group Policy Editor (gpedit)”. The latter – gpedit – is, unfortunately, only relevant (for fixing this particular problem) on Windows 10.
Solution 4: Making Use of the Registry
Continue with this step only if you’ve tried the previous ways and are familiar with the Windows registry.
- Step 1: Open Windows + R, type’regedit,’ and then press Enter to enter the registry editor.
- Step 2: Go to the registry key shown below.
HKEY_LOCAL-MACHINE\SYSTEM\CurrentControlSet\Control\Networkcopied to clipboard copied to clipboard - Step 3: Locate the Config entry under this key and right-click to delete it. Don’t worry if you missed this entry; it’s alright.
- Step 4: Restart your computer in step four. During a reboot, the configuration entry will be rebuilt automatically.
If you don’t see Config, disregard this technique because it is only for individuals who have their settings altered manually or by a third-party tool.
Solution 5: Resetting the Icon Cache
- Step 1: Right-click on an empty spot on your desktop and select Display Properties.
- Step 2: Choose the Color Quality from 32 to 16 bits based on the structure of your Display settings.
- Step 3: Click Apply, return to 32-bit, and restart your computer.
Solution 6: Restart Explorer.exe and Modify the Registry
If none of the preceding ways works, we can try removing some registry keys and restarting Explorer.exe from the command prompt as a final option.
- Step 1: Hit Windows + R, type ‘cmd’ in the search box, right-click on the result, and select ‘Run as administrator’.
- Step 2: Now, one by one, run the following commands:
REG DELETE “HKCU\Software\Microsoft\Windows\CurrentVersion\Policies\Explorer” /V HideSCANetwork /FREG DELETE “HKLM\SOFTWARE\Microsoft\Windows\CurrentVersion\Policies\Explorer” /V HideSCANetwork /Ftaskkill /f /im explorer.exestart explorer.exe - Step 3: Check the network icon to verify if the problem has been resolved.
How can we link Windows 7 with Windows 10?
Under different conditions, you have two choices. If your Windows 7 and Windows 10 computers are connected to the same network, you can link them using a LAN connection or remote desktop software. If the two computers are on different networks, you can use remote desktop software to connect them. Select based on your circumstances!
How to Create a HomeGroup in Windows 7 and Windows 10
- Step 1: To create your first HomeGroup, click Start. Step 2:
- Step 3: Go to the Settings menu.
- Step 4: Choose Networking & Internet.
- Step 5: Go to Status; Step 6: Choose HomeGroup.
- This will launch the HomeGroups management interface.
- Step 7: Click To begin, form a homegroup.
- Step 8: Press the Next button.
Click in the Permissions list box, then select the objects you want to share with other computers on your home network. These are the libraries associated with your Windows user account. If you’re not sure what’s in these, see our article on how libraries function in Windows. - Step 9: Press the Next button.
Wait for Windows to configure your choices. A password will be generated for you. Take note of this; you’ll need it when adding new machines to this home group. - Step 10: Next, launch File Explorer and navigate to Homegroup in the Navigation pane.
- Step 11: Finally, click Join now.
- Step 12: Open Settings if you don’t see HomeGroups in File Explorer.
- Step 13: Go to Network & Internet.
- Step 14: Click on the Status option
- Step 15: Go to Homegroup and select Join Now.
If you still don’t see Homegroups, proceed to the Troubleshooting Homegroups section.
As you can see, getting all of your Windows OS on the same page with HomeGroups can be difficult at times. But, once your HomeGroup is configured, sharing libraries and printers among your connected PCs is simple and convenient. This is a terrific way to share images from your primary PC with all of your machines or to access a music library from a centralized location.
What is the function of the network icon on Windows 7 and Windows 10 Systems?
Network icon designs will aid in the development of your network, linking businesses via cell phones, Windows, and PowerPoint presentations. On the other side, they can symbolize a router connection, which would look excellent on your desktop! This will allow you to connect quickly and continue working without disrupting your productivity.
Conclusion
What happened to the network connection icon in your notification tray? Maybe something you’re curious about. In this circumstance, you frequently have access to the internet, but you cannot see the ethernet icon, Wi-Fi signal bar, or connection status symbol. Other times, you can’t access the internet because the network and sharing center sign are missing.
There may be an issue with Windows Explorer, the network service may not be running, or the full network status indicator may be missing. The vanished symbol can usually be restored by turning it on in the notification panel settings.


