Windows 10 is a cool operating system, this is one of the most intuitive OS released by Microsoft in 2012. Practically this is the last edition of Windows and only updates and improvements will be provided to the OS to make it better and no new OS will be released. The OS comes with pretty useful tools and applications, which can come in handy many times. You can use the tools and applications directly from the computer. This reduces your struggle in downloading appropriate software from the internet to perform your works.
The software is intuitive and functions well and is capable of providing you with professional support. It’s not that the tools are the best in the market as there is a pretty powerful software with improved features that are developed by some third-party company. Previously Windows OS had poor quality built-in applications and tools making them incapable of use but with WIndows 10 all the applications got improved and perform better in providing the users with the best experience. You can find much built-in software and use them effectively to work efficiently.
Voice recorder is one such utility application that is built-in to the Windows 10 OS. the application provides you with the feature of voice and audio recording. The application is versatile and can record audio with great clarity. It’s very easy to use and has an intuitive user interface to make it easy for the users to function efficiently. There are many important functions available in the software that can be used to record and edit the audio in a better way. No professional knowledge is required to use the voice recorder application. You can record short voice messages for yourself or record and share them with people. If you are recording for personal or professional uses you can use this software as it is pretty easy to use and has a good user interface. You will find all the necessary tools in the user interface and will find no problem in choosing the tools as everything will be displayed on the screen.
With such efficient software, you can easily record whatever you want with your Windows computer let it be your friend snoring or you recording for a podcast.
Recommended Post:- How Rainbow Six Siege rank and MMR System Works – Complete Guide
How to Efficiently use Voice Recorder Application on Windows 10
It’s pretty easy-to-use software with basic editing tools to make your work simple. The recorder is precise and the tools perform well to provide you with a great recording feature.
Here you will learn how to use each of the aspects of the Voice Recorder software.
- First, open up the Voice Recorder by searching it on the search bar, you can also navigate to the application from the list in the start menu.
- Once opened, you will see a pretty basic user interface.
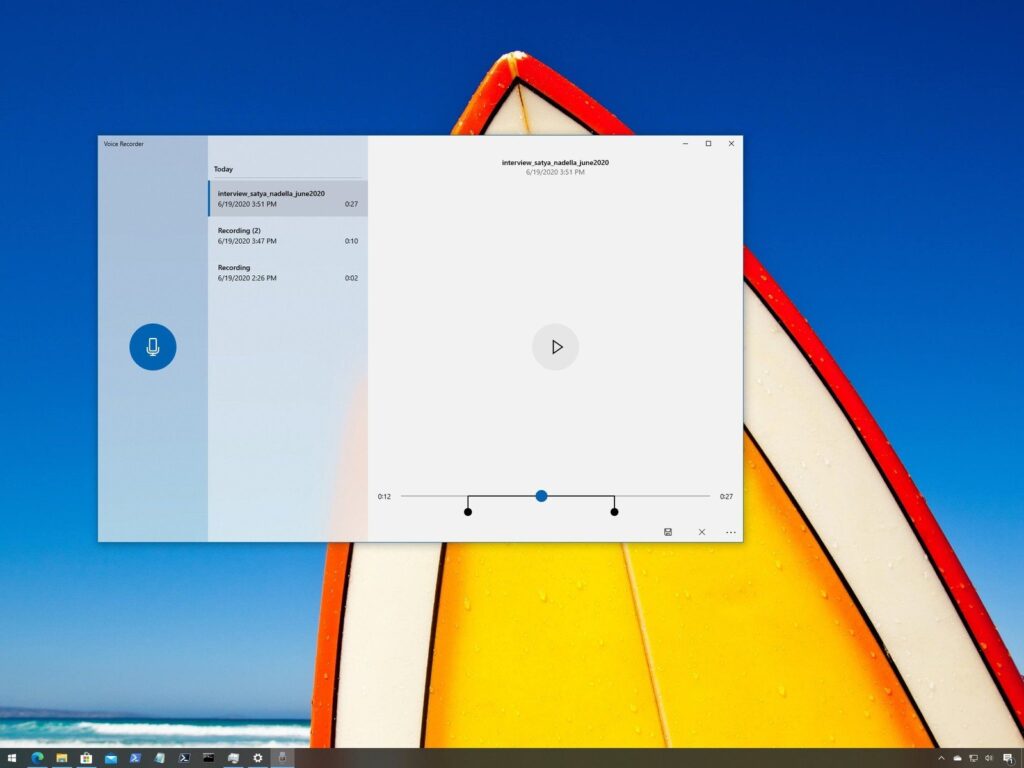
- You will find a player and the list of recorded audio on the right and a record button on the left.
- If you are using the software for the first time, you will not find the list of previously recorded audios.
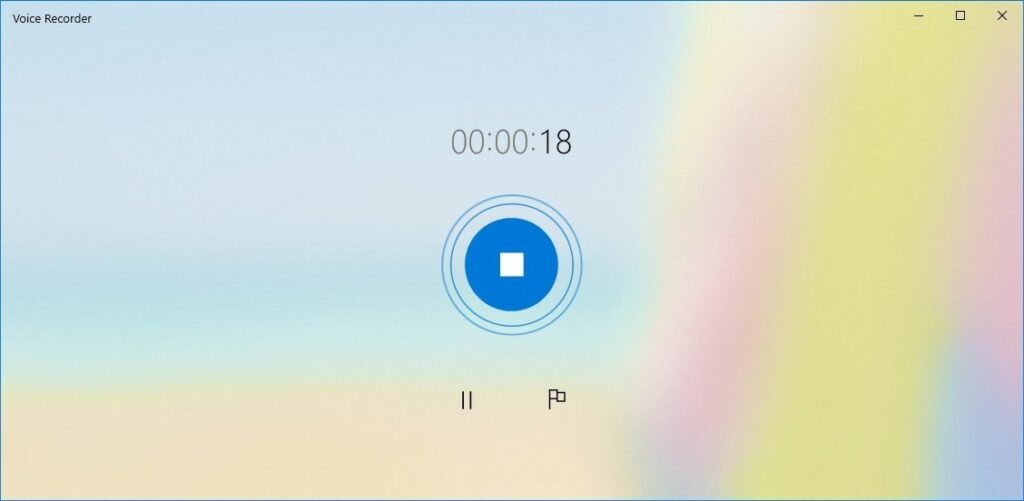
- You just need to click on the record button to record audio.
- You will find a pause button and a lag button on the record screen.
- You can pause the recording and continue afterwards using the pause button.
- You can flag a particular spot in the recording and can use the flagged spot during playing the recorded studio to jump to the flagged position.
- These are the features that are available during recording the audio.
- Once you have recorded the audio, you can play it using the player option in the software.
- The player option comes with some editing options using which you can trim, rename the files, delete and share the audio file.
- As mentioned before you can use the flag options to jump to the particular flagged point to start the playing from that position.
- The trim option is pretty useful and can be used to trim out the unwanted parts in the audio, with this you can edit the audio file and can easily save the copy that you prefer.
- You can record audio using the built-in microphone of your computer or use an external mike for high precision and clarity.
- You need to provide permission to allow the software to use the built-in microphone option by going to settings > privacy > microphones > allow access to applications to use the microphone. Enable the switch near the audio recorder software.
- If you have a problem with the microphone, check for permission from the settings and try to troubleshoot the sound settings to rectify any possible errors.
- You can access the microphone settings directly from the applications by clicking on the three dots at the right bottom of the screen and selecting microphone settings.
- If you prefer to know where the audio files are being saved, you can find out the location by clicking on the three dots at the right bottom of the screen and choosing open file location. You will be taken to the file location in WIndows explorer.
The audio recorder application in Windows 10 is pretty neat software, it functions very efficiently and provides you with some pretty basic control features to record audio efficiently. You can use the software to record any audio, edit it and save it on your computer. The software is pretty useful and comes in handy many times. You can record instantly and share it through any of the supported sharing platforms.
Hope the information provided above was useful and informative. Try using the audio recorder application and record audios instantly and easily.


