When you assemble or buy a new computer, you need to install the OS on the computer to run it, the installation process is quite simple and you need to know some basic concepts about your motherboard and the OS you are going to install. Most of the computers in the market come with the OS pre-installed, but when you try to assemble a custom PC with different parts, you need to install the OS by yourself. You can install the OS without contacting a professional as it is that simple and Microsoft had made the installation process easy to follow for anyone. You will learn the proper step-by-step procedure to install the Windows 10 OS with UEFI support.
First, you need to understand what UEFI is so that you will better understand the installation process. You might have heard of the term BIOS from somewhere and would only know it’s something related to the computer and the motherboard. Well, with this basic understanding, understanding UEFI will become easier. BIOS (basic input/output system) is the pre-built firmware in the motherboard that is built by the manufacturer to customize the motherboard and make all the hardware connected to the motherboard functional.
BIOS is an older built-in firmware of the motherboard and the updated and upgraded version is UEFI. UEFI has some perks over the legacy BIOS and has higher capabilities. UEFI provides more support to high-power hardware features like larger hard-drive, high-end graphic drivers, and much more. The UEFI is a bit of a high-end firmware and is needed only by heavy users like hard-core gamers and professional designers. Normal users can go with the legacy BIOS as the firmware and it is very user-friendly.
You just don’t have to worry so much about the UEFI and the BIOS part as you will not need to deal with them much and the installation process will guide you through the using of the firmware to install the OS without having to worry much.
USBs are much more viable compared to the CDs and DVDs that were previously used for installing OSs and software on computers. Most modern-day computers don’t come with a built-in CD driver and getting one has no real advantage. All the softwares are available for download from the internet and the use of CDs is slowly fading away. You can get a pen drive from any retail outlet or website that sells them, they can be used for many other purposes and assist you with data transferring from one computer to another without the need for internet. You just need to get a good pen drive to install Windows 10 on your computer.
Recommended Post:- Easy Way to Permanently Disable Microsoft Defender Antivirus on Windows 10
How to Create a Windows 10 Bootable DIsk to Install the OS on a Computer
Before you install the Windows 10 OS on the computer, you need to download the create a bootable disk using the media creation tool.
- Follow the steps mentioned below to create the Windows 10 Bootable USB device.
- You need some pre-requisites to create the USB bootable device.
- You need a USB pen drive, with a capacity of at least 8 GB. make sure that your pen drive is empty and doesn’t contain any important files. You need to format the pen drive before creating a bootable device.
- You need two computers, one to download the OS and making the boot device and the other to install the OS.
- You need to download the Windows 10 media creation tool to download the OS and place it on the USB stick (pen drive).you can download the Windows 10 media creation tool from the official Microsoft website.
- You now need to run the .exe file that you have downloaded.
- Now once the tool is being run, choose the option that says create installation media (USB flash drive, DVD, or ISO file) to create the installation media onto the USB.
- Now, click on next and choose the language and edition, and architecture. If you are unsure of the architecture, choose both from the drop-down menu.
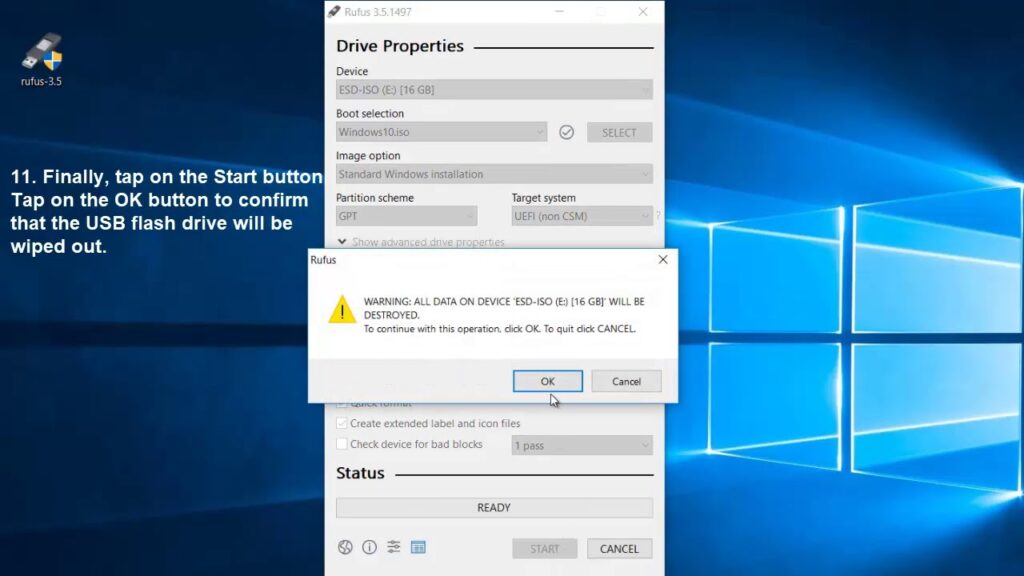
- Click on next, now, choose the USB flash drive option, choose the USB that is connected to the PC to install the installation media file to the USB flash drive.
- Click on the Next button. The tool will download the installation media from Microsoft. Once the process is complete click on Finish to exit out of the tool.
- You have successfully created a Windows 10 bootable USB flash drive. All that is left is the installation of the OS on your computer.
How to Install Windows 10 from USB with UEFI support
Here comes the tricky part, this is where you will use the BIOS to install the Windows 10 OS with UEFI support:
- Insert the USB flash drive with the OS file to the computer.
- Power up the computer.
- When the computer boots up click F12 to enter the boot mode or the BIOS.
- Once in the BIOS, you can change the bot option to UEFI.
- You need to go to the boot setup.
- Under this tab, select the boot sequel and choose the UEFI to set it as the boot sequel.
- Now choose the USB flash drive from the list that’s mentioned under the UEFI mode.
- The computer will boot up and will take you to the Windows 10 installation wizard.
- Using the installation wizard you can install Windows 10 on your computer with UEFI support.
The installation process is very simple and you just need to follow the wizard and select your preferred options whenever necessary in the wizard.
Hope the steps mentioned above were helpful and informative. With this step-by-step procedure, you can easily install Windows 10 on your computer with UEFI support.


