CPU is a very important component in the computer and every process gets processed by the CPU with this, the case OSes give the CPU very special privileges and the CPUs developed these days are made very capable. With the CPU being so sacred, OSes are made in such a way that the CPU is perfectly managed for better performance. Well, at times the CPU gets overloaded with processes to process and it malfunctions or has issues like high CPU usage.
The Task Manager helps you manage processes running on your computer. So, if issues like high CPU occur on your computer you can find it on the taskbar. Moreover, You can use Task Manager to stop running programs, and end processes, view details about running processes, and change settings associated with running processes.
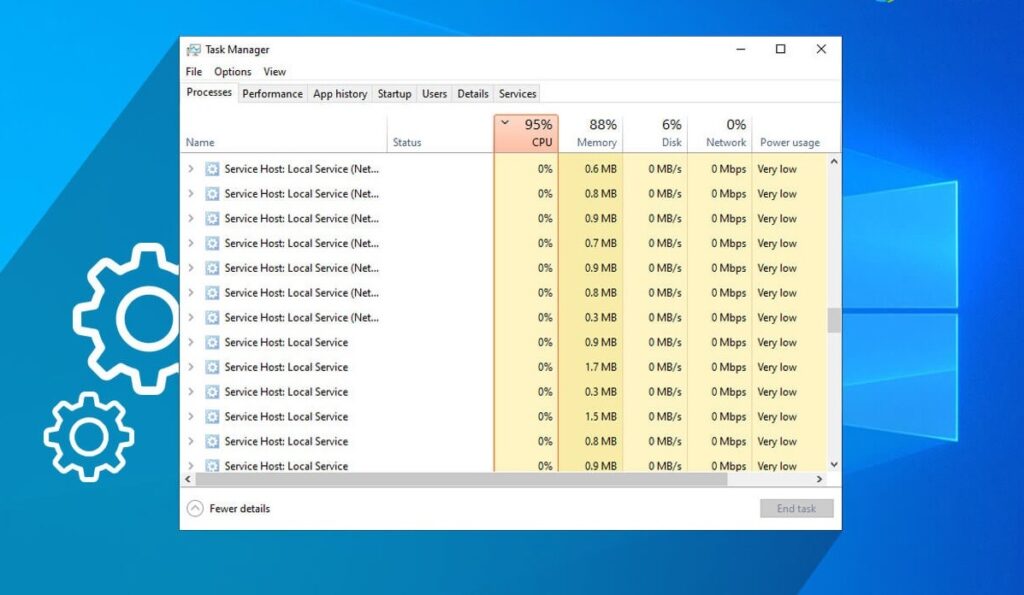
Well, the high CPU usage issue that we are about to discuss here is that of the SysMain process. The SysMain process is an enhancement process that runs in the background enhancing the user experience by speeding the process and the loading of files. This process analyses your computer usage and collects data to enable enhancement. So, this process is an enhancement process, having it running in the background is not necessary unless you are looking forward to performance enhancements.
Recommended Post:- Fixed: Missing or Failed Printhead Errors on HP Printers
Simple Methods to fix the Service Host SysMain High Usage on Windows 10
Here are some simple and straightforward methods to fix the service host Sysmain’s high CPU usage issue on Windows 10. The best method is to disable the service as in most cases this service is seen to cause issues rather than an enhancement to the performance.
Method 1: Reboot Your Computer
Windows 10 likes to reboot automatically when things go wrong, so try rebooting your computer. If that doesn’t work, you can try other methods mentioned below. To do this, hold down the power button until you hear the startup chime. Then press and release the volume keys on your keyboard until you’re in Safe Mode. Once in safe mode, you should be able to log in normally again.
Method 2: Clean Boot Your PC
Running a clean boot on your computer can solve many issues on the system.
- To perform a clean boot, open the system config.
- Now, in the system config, go to the general tab.
- Here, Check the Load system services box and uncheck the Load startup items box under Selective startup.
- Click on the services tab and here, check the box near the hide all Microsoft services box. Now, disable all and then click on Ok.
Method 3: Defragment the Disk
Defragmentation is a very crucial system management operation that every user must perform to keep the system running efficiently. Defragmentation will improve the efficiency of the hard disk.
- To perform defragmentation, open Windows Explorer by using the shortcut Windows + E
- Here in the explorer, right-click on the preferred driver(C or other drivers) and select the Properties option.
- Now, in the tools tab select the optimize and defragment drive option.
- Here, click the optimize button.
- Now, the defragmentation tool will open, and here, select the disk you want to defragment and then select analyze option and then select optimize option.
- The tool will first analyze the drivers and then defragment them if necessary.
Method 4: Update the OS
Updating the operating system can fix system file issues in many cases, so updating your computer can be a potential fix for the issue.
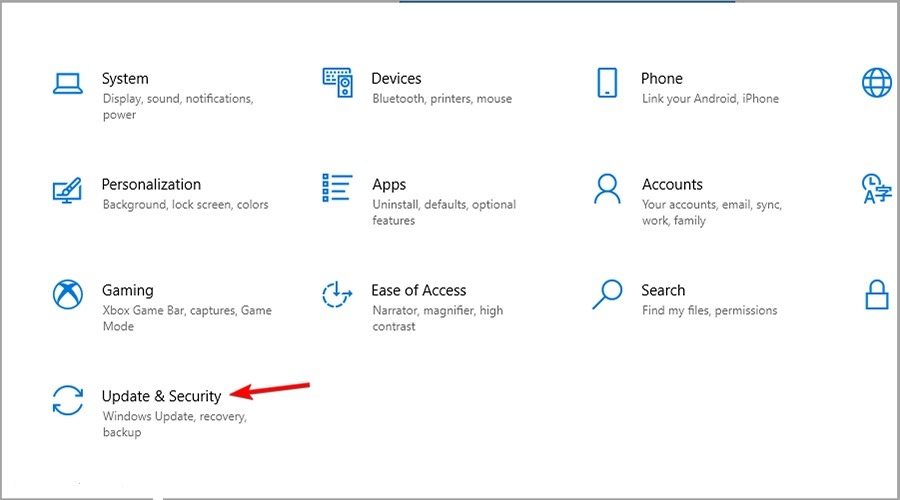
- To update your computer, open the settings application by using the Windows I shortcut.
- Now, in the settings application, go to the updates and security tab.
- Here, go to the Windows update tab and then check for updates.
- If there is an update available, you can install the update on your computer.
- Once the updates have been installed your computer will automatically restart to normalize the update.
Method 5: Disable the Service on your Computer
- Press Windows + R keys on your keyboard. This will bring up the Run Utility. Type “services.msc” without the quotes and press Enter on your keyboard. This will open the Services window. services.msc
- Scroll down to see the SysMain service. Right-click on it and then select Properties from the context menu.
- Stay in the General tab. Make sure the startup type is set to Disabled, then click the Stop button next to Service Status. Doing this will stop the service when you turn on your computer.
- disable Sysmain
- Click Apply and OK to exit the window. You should be able to see a significant improvement in the performance of your system.
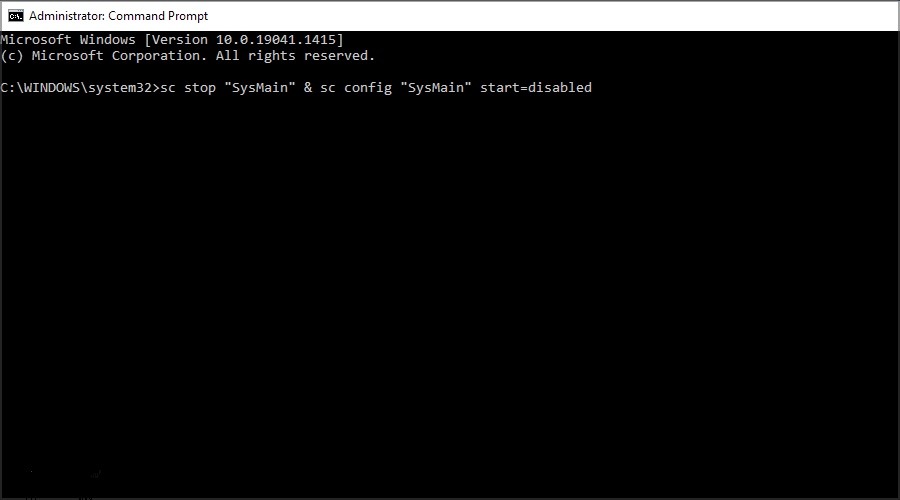
Method 6: Use Command Prompt to Disable the SysMain Service
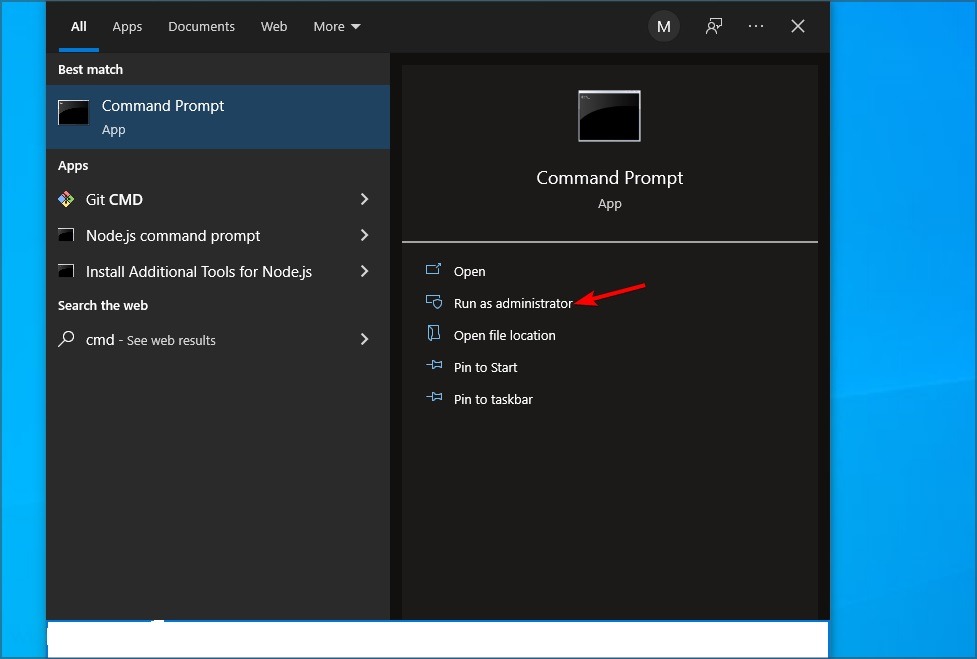
- Press Windows Key + S.
- Type cmd. Click Run as administrator to open the command prompt.
- In the Command Prompt window, type the following command and press Enter: “sc stop “SysMain” and sc config “SysMain” start = disabled”.
- You should see the Service configuration change successfully. In this way, you can disable the Service Host SysMain.
Hope the information provided above was helpful and informative, with these simple methods you can easily fix the service host SysMain’s high CPU usage on Windows 10.


