Errors on computers are pretty common and most errors that occur on computers these days are very preliminary and can be resolved by anyone with basic computer knowledge. Errors on computers are of various kinds and all of them occur only when the OS is struggling to handle something on its own and it needs human interventions to fix the issue. It is just like humans need doctors when sick and some simple medicines will fix the issue, likewise, errors can be fixed with some simple methods or procedures that will fix the error from the root.
The Windows OS is prone to errors and this is pretty normal, users might encounter errors frequently and most of them would be very minor or will not affect the users with accessing the computer, but some errors can take up users’ time. These errors can be pretty problematic and users need to make sure that they deal with them to fix them and run the system efficiently to do so, they need to use some tools and features of the computer or use external tools to fix the issue.
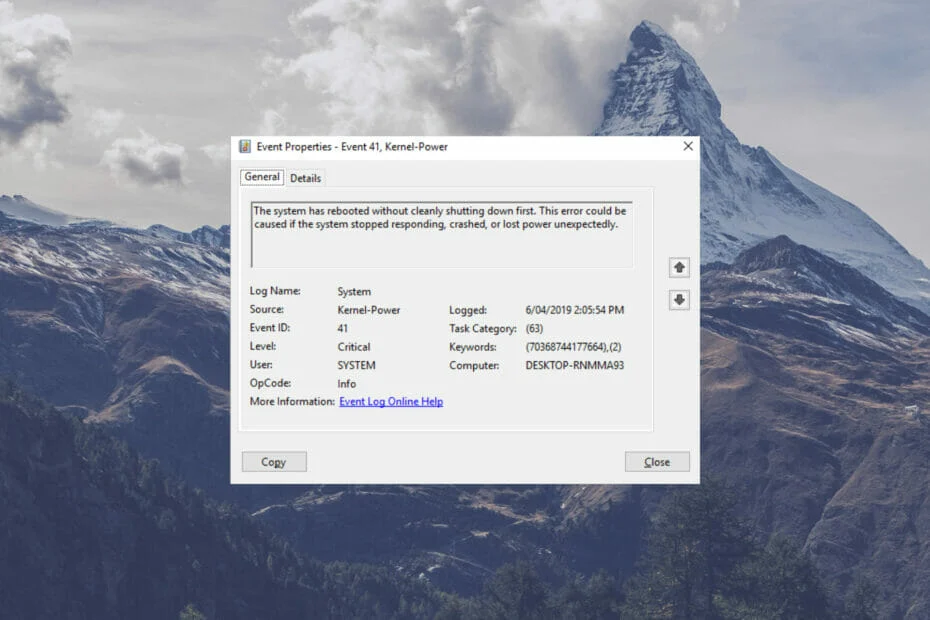
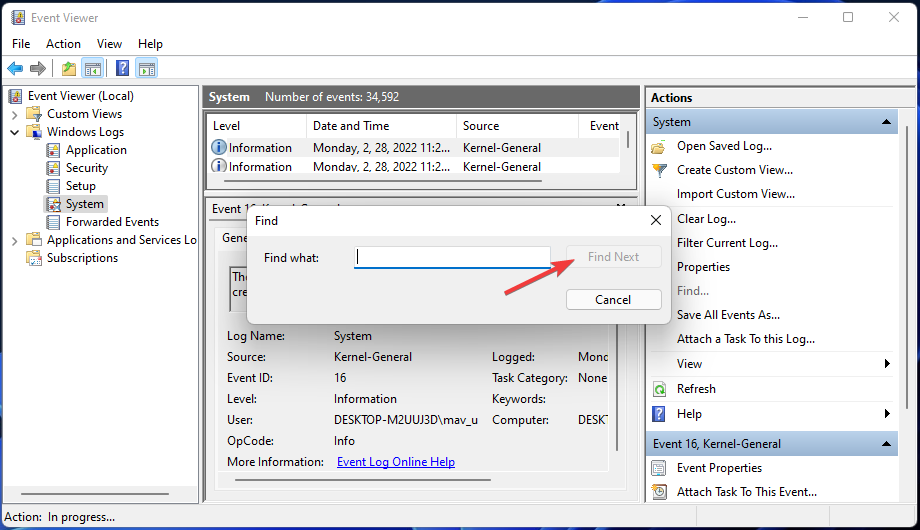
Errors on computers can be classified into different types and some errors are very frequent to occur like the BSoD error, 100 per cent Disk and CPU usage error, DLL errors and update errors but some can be rare. One such rare error on Windows OS is the Event ID 41 Error on Windows computers.
Recommended Post:- How to Download LTSC on Windows 11 – Quick Guide
The Event ID 41 error on Windows computers occurs very rarely and the main cause of the issue is the computer the power component. There might be other possible causes for the error to occur and they are corrupt system files, overclocked CPU or other components, third-party application conflicts etc. So, these causes can be pretty normal and can happen to any user, and if you are currently facing the abrupt restarting problem with an error message Event ID 41? This article is completely dedicated to resolving the error.
Simple Methods to Fix the Event ID 41 Error on Windows 11
Mentioned below are some simple methods that will help you with fixing the Event ID 41 error, the methods described below are pretty simple and straightforward, hence, you can easily follow along and fix the Event ID 41 error on Windows computers.
Method 1: Update your Windows Computer
With corrupt system files being one of the reasons for the error to occur, updating the Windows OS can be a potential fix, as when you update your computer, the update you install might bring in a new version of the file which will replace the corrupt file.
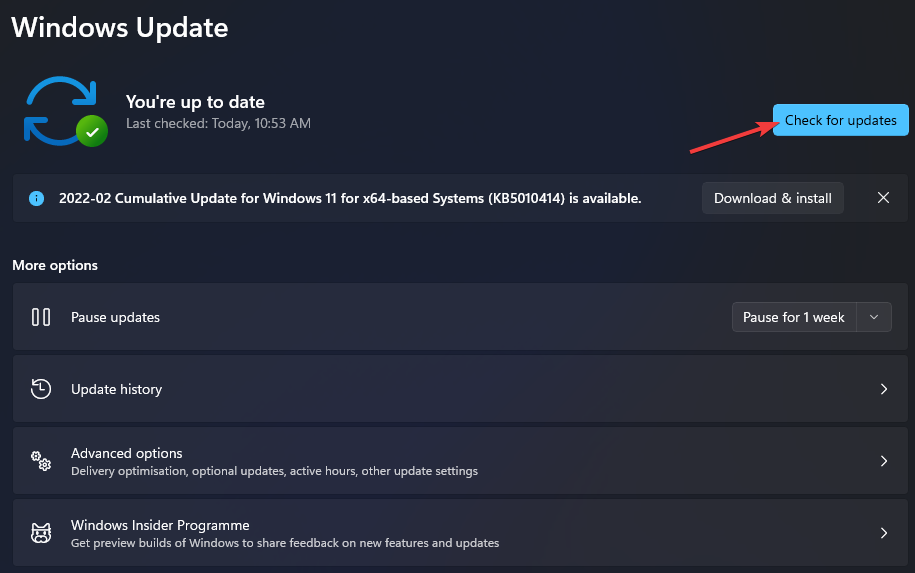
- To update the Windows OS, open the settings application by using the shortcut Windows + I on the keyboard.
- Here, in the settings application, navigate to the Updates tab and here check for updates.
- If there is any update available for download, you can download and install it with ease.
Method 2: Run the SFC Scannow Command
The SFC scan will fix corrupt files on the OS and fix any issue caused by the corrupt file.
- To run the SFC scan, open the command prompt as an administrator.
- Now, in the command prompt terminal, type in SFC/Scannow and hit enter.
- The command will run and any system file that seems to be corrupted will be fixed by the command.
Method 3: Try Using the Power Troubleshooter
With Power management being one of the reasons for the error to occur on Windows, running the power troubleshooter will help with fixing the error if it is caused by faulty power management.
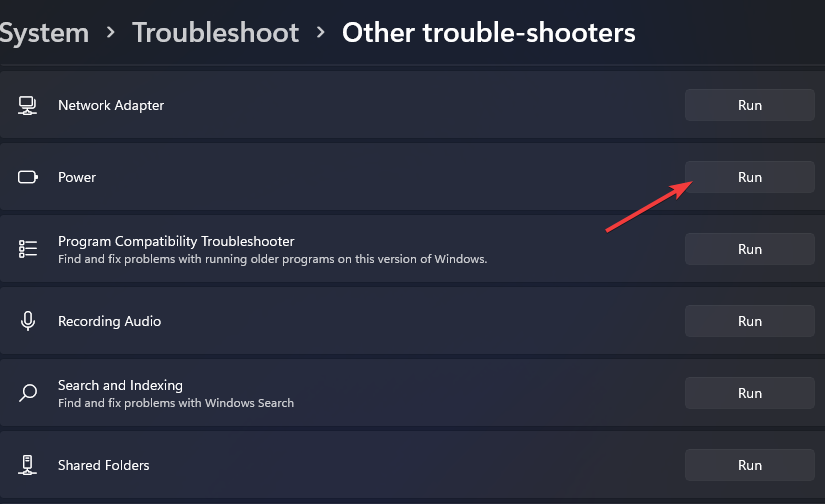
- To run the power troubleshooter, open the Settings application using the shortcut Windows key + the I key on the keyboard.
- Now, in the settings application, select the troubleshoot option or just search for it in the search tool available in the settings.
- Here in the troubleshooter tab, select the additional troubleshooter option.
- Here, from the list of troubleshooters select the power troubleshooter and then run it.
- If any issue with the power management system of the OS, the troubleshooter will fix it.
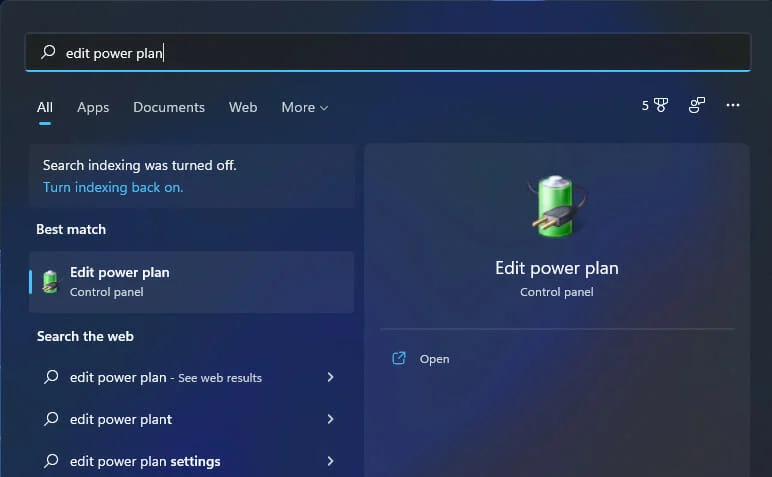
Method 4: Change the Power Settings
- Open the power options by using the search bar in the taskbar.
- Here, type in edit power plan and then hit enter.
- From the search results, select the edit power plan option.
- Here, on the edit power plan page, select the change advanced power settings.
- Here, click on the hard disk option and then select never in the box.
- Now, click on the sleep option and then click on the sleep after option to expand the options.
- Here, select never from the drop-down menu.
- Now, press on apply and then on Ok to save the changes.
- Now, restart your computer to make the saved change take effect.
Method 5: Underclock all your Overclocked Components
As mentioned above, overclocking the components of the computer will cause this error to occur, so, try to undo the overclocking and check whether the issue is resolved.
Hope the information provided above was helpful and informative, with these simple methods mentioned in detail, you can easily fix the Event ID 41 error on your Windows computer.


