When you encounter the error number 0x8007041d during the Windows Update process, your system is unable to download or install updates. It is accompanied by a notification stating that the service did not react to the start or check request on time. As a result, we will present potential remedies in this article.
The 0x8007041d error code is a typical Windows problem that occurs when attempting to connect to a distant machine or network. a lot of the time in the world.
This error code is commonly connected with Windows Update, backup and restore activities, and file transfers. It might arise due to several factors, such as network connectivity issues, firewall settings, antivirus software, or a corrupted system file.
The following are some probable reasons for error code 0x8007041d:
- Network connectivity issues: This error code can appear if your internet connection is down or your computer is not properly linked to the network.
- Firewall settings: This error code may appear if your firewall is obstructing the connection to the target machine or network.
- Antivirus issue: Certain antivirus software can interfere with network connections, causing this error number to display.
- Corrupted system files: If you have an issue with your system files, this error code may display.
You can try different troubleshooting procedures to resolve this error number, such as checking your network connection, stopping antivirus software, restarting the Windows Update service, and checking your firewall settings.
Recommended Post:- How to Fix Windows Sandbox Failed to Start
If these methods do not resolve the problem, you may need to repair or replace your operating system. So, in today’s article, we will look at all the possible solutions to fix 0x8007041d easily. Let us begin.
What is Windows Error?
Today, millions of PC and laptop users use the Windows operating system. And most of them may have at one time suffered some form of Windows issue. Microsoft introduced crash reports to give a way for gathering and delivering post-error debug information or for performing troubleshooting actions based on whether the user encountered a syntax, logic, or run-time issue.
If the user receives a stop code, the error message includes brief troubleshooting information. The user can then search for that specific error message and apply the repair found on Microsoft support sites as well as other internet articles and journals on the subject.
At times, the user merely receives a message that the machine has crashed and is then allowed to send a crash report to Microsoft. This is done to gather data for analysis so that Microsoft can provide a solution to the user.
In any event, here is some general troubleshooting knowledge to help you resolve Windows Problems.
What is the meaning of error code 0x8007041d?
The error code 0x8007041d: The service failed to reply to the start or check request on time indicating a problem with your system’s operation. It’s a runtime issue that happens during the Windows update procedure.
In addition, the problem is generally preceded by Windows running slowly and being unresponsive to mouse or keyboard input. It can also crash any open windows on the screen.
Symptoms of Error 0x8007041d
Syntax errors, logic errors, and run-time errors are the three types of Windows errors. When a user encounters a Syntax Error, the computer will display an error message indicating that something has crashed in the background. Applications that the user accesses may stall or entirely crash.
The user can continue to use the other apps, but a perplexing message appears now and then, stating that the accessed software cannot run because a process is not working.
Run-time errors occur during the execution of an application. So, when a mistake occurs, it occurs without warning, and the computer notifies the user that there was an issue.
Logic faults are caused by programming errors. A bug produces undesired results or behavior. When it comes to computer systems that have been thoroughly tested and commercialized, logic errors occur only when there have been major changes in the physical state of the logic board.
Possibly a portion of the real buses melted together or something similar happened. This can cause the computer to make a loud beep or a grinding noise, and it may even go into a sudden unstable operation, freezing up, or a sudden temperature shift before the real crash.
What is the source of the error code 08007041d?
The 0x8007041d error message is frequently displayed as a result of system problems, such as:
- Software installation or uninstallation issues: Changes to the software operating on your computer leave files and data residues on the system. These files may interfere with the operation of the system.
- Incorrectly configured system settings: Certain system settings might stymie the Windows update process, resulting in a delay and a time check error.
- Corrupt system files: Windows error code 0x8007041d might occur as a result of corrupt system files. As a result, the ongoing process cannot access them.
Regardless of the causes, the actions mentioned below should resolve the issue.
How can You fix the error code 0x8007041d?
Try the following before moving on to more sophisticated troubleshooting steps:
- Switch off any background apps that are running on your PC.
- Scan for viruses & spyware.
- Restart Windows in Safe Mode and check for the appearance of error 0x8007041d.
The troubleshooting steps for each Windows Error category are different. When confronted with these errors, however, there are common steps that can be taken. They’re right here.
Solution 1: Scan the system files with System File Checker (SFC)
- Step 1: Click the Start button, input Command Prompt, and then select Run as administrator.
- Step 2: On the User Account Control screen, click Yes.
- Step 3: Type and click Enter the following: SFC/scannow
- Step 4: Restart your System and verify if the 0x8007041d appears.
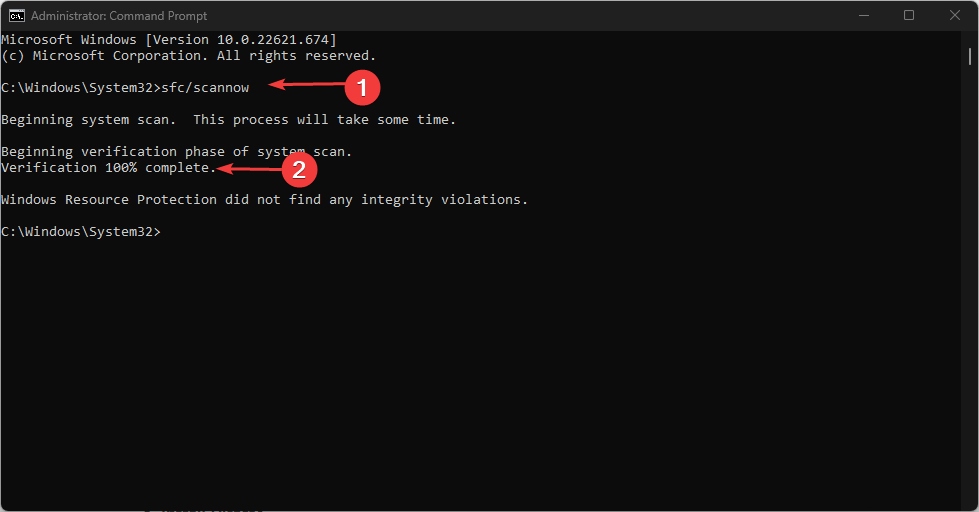
An SFC scan will detect and repair corrupt system files on your PC screen that may be causing the error in your system.
Solution 2: Reset your computer’s time and date
- Step 1: Hit the Windows + I keys together to launch the Windows Settings app.
- Step 2: Choose Date and Time from the Time & Language menu.
- Step 3: Choose Change next to Set the date and time manually.
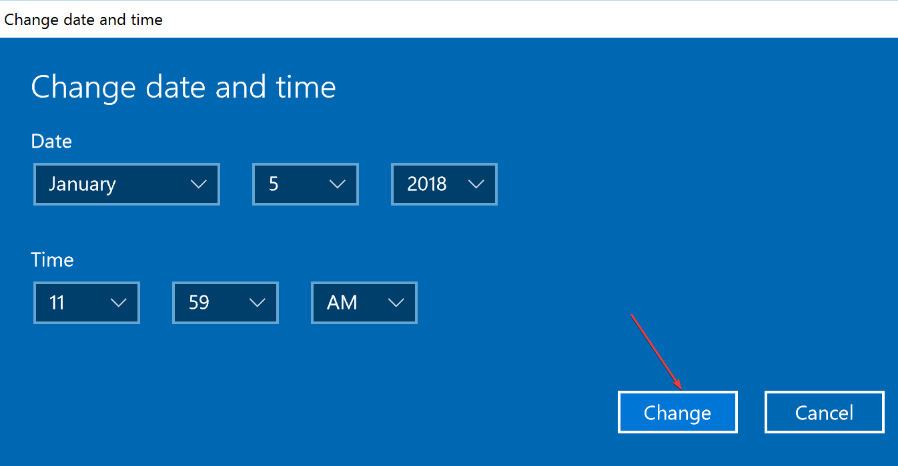
- Step 4: Correctly set the time, then click Change to save and begin the modifications.
- Step 5: Restart your computer to see if the Windows update error 0x8007041d is still present.
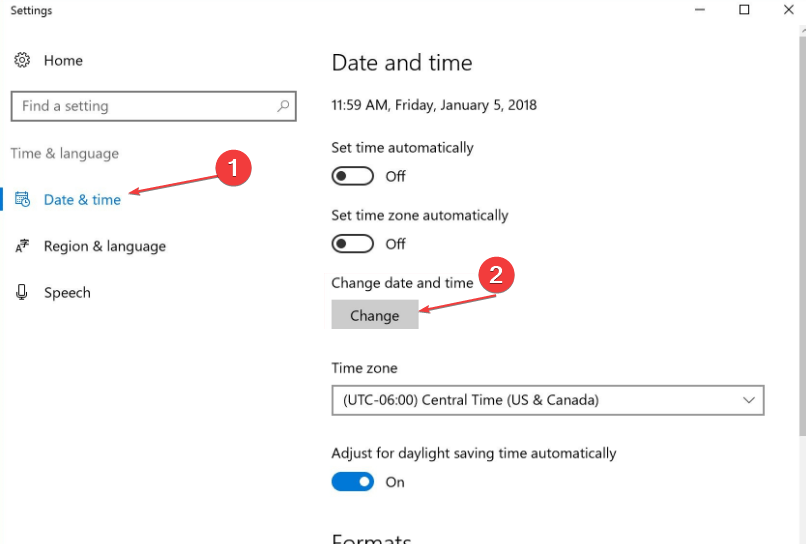
Setting the correct time and date can resolve the error and assist the update process in using the correct region.
Solution 3: Restart the Windows Update procedure as a third solution
- Step 1: Click the Start button, input Command Prompt, and then select Run as administrator.
- Step 2: On the User Account Control screen, click Yes.
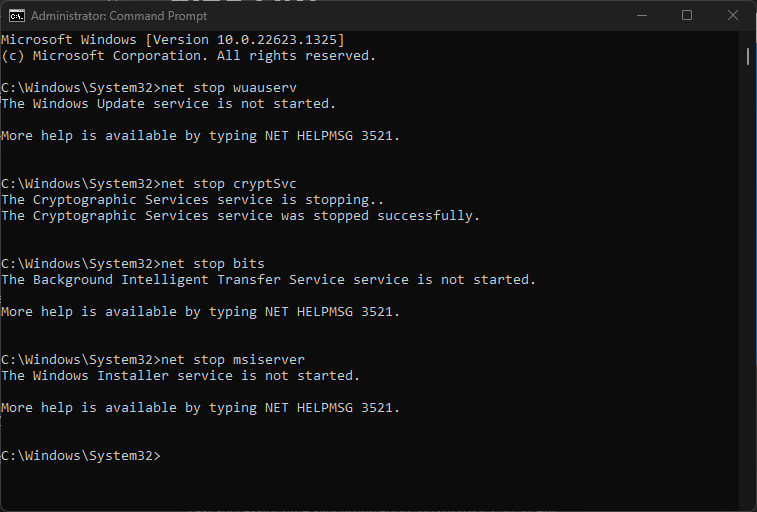
- Step 3: Input the following commands one after the other:
net stop wuauserv
net stop cryptSvc
net stop bits
net stop msiserver - Step 4: Execute the following commands sequentially:
ren C:\Windows\SoftwareDistribution SoftwareDistribution.old
ren C:\Windows\System32\catroot2 Catroot2.old - Step 5: Input the following commands one after the other:
net start wuauserv
net start cryptSvc
net start bits
net start msiserver - Step 6: Leave the Command Prompt and restart your computer to see if the problem has been resolved.
The methods outlined above will correct the Windows Update process and resolve the issues.
Solution 4: Do a system restore
- Step 1: To launch the Control Panel, press Windows + R to open the Run dialogue box, type control, and then click Enter.
- Step 2: Enter recovery and choose it from the list of alternatives.
- Step 3: Next, select Open System Restore.
- Step 4: In the Restore system files and settings window, click Next.
- Step 5: After selecting the restore point, click Scan for impacted programs.

Solution 5: Restore the Windows Update Database
When a good machine suddenly behaves strangely, Windows Updates could be to blame. Users can repair this by running System Restore if there is a restoration date saved before the error. This is how it’s done.
Windows 7 Restore
- Step 1: Click Start, then put System Restore into the search box and press the Enter key.
- Step 2: When the System Restore window appears, click Next until you reach the box that allows you to select a restoration point. There will be a list of restore dates with descriptions.
- Step 3: Next, click Next once more to confirm the restoration procedure. Wait for it to finish processing and you’ll see a window with a Finish button. Close the window and restart your computer.
You may also restore your machine using the OS installation Disc
- Step 1: Boot to the operating system CD or recovery media.
- Step 2: Follow the prompts until you reach the Repair My Computer page, then click and select System Restore from the list of recovery methods.
- Step 3: On the System Restore window, select any restore point, but make sure to restore to a date when you know your computer is working properly.
- Step 4: Wait for the procedure to complete before rebooting your computer to the desktop.
You can also Boot in Safe Mode
- Step 1: Start your PC and press F8. By using the keyboard arrows to slide the highlight down to that item, select Safe Mode with Command Prompt.
- Step 2: Once in Safe Mode, open a command prompt and enter rstrui.exe.
- Step 3: Follow the restoration wizard’s instructions and restart your computer normally.
Windows 8 Restore
Inside the Windows environment, restore
- Step 1: In Windows 8, go to the search bar and type System Restore.
- Step 2: Continue to click Next until you reach the window where you can select the restoration date.
- Step 3: Complete the remaining procedures to confirm the restoration. After that, restart your computer normally.
Restore at the Boot
- Step 1: Restart your computer and press F11 to launch System Recovery. You will see the Advanced Settings menu, which includes System Restore.
- Step 2: It will prompt you to select the Administrator account; simply select and log into your administrator account.
- Step 3: Press the Next button until you reach the screen where you can select the restoration dates.
- Step 4: Continue to hit the Next button until the restore procedure is complete and you see the Done button.
- Step 5: Restart the computer normally.
Windows 10 Restore:
The environment within the windows
- Step 1: Enter System Restore into the Search box. Click on the item that appears in the search results.
- Step 2: When the System Restore window appears, click Next until you are presented with a list of restoration dates from which to select the one that you know works best for you.
- Step 3: Confirm the procedure by clicking Next, then Yes, and finally Complete. After you’ve closed the window, restart your computer.
Making use of the installation media
- Step 1: If you can’t boot into Windows, you should obtain the Media Maker file from Microsoft. Make a boot disc from a DVD or a flash drive.
- Step 2: Reboot your computer and go into BIOS to change the boot device to either your DVD or your flash disc.
- Step 3: When you reach the installation page, navigate to Troubleshoot > Advanced Options > System Restore and repeat the process.
Solution 6: Correct the inaccurate system date and time.
Windows may occasionally operate incorrectly due to an incorrect time setting. To set the time and date:
Under Windows 7
- Step 1: Go to Start and then Control Panel.
- Step 2: Choose the Date and Time option.
- Step 3: In the Date and Time window, click Change time zone to select the appropriate time zone.
- Step 4: Press the Apply and OK buttons.
Under Windows 8
Step 1: Move your mouse to the right side of the screen and select the gear symbol when the Settings tab appears.
- Step 2: A new pop-up tab for Settings will appear; click Control Panel.
- Step 3: Go to the Control Panel and select Clock, Language, and Region. Then, under Date and Time, click Set the time and date.
- Step 4: When the Date and Time window appears, click Change date and time and then select the appropriate date and time on the next window. Simply click OK to apply.
Under Windows 10
- Step 1: Right-click on the date and time in your system tray, which is located at the bottom right of the screen.
- Step 2: Choose a Date and Time. That will launch the Date and Time Settings window.
- Step 3: Choose a time zone and then shut the window. This will update the time and date on the system tray automatically.
Conclusion
Hence, we have reached the end of the essay, and in today’s article, we discussed in depth the 0x8007041d problem in our Windows system. Please follow the instructions outlined above to resolve this problem.


