Microsoft is always introducing new and intriguing features to Windows 10. They are not always effective. Many people are not well received when they arrive. The launch of a Windows Sandbox environment for Windows 10 drew a lot of attention.

Traditionally, only third-party tools could be used to build a sandbox in Windows 10. Having an integrated instrument could be simpler and safer than the alternatives.
For testing questionable files, the Windows Sandbox feature provides a closed-lightweight environment that does not influence the outside core system files. Thus, if you notice the error message “Windows Sandbox failed to start” while initializing the Windows Sandbox. 0x80070015 is the error code. What should you do if the device isn’t ready?
This guide can assist you if you are looking for solutions to the Windows Sandbox failure to start issue. After examining the causes, we will go over all of the various strategies for resolving the problem. Let’s get this party started!
Recommended Post:- How to Fix Error 0x80070057 on Windows Update
What exactly is Windows Sandbox?
Windows Sandbox is a virtual desktop environment that is used only temporarily. When you run Windows Sandbox, you’re essentially running a clean version of your operating system in which your actions do not affect the rest of your PC.
So, the Windows Sandbox provides a protected environment in which you can test any software before installing it on your primary device. When you close the sandbox, all activity is destroyed before returning to the host machine.
How Does Windows Sandbox Function?
Microsoft employs several tools to bring Windows Sandbox to life.
- Dynamic image generation: The Windows Sandbox creates a virtual computer by copying an image of your present operating system. Your Windows Sandbox environment always runs a fresh, clean installation of Windows 10 with the most recent updates. Nevertheless, unlike other virtualization technologies, you do not need to store an extra copy of the operating system to boot into.
- Intelligent memory management: Virtual machines can consume a lot of resources and require the host machine to share its hardware. Windows Sandbox employs intelligent memory management to dynamically allocate memory between the host and the sandbox, ensuring that the host does not stall.
- Snapshot and Clone: To reduce the strain on the host system, Windows Sandbox employs two common virtualization technologies known as Snapshot and Clone. The snapshot enables Windows Sandbox to boot the environment once and then “save the memory, CPU, and device state to disk.” The environment can then restore from the disc rather than booting it each time a new instance of the sandbox is required.
Windows Sandbox also makes use of better graphics virtualization to provide a smooth experience that mirrors the host.
Prerequisites to Run Windows Sandbox
Windows Sandbox is presently available for installations of Windows 10 Pro or Enterprise running Insider Preview build 18305 or later, or the Windows 10 May 2019 upgrade or later. Windows Sandbox will not be available to Windows 10 Home users.
You will also require:
- Virtualization of a 64-bit processor enabled in your system BIOS
- A minimum of 4GB RAM is required (Microsoft recommends 8GB)
- 1GB of free disc space is required (Microsoft recommends using an SSD)
- A minimum of two CPU cores (Microsoft recommends four cores with hyperthreading)
What is the source of the Windows Sandbox failed to start error?
There could be several reasons why the Windows Sandbox is not operating; some of the most prevalent are listed below:
- Services deactivated: If the Sandbox-related services are disabled, Windows Sandbox will not start. You must guarantee that the services and dependencies that are responsible for the functionality are operational.
- System files have been corrupted or are missing: If the system files are corrupted, the Sandbox may not start. To resolve the issue, use Command Prompt to repair the system files.
- The system requirements are incompatible: To run Sandbox, your system must meet the minimal hardware requirements. Otherwise, you may encounter this error.
- Sandbox feature not activated: Windows Sandbox may not start if the Sandbox feature is not chosen from the Windows Features list.
- Antivirus software from a third party: Certain security applications may interfere with the Sandbox’s operation. You may need to temporarily disable your antivirus.
- Old graphics driver: If your graphics driver is old or obsolete, you may experience this problem. To resolve the issue, you must install the most recent drivers.
What can You do to fix the Windows Sandbox failed to start error?
Before proceeding with advanced troubleshooting, you should do the following checks:
- Examine Windows updates.
- Temporarily disable your security software.
The error code could be 0x80070057, 0x800706d9, 0x80070002, 0x80070569, 0x80072746, or 0xc0370106 in rare situations.
Whichever Sandbox issue code you received, the following post will offer you the top tips for troubleshooting Windows Sandbox not starting.
Solution 1: Deactivate and reactivate the Windows Sandbox utility
The best solution to this problem may be to restart Windows Sandbox. So here’s how to switch it off and on again:
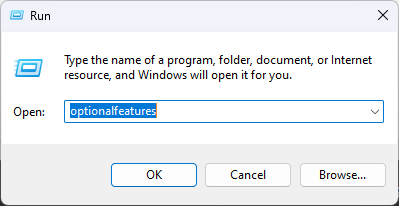
- Step 1: Hit Win + R to open the Run command prompt.
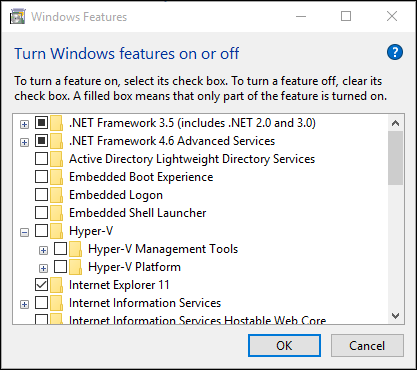
- Step 2: Enter optional features to launch the Windows Features application.
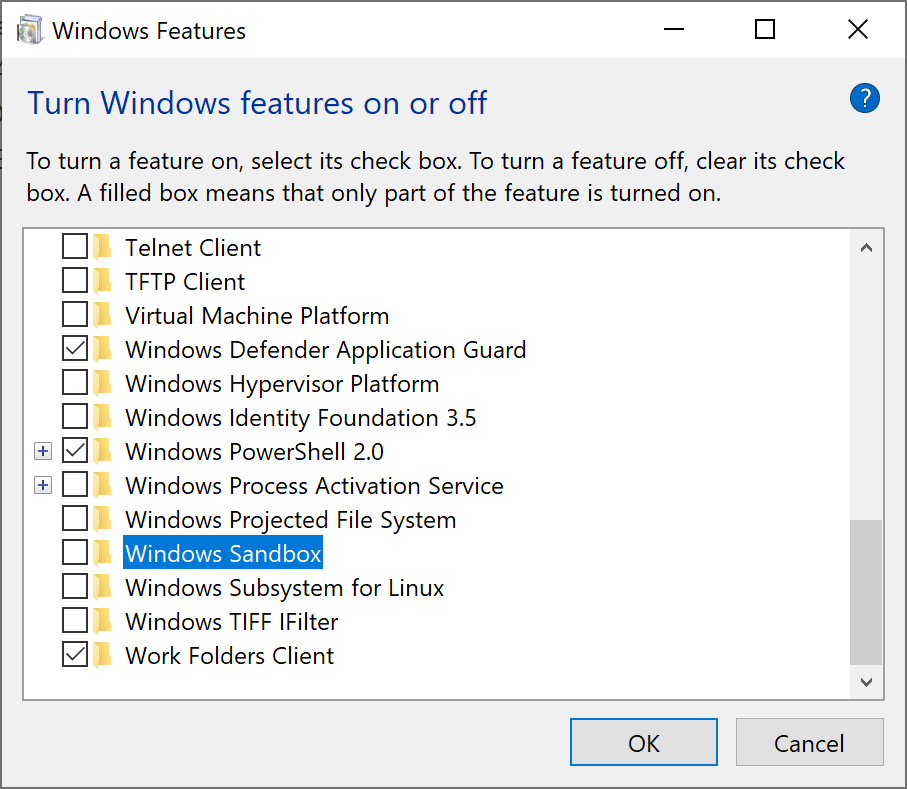
- Step 3: Go down and deactivate the Windows Sandbox option. After that, click OK.
- Step 4: On the pop-up box, select restart now. This restarts your device and applies the most recent updates.
When the device boots, launch the Windows Features software by following the instructions outlined above. Then, in the pop-up window, select restart now after checking the Windows Sandbox option.
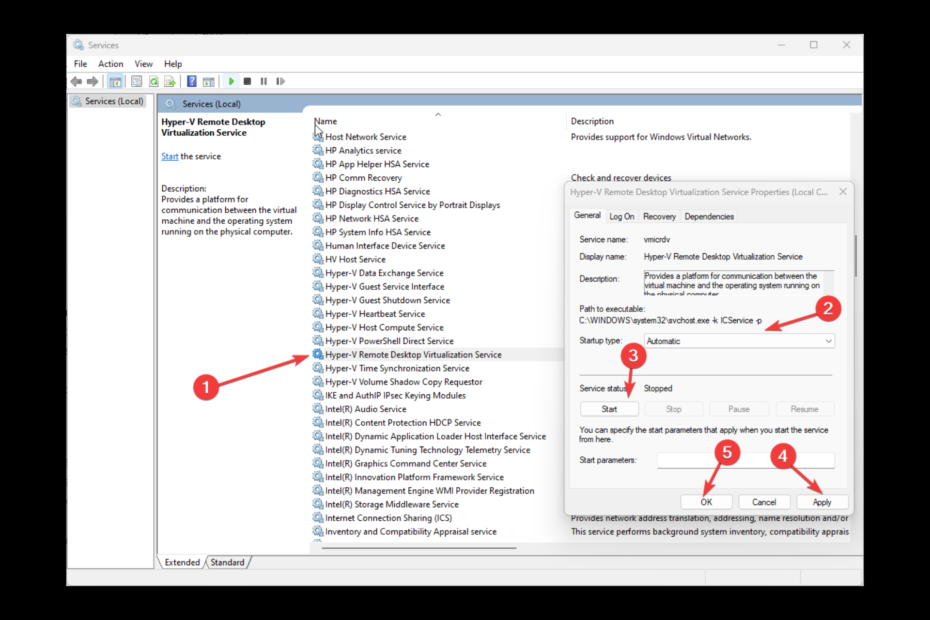
Solution 2: Start the Windows services required by the Sandbox.
When certain Windows services are disabled, sandbox issues frequently emerge. So, let’s look at how you may remedy this problem by enabling various Windows services:
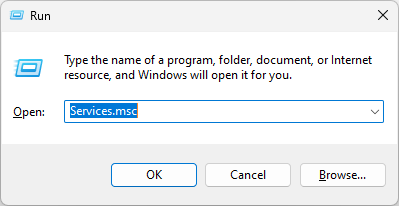
- Step 1: To launch the Run command dialogue box, press Win + R.
- Step 2: Open the Services window by typing services.msc and pressing Enter.
- Step 3: Locate and right-click Hyper-V Remote Desktop Virtualization Service, then select Properties.
- Step 4: Next, select the General tab. Next, pick Automatic from the Startup type drop-down selection.
- Step 5: To save these changes, click the Start button, then Apply, and finally OK.
Lastly, exit the Services software and restart your computer to apply these modifications.
To avoid the same issue in the future, you will need to make some changes in the Services window. Let’s go over the actions you’ll need to take:
- Step 1: Follow the preceding steps to open the Services window.
- Step 2: Choose Properties from the context menu of the Hyper-V Remote Desktop Virtualization Service.
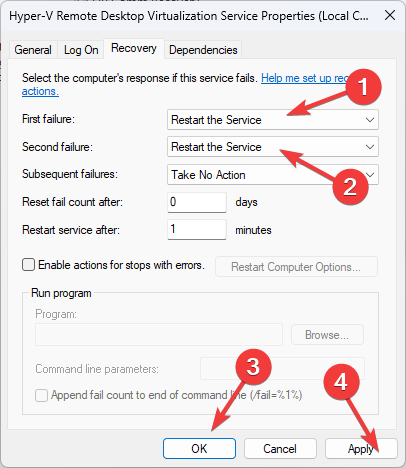
- Step 3: Choose the Recovery option.
- Step 4: Next, pick Restart the Service from the First Failure drop-down box. This will assist in automatically restarting this service if it faces any issues.
- Step 5: For this option, click on the Second Failure option and select Restart the Service. Lastly, click Apply, followed by OK.
If the Sandbox problem remains, try applying the same configuration to the following other services:
- Hyper-V Host Service
- Hyper-V Time Synchronization Service
- Virtual Disk
Solution 3: Restart Hyper-V and any other apps listed on the “Windows Features” screen
It may help to restart a few apps from the “Windows Features” screen. This solution, however, will only work if you resume the features on which the Sandbox engine is dependent.
In this situation, the following Hyper-V, Virtual Machine Platform, and Windows Hypervisor Platform functions will be restarted:
- Step 1: Hit Win + R to open the Run command prompt.
- Step 2: Enter optional features to start the Windows Features application.
- Step 3: Expand the Hyper-V option by scrolling down. Uncheck the Hyper-V Management Tools and Hyper-V Platform choices after that.
- Step 4: To save these changes, click OK, dismiss the Windows Features software, and restart your device.
Finally, make the same changes to the Windows Hypervisor Platform and the Virtual Machine Platform.
Solution 4: Make use of the built-in debugging tools
Built-in troubleshooting tools can assist you in resolving this issue. This, however, will be determined by the nature of the situation.
If the Sandbox error is caused by hardware issues, utilize the Hardware & Devices troubleshooter to resolve it. But, if the issue is related to system maintenance, you can use the System Maintenance troubleshooter.
If you have a hardware problem, the Hardware and Devices troubleshooter can assist you:
- Step 1: Choose Computer Settings from the Start menu. After that, go to Update & Security and then Troubleshoot.
- Step 2: On the right pane, select the Hardware and Devices troubleshooter. Then, select Run the troubleshooter.
- Step 3: To finish the process, follow the directions on the screen. When you’re finished, restart your computer to save your changes.
If, on the other hand, you’re having problems with system maintenance, here’s how the System Maintenance troubleshooter can help:
- Step 1: To launch the Run command dialogue box, press Win + R.
- Step 2: In the search box, type msdt.exe -id MaintenanceDiagnostic and press Enter to launch the System Maintenance troubleshooter.
- Step 3: On the following screen, select Advanced. Check the box next to Apply Corrections automatically.
- Step 4: Lastly, click Next and complete the process by following the on-screen instructions.
Solution 5: Use the Windows troubleshooter
- Step 1: To launch Windows Settings, press Windows + I.
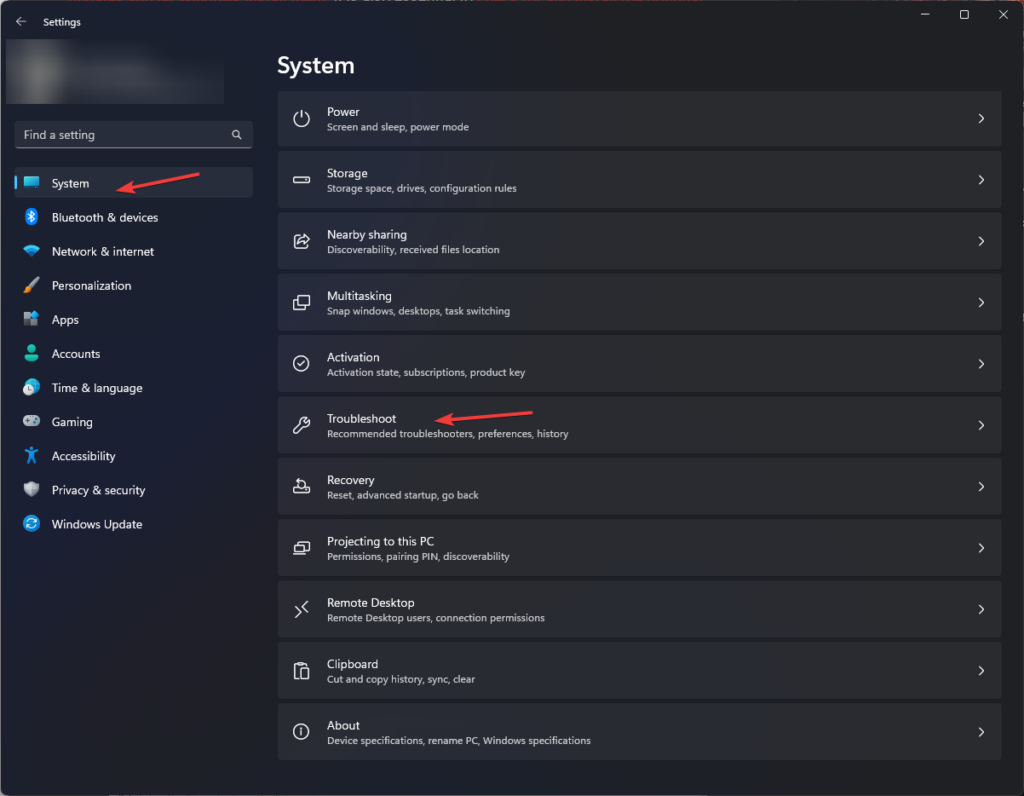
- Step 2: Choose System, then Troubleshoot.
- Step 3: Choose Other troubleshooters from the menu.
- Step 4: Choose the hardware or device and press the Run button.
- Step 5: Restart the computer by following the onscreen instructions.
Solution 6: Repair system files is a sixth option
- Step 1: Click Run as administrator after pressing the Windows key and typing CMD.
- Step 2: To fix system files, enter the following command and press Enter: sfc/scannow
- Step 3: Then, one by one, copy and paste the following commands, pressing Enter after each one:
DISM /Online /Cleanup-Image /CheckHealth
DISM /Online /Cleanup-Image /ScanHealth
DISM /Online /Cleanup-Image /restorehealth - Step 4: Exit Command Prompt and lastly restart your computer.
Solution 7: Revert to an earlier version of Windows
- Step 1: Click the Windows key, type Control Panel, and then press the Open button.
- Step 2: Click Recovery after selecting Category as Huge Icons.
- Step 3: Finally, click the Open System Restore button.
- Step 4: The System Restore box will now appear; select Select a different restore point and click Next.
- Step 5: Choose the system restore point and press the Next button.
- Step 6: Finally, click Complete and wait for the procedure to finish.
Solution 8: Install the latest device drivers
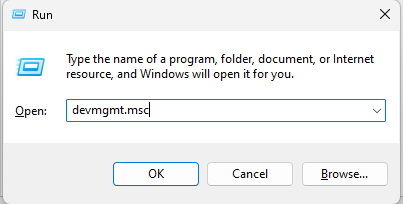
- Step 1: Hit Windows+ R to launch the Run dialogue box.
- Step 2: Open Device Manager by typing devmgmt.msc and pressing Enter.
- Step 3: Expand the Display Adapters section.
- Step 4: Pick the graphics drivers and right-click to select the Update driver.
- Step 5: Choose Automatically search for drivers.
- Step 6: To finish the process, follow the onscreen instructions.
In our opinion, a better alternative to manually installing drivers is to use a professional driver program that can do it automatically and without risking system damage.
How to Use the Windows Sandbox?
After Windows restarts, open the Start Menu search bar and type Windows Sandbox. The Best Match will be the Windows Sandbox. Launch the Windows Sandbox and you’re done!
Every time you launch the Windows Sandbox, it launches a fresh copy of your current Windows version. It receives the same system upgrades as the host and is always up to date.
Just close the application after you’ve finished using the Window Sandbox. All changes you make to the operating system running in the Windows Sandbox are lost forever.
How to Verify If Virtualization Is Enabled?
Before going into your BIOS to enable virtualization, you can perform a fast check to verify whether it is already enabled.
Enter the task into your Start Menu search field and click on the Best Match option. Go to the Performance tab in the Task Manager. Together with Virtualization, it will either show Enabled or Disabled.
If virtualization is turned off, go to the BIOS and enable it. Once it’s turned on, restart it and proceed.
Conclusion
Try Windows Sandbox if you have the capability. The Windows 10 May 2019 update is still making its way to the majority of Windows 10 users. The large upgrade rollouts do take time. But, when the update is released, Windows Sandbox will be included.
The Windows Sandbox is a dependable solution that delivers an excellent virtual desktop environment. If this tool does not start, you can quickly repair it by utilizing any of the approaches we’ve discussed.


