Windows 11 makes it simple to set and disable network adapters from the Settings app, eliminating the need to utilize the Control Panel.
Although the Control Panel is still present in Windows 11, you will no longer need to use it to disable or enable a WiFi or Ethernet network device because the option is now included in the Settings app. When you have more than one adapter and want to disable the ones you don’t need, this will come in handy when you have troubles with a network connection, and disabling and re-enabling it may fix the problem.
Whatever the reason, the settings on the “Network & Internet” advanced settings page are included in the Windows 11 Settings app.
This post will teach you how to disable network adapters on Windows 11.
Recommended Post:- Can Windows Vista be Upgraded to Windows 11 – Quick Guide
Why would you want to turn off the Network Adapter?
For a system to connect to the internet, the Network Adapter is required. However, if numerous adapters are present in the system, they might sometimes interfere with one another. You may need to disable the redundant adapters in this scenario.
Can You find hidden network adapters on the PC?
Indeed, hidden network adapters can be found on your System. Hidden Network Adapters are often ones that are not in use or are not displayed in the Device Manager.
Discovering hidden Network Adapters on your PC might help you fix network problems and identify potential security concerns. You can use the following steps to locate hidden Network Adapters:
- Step 1: Click the Windows + X button to launch the Device Manager.
- Step 2: From the Windows menu, click the View tab and then Display hidden devices.
- Step 3: Choose the Network Adapter tab. All of your PC’s hidden Network Adapters will be grayed out.
Because hidden network adapters may be purposely concealed by the system administrator or device vendor, enabling them may cause compatibility or security issues.
How to Disable the Network Adapter on Windows 11?
In the following section of the post, we will discuss numerous methods for disabling network adapters in Windows 11. These are their names:
Method 1: Make use of Windows Settings
- Step 1: Hit Windows + I to launch the Windows Settings dialogue box.
- Step 2: Choose Network & Internet from the left pane and then Advanced network options.
- Step 3: Next, from the list, pick the Disable button for the Network Adapter you want to disable.
- Step 4: Exit the Settings window and restart your computer.
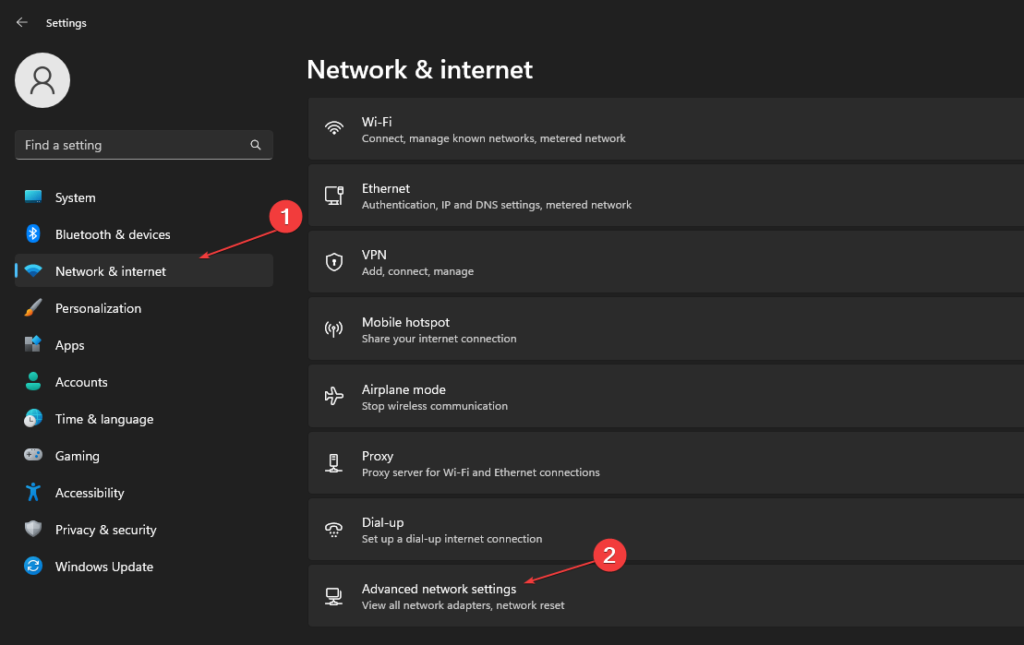
The Windows settings have an option that allows the user to examine and disable the network adapter.
Method 2: Uncheck the Network Connections box
- Step 1: Click the Search button, type Network Connections into the search box, and then select See network connections.
- Step 2: Next, in the See network connection folder, right-click on the Network Adapter you wish to disconnect and select Disable from the pop-up menu.
- Step 3: Close the window and restart your computer to disable the Network Adapter.
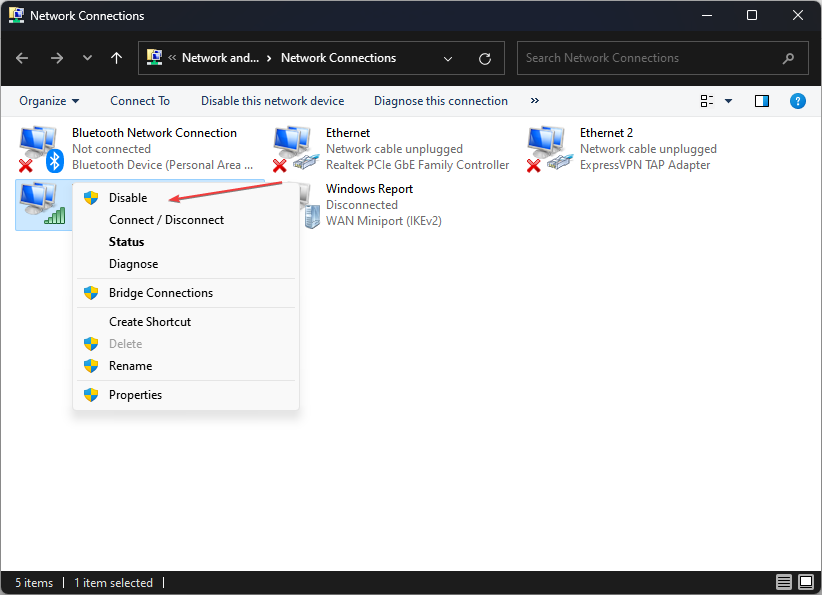
The Network Connections folder is a Microsoft Windows operating system folder where users can manage their network connections.
Method 3: Make use of Command Prompt
- Step 1: Click the Start button, input cmd, and then select Run as administrator.
- Step 2: Type the following command and press Enter to view your PC’s Network Adapter list: netsh interface shows the interface
- Step 3: Execute the following command followed by the name of the network adapter you want to disable: netsh interface set interface “YOUR ADAPTER NAME” disable
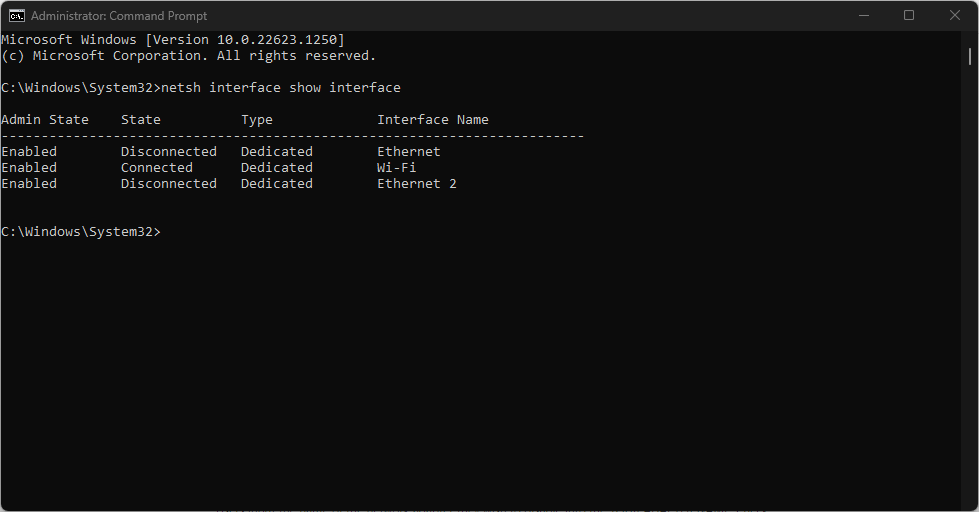
Users enter the name of the network adapter to be disabled into the YOUR ADAPTER NAME field.
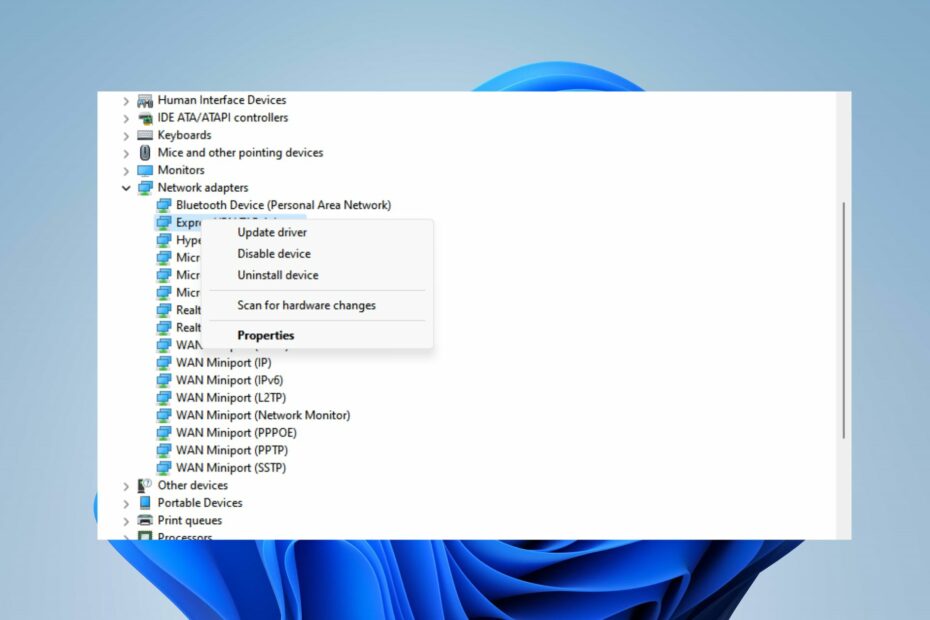
Method 4: Make use of the Device Manager
- Step 1: Choose Device Management from the list by pressing the Windows + X button.
- Step 2: To extend the Network Adapter category, click the drop-down box. Right-click on the network adapter you wish to disable and select Disable.
- Step 3: From the context menu, select Disable device.
Microsoft Device Manager provides a centralized interface for controlling multiple devices, including the ability to enable and disable Network Adapters.
Method 5: With PowerShell, disable a network connection.
- Step 1: To open PowerShell, press the Windows button, type PowerShell, and then select Run as administrator from the right pane.
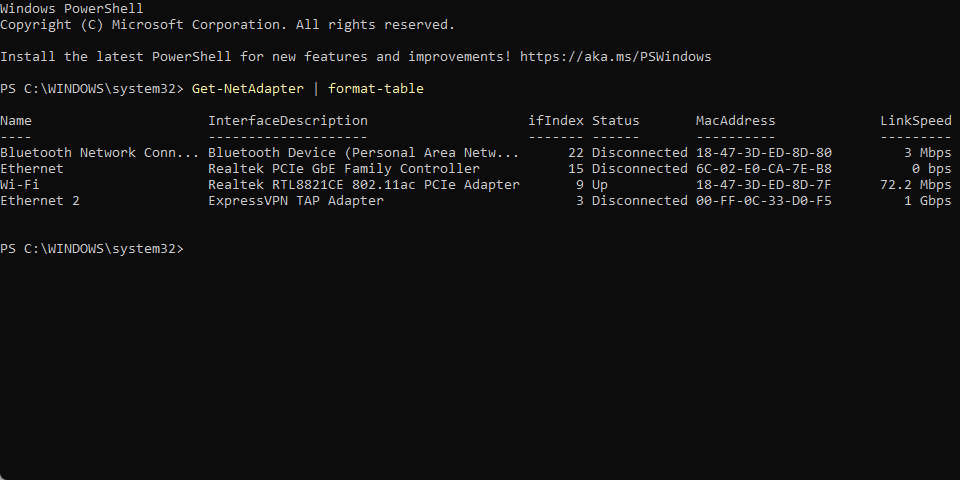
- Step 2: Run the following command to identify the name of the adapter you want to disable: Get-NetAdapter | format-table
- Step 3: Execute the following command followed by the name of the network adapter you want to disable: Disable-NetAdapter -Name “YOUR-ADAPTER-NAME” -Confirm:$false
- Step 4: Exit PowerShell and reboot your device. PowerShell allows you to see, enable, and disable network adapters by giving you access to system operations and services.
Conclusion
Windows 11 introduced additional settings. While Microsoft simplified things for users, many would struggle to find new options. The same holds for Network Adapter settings.
Finally, this post should assist you in disabling Network adapters in Windows 11. If you have any further questions or recommendations, please leave them in the comments area.


