Devices are the main component of any computer system a computer houses many devices and each device functions to provide them with a specific utility to the computer. Well, with computers becoming modern and compact most devices are integrated with the motherboard and the size of the computer is reduced. Well, one thing that is constant with devices is their relative software or the driver that is installed on the computer to run efficiently. As we all know the computer is a combination of both hardware and software, so it is very crucial that there are systems in place that can effectively manage and provides a proper bridge between both these components and that is what exactly drivers do. So, in the Windows OS, devices are being managed using a tool called device manager where the users can find tools and options to manage devices on the computer.

The device manager in the Windows OS is a very simple tool that is dedicated to providing users with management features to manage devices on the computer. One of the major features that are available is that users can access the driver software and take actions like updating it, uninstalling it and disabling it. This device manager tool comes in handy when users face issues with the devices mounted on the computer. So, when there is an issue with the Device Manager itself, it becomes difficult for users to fix issues with the devices on the computer.
Recommended Post:- Fixed: Windows 11 not Recognizing DVD Drive
So, here in this article, we will discuss some simple methods to fix the device manager issue. The issue we focus on today is, that the device manager displays multiple keyboard devices in the list whereas only one physical keyboard is actually mounted. Well, situations like this are pretty uncommon but at times like this, you don’t have to panic. Here we will explain in detail the cause of the issue and some simple fixes that you can follow and make sure the issue is gone.
Some Causes for the Device Manager to Display Two Keyboards in the List
Any issue on a computer will have a root cause and knowing the root cause is very important for resolving the issue. At times the root cause can be entirely different but the impact will be on an entirely different component of the computer. So, in our case, the issue is the keyboard.

- Incorrect device settings.
- Missing updates.
- Corrupt files.
- Hardware issues.
So, these are some of the common causes of the issue on your computer, so now that we have discussed the causes of the issue, we can dive into learning the simple methods to fix the issue.
Some Simple Methods to Fix the Device Manager Displaying Multiple Keyboards in the Device List
Mentioned here are some simple methods that you can use to fix the device manager displaying multiple keyboards.
Method 1: Disconnect Additional Keyboards from the System
If you have connected two keyboards to the system, the device manager will display two keyboards, so to fix the issue, you just have to simply unplug the additional keyboard from the computer and use one.
Method 2: Use a Third-party Utility Tool to Fix the Issue
If you feel that the device manager is corrupt or it may tend to be not functioning well, you can use a third-party utility tool to manage the devices on your computer. You can install and use many free and paid third-party utility tools to manage the devices and corresponding drivers. So, search the internet and download the best application on your computer easily manage the driver and devices.
Method 3: Remove HID Keyboard
The HID keyboard is a pretty old version of the keyboard that was used before USBs were replaced and now the most advanced keyboards are connected through Wi-Fi or Bluetooth. So, if the device manager displays the HID keyboard driver, you can go ahead and remove it.

- To remove the HID device, open the device manager.
- Here, go to the keyboard tab and now expand the drop-down menu from here, right-click on the HID driver and then select uninstall option.
- Now, open the run command and here, type in gpedit, MSC.
- Here, go to the administrative template and now, go to the system folder.
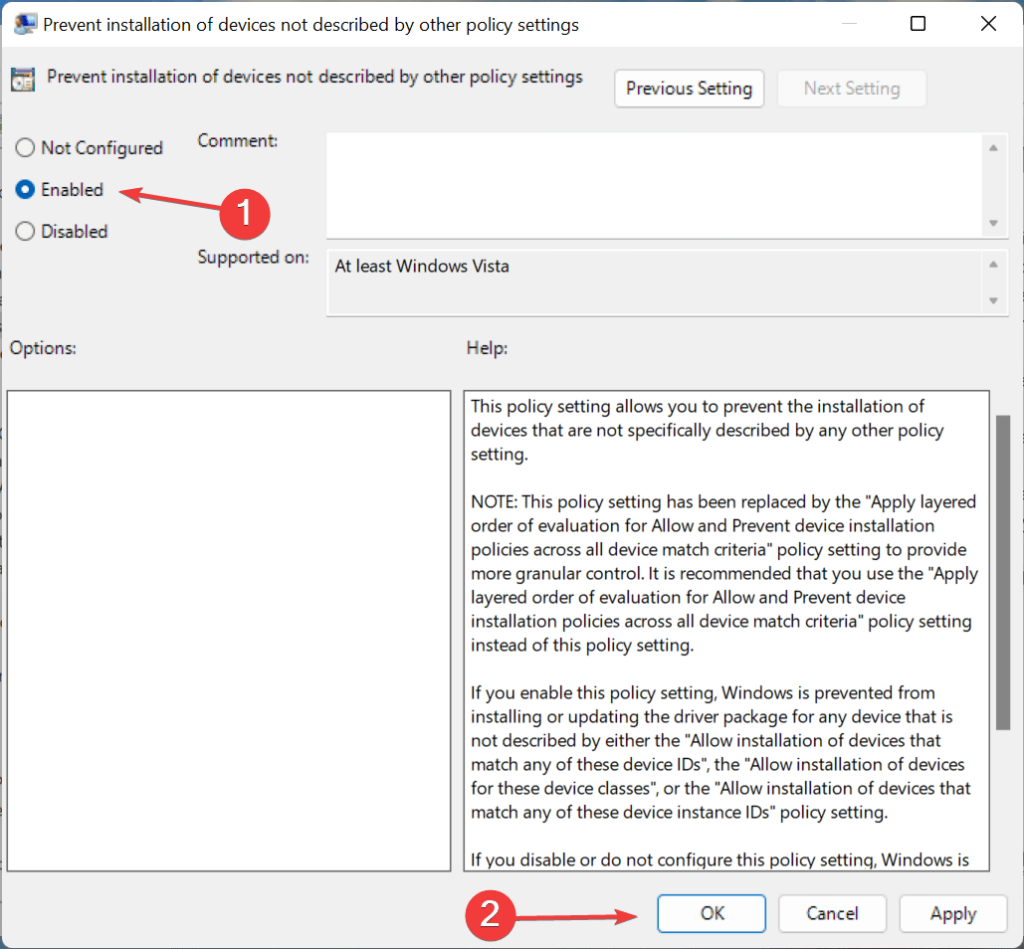
- Here, under the device installation, double-click on the device installation restrictions and then on the Prevent installation of devices not described by other policy settings.
- Now, select the enable option and click on Ok at the bottom to save the changes.
Method 4: Run the SFC Scan
Running the SFC scan will check for issues with the system files and any corrupt files will be fixed after the scan is complete.
- To run the SFC scan, open the command prompt as an administrator.
- Now, in the command prompt, run the command SFC / scannow and hit enter.
- The scan will take a few minutes to complete and once done, any corrupt system file will be fixed.
So, above mentioned are some of the simple methods to fix the additional keyboard displayed in the device manager tool on Windows computers.
Hope the information provided above was helpful and informative, with these simple methods you can remove the additional keyboard device from your computer.


