Windows OS is by far the most used OS on computers with millions of computers running a version of Windows. The OS offers a wide range of features and tools that users can use to make their life better. These tools are what make Windows a good OS. Well in recent times Microsoft has included many new features and tools to their OS so, they function better and provide users with the best possible user experience.

Even with many new features being included in the OS, some old features and tools have always made their palace in the OS as they have been so useful that removing these tools/ features will degrade the OS. So, here, we will discuss one simple yet powerful tool that is included with the OS ever since Windows Vistas. This tool has been a saviour for many users, as it offers users the option to restore some repaired software and other features on the computer.
So, to begin with, let’s get started with an idea of what system restore is and how it works. So, the system restore tool is a simple feature that will create a restore point and when required the system will be restored to the point which was created initially. The work of the system restore is to fix repairs with software or system files. So, to use the system restore, you first, need to create a restore point, which you can later use to restore when there is an issue, well, it is better if you create a restore point frequently as when you restore frequently you will have the most recent point to restore when needed.
Recommended Post:- How to set a Dual Monitor Wallpaper in Windows 10
So, the components that get influenced by the system restore feature are:
- Installed software.
- Windows updates.
- Any changes impact the registry files.
Well at times, the system restorer activates automatically, and it happens when there is some unpredictable changes happening because of something that is introduced in the Windows ecosystem like application installation. Even so, most of the time the system restore feature is turned off on a Windows computer and you need to manually turn on the feature to create the restore points and use it when needed.
So, now that we have explored what and how the system restores functions, we can dive into learning how to enable the system restore feature on Windows 10 computers.
How to Enable System Restore on Windows 10
Mentioned below is how you need to enable the system restore feature on your Windows 10 computer. So, the first aspect of enabling the system restore feature is to create a system restore point, which you can later use to fix issues that will seriously affect your workflow.

- To get started open the start menu.
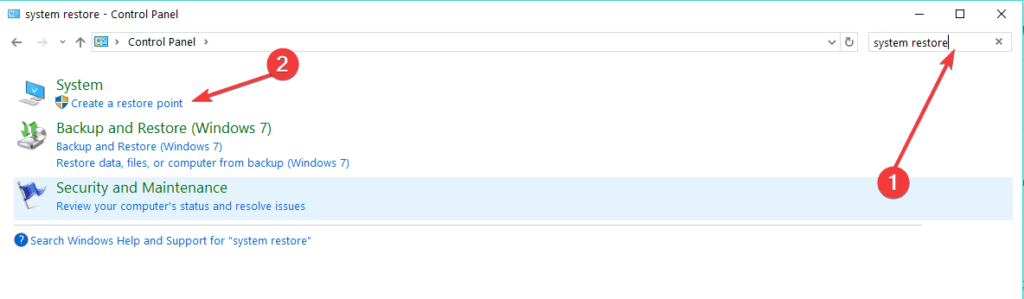
- Here, use the search tool to search for create a restore point and then click the first search result. To open the system properties page.
- Here, under the protection settings select the primary system drive.
- Here, click on the configure option.
- Here, select the Turn on System Protection option. Here, you can use the slider to fix the storage capacity to create the restore point and then click on the apply button.
- Now, click on the Ok button.
Steps to Create a System Restore Point on Windows 10
- To create the system restore point use the keyboard shortcut Windows + S and here in the search bar, search for Create a restore point and open the system properties option.
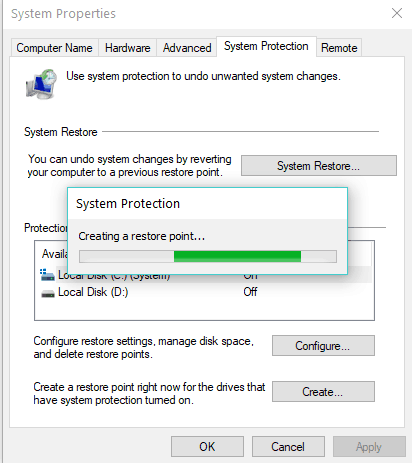
- Here, under the protection settings select the create option.
- Now, give the restore point a name and then click on the create button.
- Now, click on the close button and then click on the Ok button.
- Now click on the close button.
Now, that you have created a restore point, you can use it when needed, so here is how you can effectively use the restore point.
How to Restore your PC Using the System Restore Tool
- Open the search bar by using the Windows + S key on the keyboard.
- Here, in the search bar, search for creating a restore point.
- Now, the system properties toolbox will pop up.
- Here, select the system restore option and then click on the restore point that you have already created on your computer using the method mentioned above.
- Now, click on Next to further the process.
- Now, select the scan for affected programs and then confirm those apps.
- Now, the affected apps will be reverted back to normal.
- Now, click on the close button and then select the next option.
- Now finally click the finish option.
This is how simply you can use the System Restore tool on your Windows 10 computer. But when it comes to recovery there are many recovery options that you will be able to avail yourself of from the settings application. You can also use the backup and restore option if you feel like as it will completely restore your PC to the backup you had created, and usually, when you purchase a Windows system the first thing that you need to do is to backup the Windows OS, as it will be fresh and you can use it when needed in future.
Hope the information provided above was helpful and informative, with the simple step-by-step process mentioned above, you can efficiently use the system restore feature on your Windows 10 computer.


