A majority of Mac clients who are moving up to OS X Yosemite ought to experience the standard procedure using the Mac App Store and start the establishment from that point, it’s by a long shot the least demanding methodology and it by and large goes perfectly.
A few clients like to perform what is known as a spotless establishment of Mac OS X however, which is cleaning the Mac drive, and beginning crisp with a spic and span immaculate introduce of OS X Yosemite, and afterward physically replicating or getting to records and re-introducing applications.
While clean introducing isn’t especially troublesome, it’s viewed as further developed because it’s a substantially more active and protracted procedure than essentially refreshing to OS X 10.10 through the App Store.
- Simply ensure that once you have the establishment application for Yosemite in your Applications organizer, which will be named “Introduce OS X Yosemite,” that you don’t introduce it yet.
- When you introduce Yosemite, the document will consequently eradicate itself, so it’s critical to make a bootable drive first. If you need to introduce first and, at that point make a bootable drive, duplicate the installer application in another area so you can get to it later.
Also Read:- How to Clean Install Mac OS X Leopard 10.5 using USB
Step-by-Step Clean Installation of macOS X Yosemite 10.10 using USB
Back up the Mac with Time Machine or by physically duplicating your most significant information to an outer drive – never skip backing up your significant information.
- Append the OS X Yosemite bootable installer drive to the Mac, at that point reboot as typical.
- During boot down the OPTION key until a boot determination menu shows up, pick “Introduce OS X Yosemite” as the drive for sure (this is the USB installer).
- When the “Operating system X Utilities” screen shows up, pick “Disc Utility”.
- Pick the hard drive (or parcel) from the left side menu which is the goal for the spotless Yosemite introduction, at that point pick the “Eradicate” tab.
- Pick the Format type as “Macintosh OS Extended (Journaled)”, name the drive something self-evident (like Macintosh HD or Yosemite HD), and afterward pick “Delete” – this will design the drive/parcel and all substance on it.
- At the point when the drive has completed the process of arranging, quit Disk Utility to come back to the OS X utility menu.
- Presently from the “Operating system X Utilities” menu, select “Introduce OS X”.
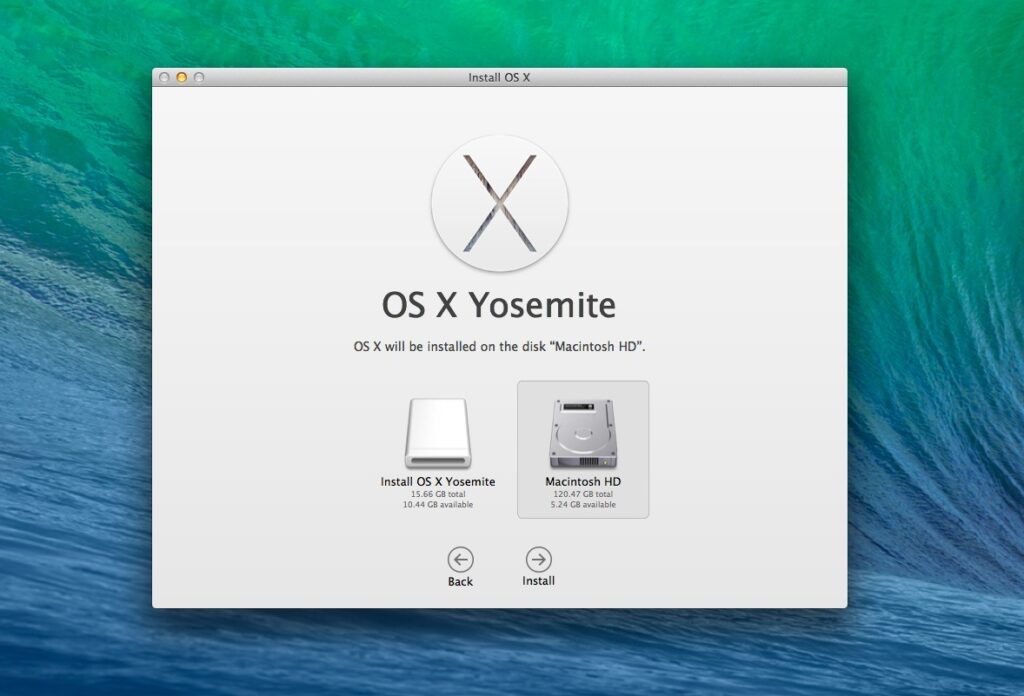
- Navigate the Terms of Service and essentials, and select the crisply arranged “Mac HD” or “Yosemite HD” drive to set as the goal for the new introduction of OS X.
- Operating system X Yosemite will introduce a fresh start rendition of itself on the clear goal drive, giving the client a new beginning. Since the drive was organized first, no current working framework will be refreshed, and no different substance on the drive will be brought over.
- At the point when the establishment is fully completed, the Mac will reboot into OS X Yosemite and experience the ordinary new arrangement process.
Keep in mind, no information will be on the volume beside the crisp Yosemite establishment, so it’s dependent upon the client to re-introduce essential applications, modify inclinations, and above all, recuperate or move over again their significant records and documents.
Investigating Tips for troubleshooting purposes
- On the off chance that the establishment of Yosemite freezes, it’s likely because your USB drive is tainted here and there. This transpired on the main couple attempts, where it would freeze at 5 minutes left. The third USB stick I utilized was effective, and it took under 15 minutes for Yosemite to boot up.
- In case you’re getting an Undefined mistake: 0 admonitions when attempting to introduce, this more than likely implies that you neglected to perform Step 6 above, so make a point to duplicate over those two Base System documents.
Significant note
A clean installation of OS X Yosemite requires re-designing the Mac hard drive by formatting it, which means all substances on the drive will be expelled and deleted. Be certain you have your significant documents supported up before endeavoring this.
Necessary System requirements
- A Mac which can run OS X Yosemite – as far as framework prerequisites, the machines which bolster Yosemite are equivalent to that which can run Mavericks
- An OS X Yosemite bootable installer drive – generally this is a USB disc yet it tends to be whatever in the scenario that the drive is bootable, the installer independent from anyone else is lacking except if you’re crisp introducing onto an alternate parcel or volume. On the off chance that you haven’t made one of these yet, do that first.
Clean Install macOS X Yosemite 10.10 using USB
You can clean Install MacOS X Yosemite 10.10 using USB by accessing the link below. Also, make sure that you have enough back up before you proceed with the same. There are a lot of duplicate ISO images on the market and it is best to download the same from a trusted source.


