Knowing a computer’s configuration, and details is always a necessity for a user as with the configurations understood, you can easily manage or use the computer efficiently. Well, computers are built upon several layers of hardware and software and these layers constitute the overall functioning of the computer. So, with one component or the other failing, you might have trouble with running the computer smoothly, and hence, learning what is what about these components can help you surpass some common issues.

As explained, computers run smoothly with the support of different layers and one of the very crucial layers is BIOS every Windows OS runs over a BIOS, where the BIOS acts as a bridge between the Windows interface and the hardware. Well, the BIOS is not just a bridge, but it has several functions making it a very essential component of the OS, and literally, this is one such component that has not been replaced until recently by a much more advanced firmware called UEFI.
Most Windows users, who had been using computers for decades, are unfamiliar with the BIOS and at times this unfamiliar causes panic when something related to the BIOS fails, so, it is better if Windows users get familiarise themself with the basic functioning of the BIOS, it would be less complicated at the time of crisis.
Well, the BIOS is a very interesting software component on Windows computers and every other Windows counterpart like Mac OS or even Android uses something common as the BIOS and they are called Open Firmware and Firmware respectively. Well, this BIOS holds great importance in Windows systems and without this simple software, the whole system will be a piece of machine which is unusable.
So, to put it in simple terms, BIOS is the first program loaded into computer memory after power-on. It contains information about the hardware devices installed on the motherboard, including the type and number of video cards, hard disk drives, serial ports, parallel ports, floppy drives, etc. Generally, You may access BIOS setup menus via F8 at boot time, Del, F10, or Esc at shutdown time, or by pressing the appropriate keyboard combination depending on your computer brand. The default settings for the BIOS are stored in ROM that is etched to the motherboard and cannot be changed. However, some manufacturers allow BIOS configuration menus to be modified using jumpers on the board. So, this is how important BIOS is considered for Windows and learning the basics is pretty important.
Recommended Post:- How to set a Dual Monitor Wallpaper in Windows 10
So, UEFI needs to get a special mention as this is the modern firmware that has replaced the BIOS on millions of systems and this firmware has proven to be much better, but still, some computers come with the good old BIOS firmware. So, if you are using a Windows computer, you need to be aware of which firmware you are currently using, as the firmware is the key to the smooth running of the OS and this article is dedicated to providing you the information on how to check the BIOS on your Windows computer.
Well, the basic function of the BIOS and UEFI is that when your computer boots, it sets things up like checking whether all the components are good and running and then hands over the bootup task to the OS which is stored in the hard disk. This seems to be very basic, but without the BIOS taking up this role, it will be impossible for the computer to boot.
So, that we know that the BIOS is important, we need to know how to access the BIOS mode as this mode has many hidden functions which can be used to configure the computer at the very basic level.
Simple Methods to Access the BIOS Mode and Check the Version on Windows 10
So, mentioned below are some simple methods that you can use to access the BIOS mode on your Windows computer.
Method 1: Use the F8 key to Access the BIOS Mode on your Computer
The F8 key is often referred to as the “safe mode” key since it takes you straight into safe mode. The safe mode gives you access to the BIOS settings, which are useful if you’ve tried everything else and the computer still isn’t working properly.
- Turn off your computer.
- Now, press and hold down the power button until the screen goes black.
- After 5 seconds, release the power button and wait 30 seconds before releasing it again. You should now have access to your bios menu.
- If you want to open the Bios Menu without holding down the power button, press F10 at any time while the computer boots up and the bios menu appears.
- Here, in the BIOS mode, you can
Different computer manufacturers will have different buttons to access the BIOS mode and the keys are listed below for some common PC manufacturers.
- For Acer: F2 or DEL.
- For ASUS: F2 for all PCs, F2 or DEL for motherboards.
- For Dell: F2 or F12.
- For HP: ESC or F10.
- For Lenovo: F2 or Fn + F2.
- For Lenovo (Desktops): F1.
- For Lenovo (ThinkPads): Enter + F1.
- For MSI: DEL for motherboards and PCs
Method 2: Use DXDiag
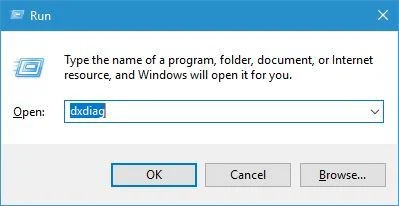
- To use the DXDiag tool, open the run command by pressing Windows + R on the keyboard.
- Here, in the run command box, type in DXDiag and hit enter.
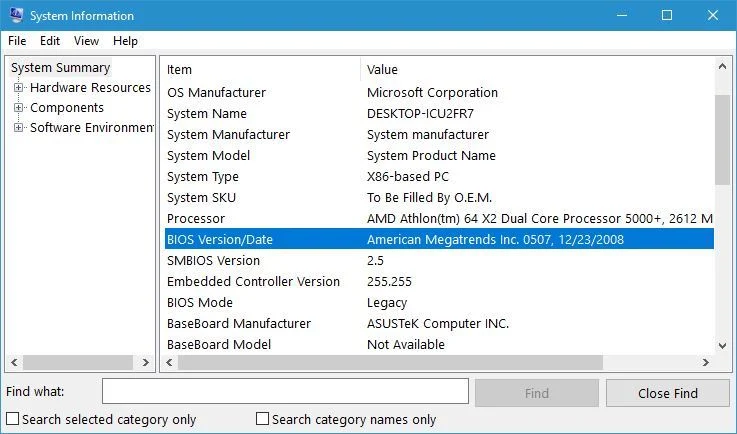
- Now, the tool will open, and here, you will be able to find all the details of your computer and under the system option, you will find the BIOS details.
Method 3: Use the PowerShell to View the BIOS Version
- Open the PowerShell as an administrator on your computer,
- Here, type in “Get-WmiObject win32_bios” and hit enter.
- Now the details will be displayed, from where you can find the version of the BIOS on your system.

Hope the information provided above was helpful and informative, with these simple methods, you can easily find the version of the BIOS that’s running on your computer.


