Data safety and security are a concern for every tech developer and user as well, as digital data is volatile and needs to be saved and stored in a proper format and in a safe place to safeguard it for future use. So, any tech developer will have a set of data security protocols that will include features and tools, so users can easily safeguard the data and safely keep it for later use, and when it comes to computers and smart devices that people use every day for professional, personal and various uses contains lots of data of the user and these data has to be stored safely in a non-volatile memory that will hold it forever unless and until it is damaged.
With this said, modern computing has come a long way in terms of storage and memory and today’s storage technology is by far very advanced and reliable for the users. Not just the hardware compone t has improved but even software components that control the hardware component provide the best storage feature and apart from better storage for safe keeping of files, backup features for files have improved in modern OSes. There are several other ways using which users can safeguard their data. One such file backup feature of the Windows OS is the File History feature. Here in this article, we will elaborate discussion on the best use of this feature on Windows OS, so, you can effectively use this feature and safeguard all the important data from being corrupt or accidentally deleted.
So, as mentioned above, the File History feature is a built-in feature of Windows OS that was introduced in Windows Vistas in 2016 thereafter the feature is continued and users who prefer to use it can access it from the control panel with ease. Backing up files is a very important aspect of file management on computers and to do so, there are various methods of backing up files one simple and handy method is the backup tool available on Windows OSes. So, now, let’s explore the features of the File History feature on Windows systems so, that users can backup important files with ease. Well, if we come to think about it, backing up all the files is pretty impossible but you can certainly back up a few files that you deem to be important, so features like File History come in handy.
Recommended Post:- How to Fix api-ms-win-crt-runtime DLL Missing Error in Windows 11
Now, let’s find out, how, do I use the File History to backup Files on a Windows Computer
The process to use this feature is very simple and straightforward, and here you will find the simple method to use this File History feature effectively on your Windows system. Before we get started, you have to connect an external storage device to your computer via any available option like USB, network, or any other means that suits you. Once, you have a driver to back up your files from your computer, you can proceed by following the steps described below.
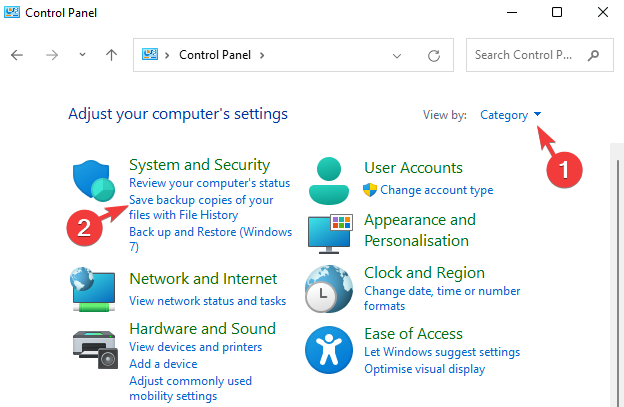
- To get started, open the control panel by using the search bar in the taskbar.
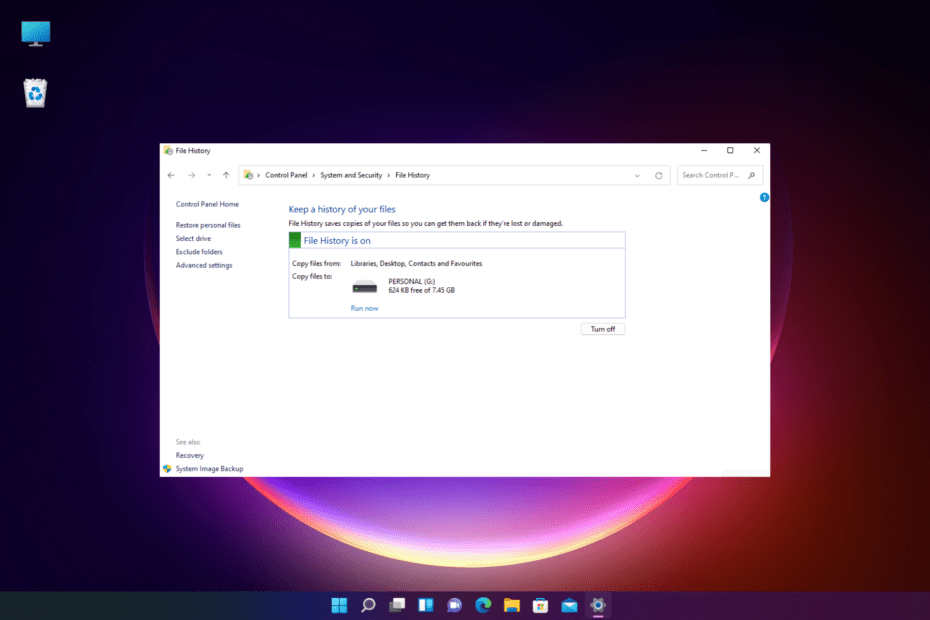
- Now, search for the control panel (all control panel items page) and select the file history option.
- Now, select the driver that you have connected via external ports as the sink for backing up the files.
- Now, turn on the File History by selecting the Turn On File History button.
Note: Well, if the network driver, you have connected as the external storage unit is not available on the list, you can add the network by using the add network location option.
So, you might ask, which documents will be backed-up to the external device and the answer is all the files that are contained in the Documents, Music, Pictures, Videos, and Desktop folders that are available in the file explorer will be the source folders from where the files will be backed-up, so, if you want files other than what these folders have, you can either manually copy paste these files to the external storage device or copy and paste the files to these above-mentioned source folders, so the File History feature will take care of the backup for you.
So, now, that we have discussed the steps to use the File Backup to back up the files from your computer, we can now, jump into learning the restoration method using the File History feature when you need to do so.
- To restore the files using the File History feature, use the search feature from the taskbar here just search for Restore your files with File History and just hit the enter button and the restorer window will open.
- Make sure you have the external device where you backed up the files connected to your computer before you start the restore option.
- Here, search for the file you are looking for.
- Now, once you find the file that you need, select it and then click on the restore button.
Well, apart from using this feature on Windows, you can also manually backup files to cloud-based storage or to external storage devices by simple copying and pasting the files in the respective folders or locations.
Hope the information provided above was helpful and informative, with these simple and detailed steps you can easily use the File History feature to backup and restore files on your computer.


