Do you wish to relive the nostalgia of Windows XP by employing the famous startup and shutdown sounds in Windows 11?
If you wish to hear the historic Windows XP sound you can do it. Yes, we can. Many of us don’t know that we can get our favorite XP sound on Windows 11. There are several possible methods that will help you with this nostalgic sound.
This article will go over how to get and install the Windows XP sounds for Windows 11. Let’s get started!
Recommended Post:- How to Change Boot Logo on Windows 10 – Quick Guide
What is Windows XP?
Windows XP was an ancient yet gold standard. It has a particular place in most of our hearts because it was most likely the operating system on our first desktop computer. So here are some things we genuinely miss about our old companion—before Android or IOS took over.
Windows XP was introduced on October 25, 2001, and is widely regarded as one of the most popular versions of Windows due to its simplicity, speed, and stability.
This continuous use attests to its success, but it also raises worries about its lack of security.
Even after Microsoft released Windows 7, 8, 10, and 11, a tiny but significant number of users continue to use the old operating system.
How do You get and install Windows XP sounds on Windows 11?
Let us know in the next section of the post what procedures you took to obtain the old Windows XP sound onto your newest Windows 11 machine.
Solution 1: Make the Windows XP startup sound active
1.1 Save the .wav file to your computer

- Step 1: Navigate to the Vsthemes site.
- Step 2: Scroll down to the bottom of the page and select Obtain file to download all of the Windows XP sounds.
- Step 3: On the following page, click Download.
- Step 4: Save the file in a convenient location.
1.2 Modify the Registry Editor
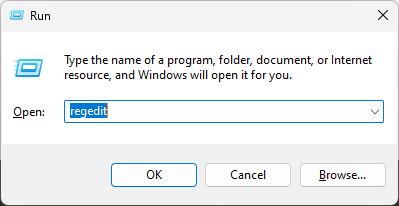
- Step 1: Press Windows+ R to launch the Run dialogue box.
- Step 2: To open Registry Editor, type Regedit and press Enter.
- Step 3: Make a backup first, then go to File, then Export. After that, save the.reg file to your PC. REG backup
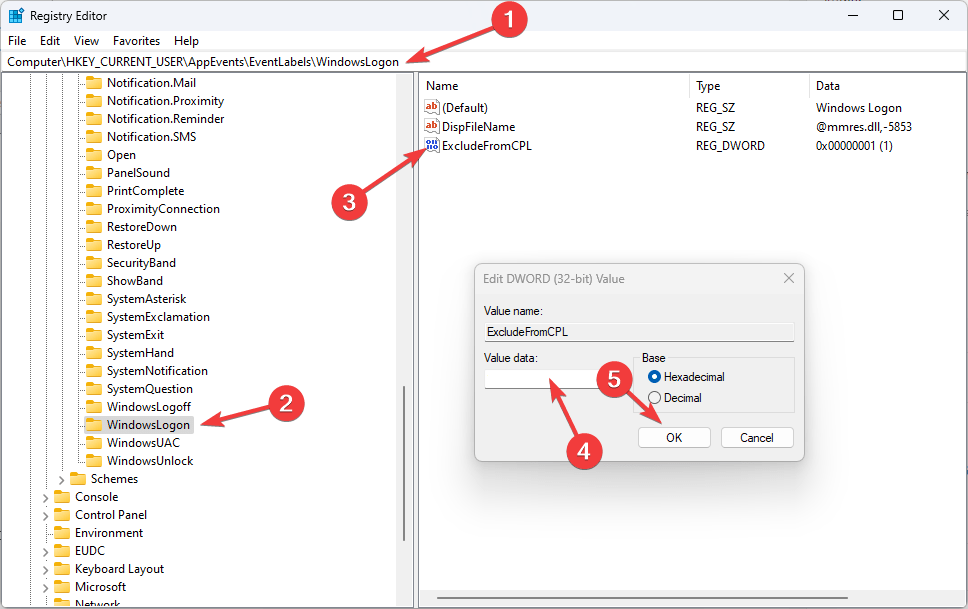
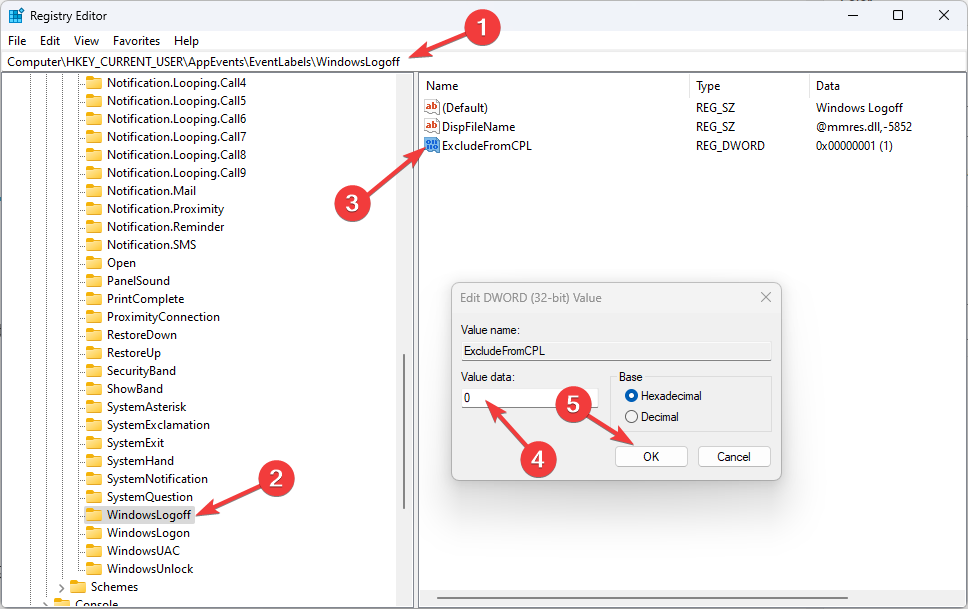
- Step 4: Follow this path: Computer\HKEY CURRENT USER\AppEvents\EventLabels\WindowsLogon
- Step 5: Select ExcludeFromCPL and set the Value data to 0.
- Step 6: Turn off your computer.
1.3 Modify settings in the Control Panel
- Step 1: Press the Windows key, type Control Panel, and then press the Open Control Panel
- Step 2: Under View, choose Category. Select Sound and Hardware. Sound is a category.
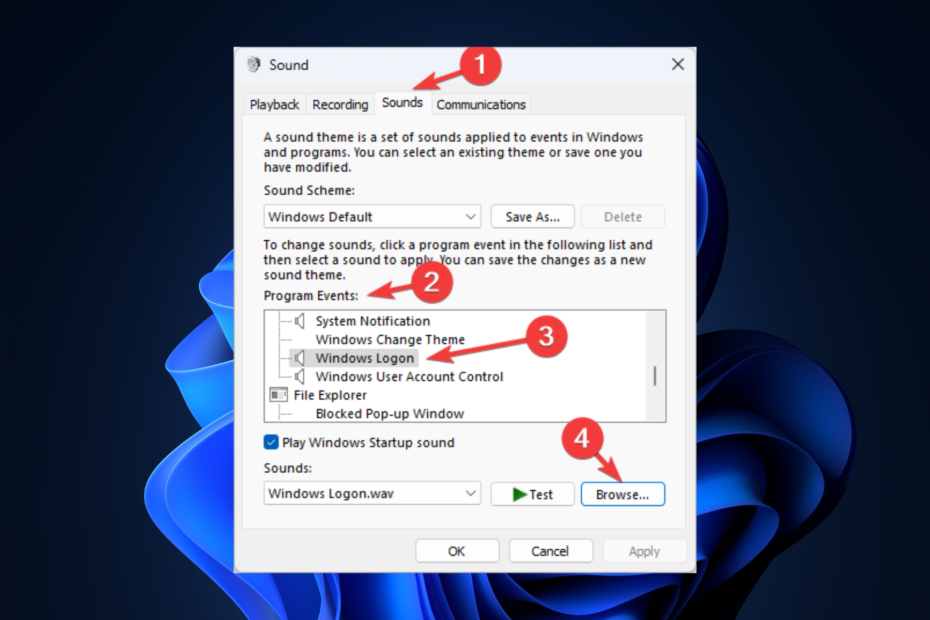
- Step 3: On the following screen, click Change system sounds under Sound.
- Step 4: Replace the system sounds with Windows XP sounds for Windows 11.
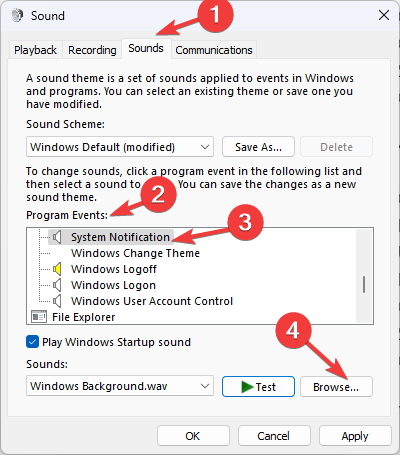
- Step 5: Navigate to the Sounds tab, then to Program Events, then to Windows, and finally to Windows logon.
- Step 6: Click the Browse button. Windows XP Sound Settings for Windows 11
- Step 7: Select the downloaded file and click Open.
- Step 8: Open startup sound
- Step 9: Select Apply, then OK. Apply and accept
- Step 10: Reboot your computer to hear the sound.
Solution 2: Turn on the Windows XP shutdown sound
2.1 Modify the Registry Editor
- Step 1: Open the Run terminal by pressing Windows+ R.
- Step 2: To open Registry Editor, type regedit and press Enter.
- Step 3: Enter and follow this path: Computer\HKEY CURRENT USER\AppEvents\EventLabels\ WindowsLogoff
- Step 4: Find ExcludeFromCPL and set its Value to 0.
- Step 5: Restart your computer.
2.2 Modify settings in the Control Panel
- Step 1: Launch Control Panel by following the instructions outlined in Method 1.
- Step 2: Under View, choose Category. Select Sound and Hardware.
- Step 3: Select Change system sounds from the Sound menu.
- Step 4: On the following page, navigate to Windows, then pick Windows Logoff under Program Events.
- Step 5: Click the Browse button.
- Step 6: Open the shutdown sound from the folder you downloaded in the first step.
- Step 8: Select Apply, then OK.

Solution 3: Enable more sounds
- Step 1: Launch Control Panel by following the instructions outlined first.
- Step 2: Select Category from the drop-down menu for View. Select Sound and Hardware.
- Step 3: Select Change system sounds from the Sound menu.
- Step 4: Under Windows, go to Program Events, scroll to the sound you wish to change, and select it. Select Browse.
- Step 5: Click Open after selecting the.wav file from the downloaded folder.
- Step 6: Press the Apply and OK buttons.
Conclusion
The way Windows XP improved on its predecessor was one of the reasons it was so popular at first. The operating system was Microsoft’s first offering geared at both the consumer and commercial industries, ensuring that it coupled dependability with ease of use.
Windows XP, also known as the operating system that people and organizations refuse to abandon even though they should, has more to offer the world than occasional malware breakouts. While it hasn’t received as much attention as, say, Windows 95, the operating system will never fade from popular culture after being around for nearly two decades.
So, this is how you may enjoy the same old nostalgic feeling by downloading and installing Windows XP sounds on your Windows 11 machine.


