With Windows 11 being the flagship product of Microsoft that got released recently, users have been flocking to get the OS installed on their computers. As of now, there have been millions of downloads of the Windows 11 OS and this number is set to increase as Microsoft has slowed down the updates for Windows 10 and in almost 3 years the support will be scrapped completely. With this being the situation, users have no other go but to shift to Windows 11. Well, initially the OS seemed to create a lot of attraction among PC users as Microsoft had suddenly decided to release Windows 11, but after the release, the OS got many dislikes and many who upgraded their computers to Windows 11, reverted back to their Windows 10, but some liked the new OS and have stuck around to experience the new OS.
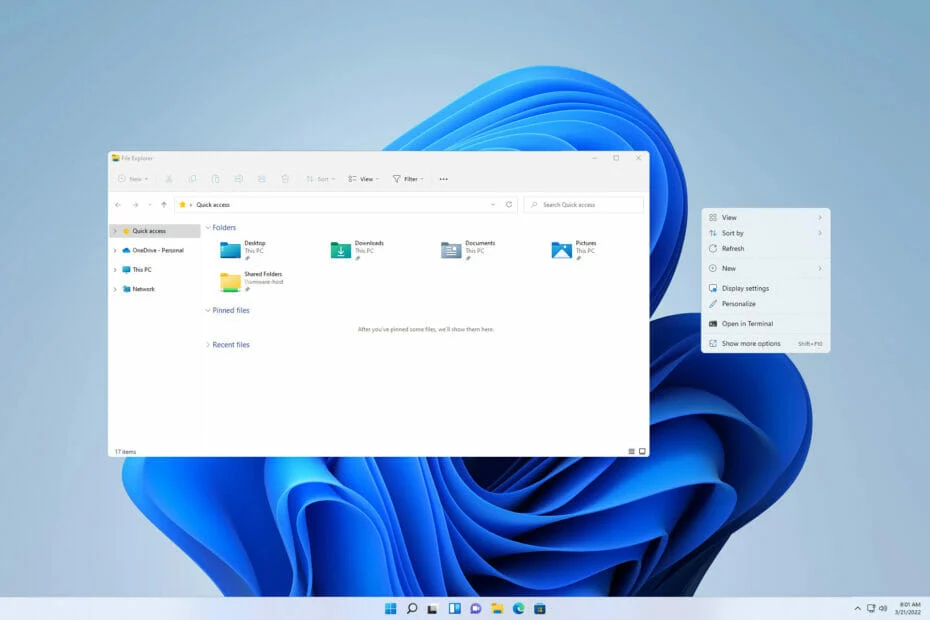
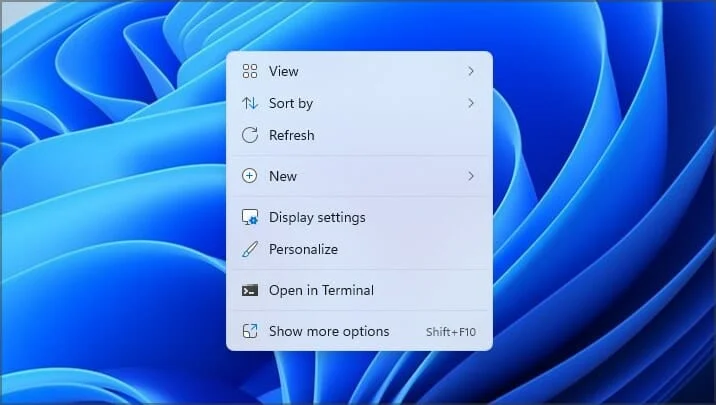
Some downsides like the new user interface have been extensively changed and some of the previously available options have been made difficult to be used or availed by users. Well, one such feature that got changed by Microsoft that is making it difficult for users who have shifted to Windows 11 after using Windows 10 and below versions is that when the right mouse button is clicked, the full menu is not displayed and to make it display, you have to select the display full options option in the menu.
Well, the options displayed when the right-click in done on Windows OS will enable the users to explore more options from the menu and the user can decide on what function they need, but in Windows 11, on clicking the right mouse button, the full menu is not displayed but the user has to select the show more options to actually use enable the whole menu. With this being the case, users who were used to the menu of older OS have difficulties coping up with this unwanted new feature. So, here in this article, we are about to explore some simple methods to make the right-click menu display all the options at once, so you can effectively use the options.
Recommended Post:- Solved: Draftkings Network Error Code 5-0-2-503
Why did Microsoft Reduce the Right-Click option size
Well, the options displayed when the right mouse button is clicked were modified to make it look simpler and only the most used options were readily available on the menu, but for some users, this change has caused issues. So, with this known, let’s dive into restoring the menu to what it used to be in Windows 10 and previous Windows versions.
Simple Methods to Restore the Old Right-CLick Menu On Windows 11
So, here are some simple methods that you can use and restore to the old right-click menu with the full options list displayed. Follow along to make the changes.
Method 1: Run a Command to Change the Right-Click Menu on Windows 11
- Open the run command terminal by using the Windows +R keyboard shortcut, here, type in cmd and then hit enter.
- Here in the command prompt terminal type in reg.exe add “HKCU\Software\Classes\CLSID{86ca1aa0-34aa-4e8b-a509-50c905bae2a2}\InprocServer32” /f /ve and hit enter.
- Now, restart your computer or restart Windows Explorer.
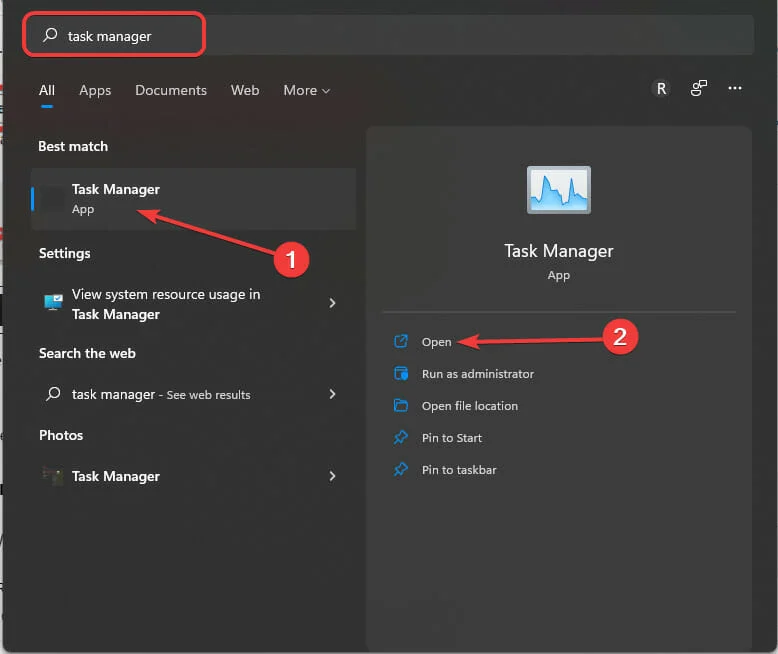
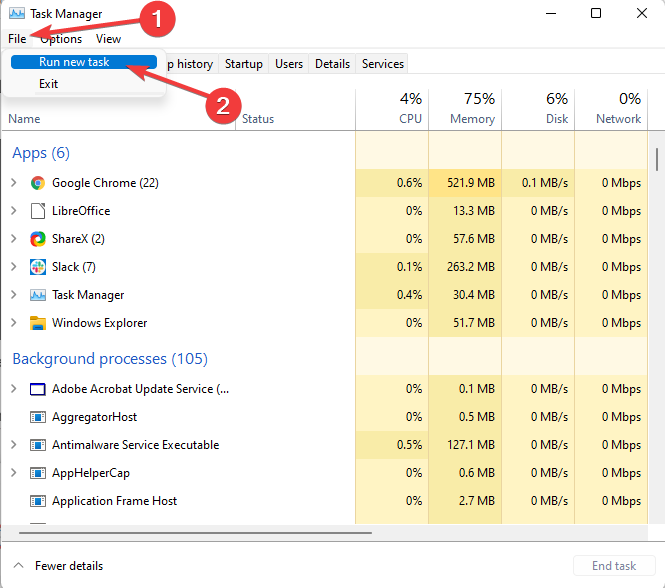
- To restart Windows Explorer, open the task manager by using the Control + Shift+ Escape key on the keyboard.
- Here, in the processes tab, find the Windows Explorer task and then right-click on it and here select the end task option.
- Now, in the task manager, click on the file option and here select the run a new task option and then now, run explorer.exe.
Method 2: Edit the Registry to Change the Menu Option
- To use the registry editor, to make changes, open the run command by using the Windows + R shortcut on the keyboard.
- Here, in the run command terminal, type in Regedit and hit enter to open the registry editor.
- Now, first, back up the registry settings by right-clicking on the Computer option and then selecting the export option.
- Now, select the location, where you want the backup to be stored and then click on save to save the backup.
- Now, with a backup created, you can get into making the changes to the registry editor to make more options appear on the menu by default.
- Now, in the registry editor navigate to the location HKEY_CURRENT_USER\SOFTWARE\CLASSES\CLSID by copying this path in the address bar in the registry editor.
- Here, right-click on the CLSID folder and click on New and select the key option.
- Now, rename the key to “{86ca1aa0-34aa-4e8b-a509-50c905bae2a2}”.
- Now, right-click on the new key that you just created and then select the sub-key option.
- Now, name this new sub-key InprocServer32.
- Here, you will find a key named default, click on it to edit the value.
- Here make sure that the value data is left empty and not zero.
- Now, click on the Ok option to save the changes.
- Now, close the registry editor and then restart your computer.
Well, these were some simple methods that you can use to make the right-click menu display all the options by default.
Hope the information provided above was helpful and informative, with these simple methods, you can get back all the options in the menu when you use the right-click on the mouse.


