Since its release in 2021, Windows 11 has received generally excellent feedback from users. Many users like the new operating system’s look and functionality, as well as the greater security and speed advantages it provides.
The revamped Start menu is one of the primary improvements that has contributed to Windows 11’s popularity among users. The new menu is more simple and more customizable, allowing users to pin their favorite programs as well as more readily access commonly used documents and settings. The new Start menu now has a search bar that allows users to instantly search for files, programs, and settings from the menu.
Although Windows 11’s default notification sound alert is fairly pleasant, you may become tired of it after a while. Fortunately, Windows 11 allows you to adjust or deactivate the default notification sound in a few simple steps.
Adjusting notification sounds is just one of the numerous ways you can customize your Windows 11 experience. This post will show you how to customize and disable notification sounds in Windows 11.
If you’re going to be hearing the notification sound all day, change it to something you prefer. On Windows 11, the Settings app gives you access to all of the sound options. Here’s how to use it to adjust the notification sound.
Recommended Post:- Virtual Disk Service Error: The Object is Not Found on Windows
All About Windows 11
The latest version of Microsoft’s popular operating system, Windows 11, was released in October 2021. It outperforms its predecessor, Windows 10, with a redesigned user interface, improved performance, and more functionality.
The redesigned user interface in Windows 11 is one of the most visible changes, with a centered Start menu, rounded corners, and a cleaner appearance. The taskbar has been revamped, with the icons now defaulting to being centered, and the icons themselves having been altered to a more modern, flat look.
Windows 11 also contains several performance enhancements, including faster startup times, longer battery life, and more effective multitasking. This is thanks to Snap Layouts, a new feature that allows users to instantly organize their windows and applications on the screen.
Microsoft Teams, Microsoft’s popular communication and collaboration platform, is also included in Windows 11. Users can connect with friends, family, and coworkers, as well as join meetings or video conversations, straight from the taskbar.
Windows 11 also contains various new productivity tools, such as the ability to swiftly transition between several desktops and Snap Groups, which allows users to save and restore groups of Windows and programs.
As a result, Windows 11 represents a considerable update over Windows 10, with a redesigned user interface, improved performance, and several new capabilities. While not all users will be able to switch to the new operating system, those who do will most certainly find it beneficial.
What are Windows 11 Notification Sounds?
Windows 11 includes a new set of notification sounds that are more modern and minimalistic than the noises in prior versions of Windows. These noises have been deliberately constructed to be both pleasant and attention-grabbing so that users are alerted to key occurrences as soon as they occur.
“Fluent,” one of the new notification sounds in Windows 11, is a soft chirp that is meant to be both calming and uplifting. Another sound option is “Warm,” which is a short and cheerful beep that is excellent for less important notifications.
For more urgent notifications, Windows 11 adds a sound dubbed “Urgent,” which is a succession of short beeps designed to get the user’s attention rapidly. The “Bamboo” sound, on the other hand, is a sharp, staccato noise that is appropriate for urgent messages that require rapid action.
Finally, Windows 11 features a sound called “Funky,” which is a piece of joyful and energetic music designed to be played when something wonderful occurs, such as receiving a compliment or achieving a goal.
Windows 11 Notification Sounds
Overall, the notification sounds in Windows 11 are a pleasant addition, and they provide the operating system with a new degree of personality and flexibility. Users may also tweak the sounds by selecting different choices in the Sounds settings menu, allowing them to personalize their notification experience.
Yet, some users dislike the default Windows 11 notification noises. However, if you want to modify it, you may. Hence, in the next section of this post, we’ll look at how to adjust the notification sounds in your Windows 11 system.
What can You do in Windows 11 to update the Notification Sound?
The techniques listed below will assist you in changing the notification sound of your Windows 11 system and setting it to your preferred sound. Let’s wait and see.
Solution 1: Make use of the Settings app
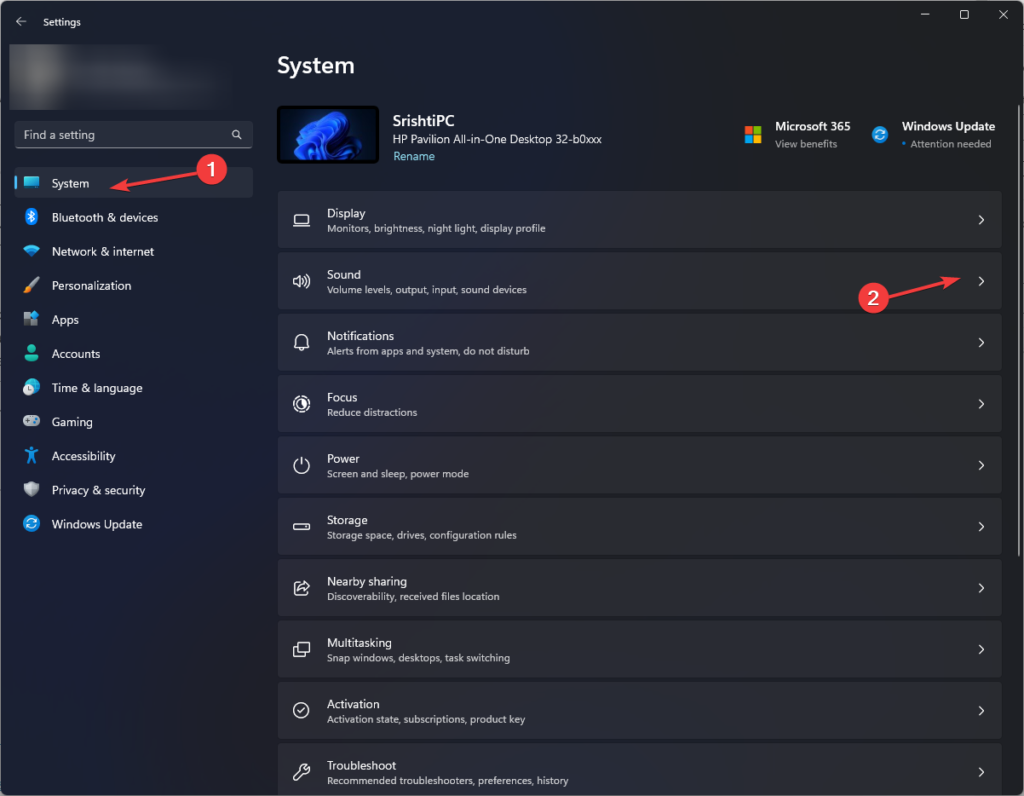
- Step 1: To open Settings, press Windows + I.
- Step 2: Choose Sound from the System menu.
- Step 3: Return to the Advanced section and select Additional sound settings to bring up the Sound dialogue box.
- Step 4: Go to the Sounds section.
- Step 5: Go to the Notification area under Program Events.
- Step 6: Choose the sound under Sounds and press the Test button to hear a preview.
- Step 7: To confirm the changes, click Apply, then OK.
Solution 2: Make use of the Control Panel
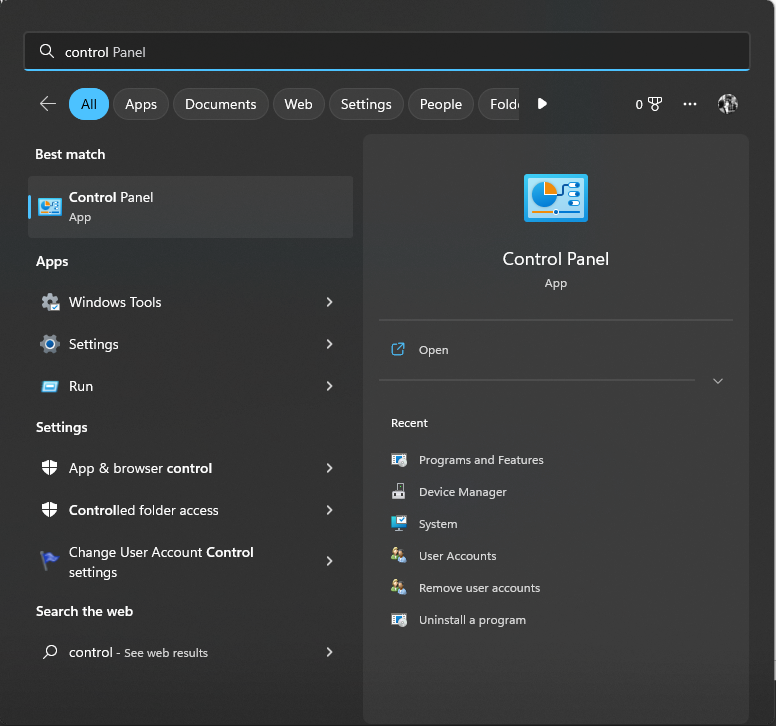
- Step 1: Click the Windows key, type Control Panel, and then press the Open button.
- Step 2: Choose View by Category and then choose Hardware and Sound.
- Step 3: Next, select Sound.
- Step 4: Go to the Sounds tab in the Sound dialogue box.
- Step 5: Look for the Notification in the Program Events section.
- Step 6: Choose notification sound from the drop-down option under Sounds.
- Step 7: After selecting, press the Test button to hear the sound.
- Step 8: To save the changes, click Apply, then OK.
Solution 3: Make use of the Customization options
- Step 1: To open Settings, press Windows + I.
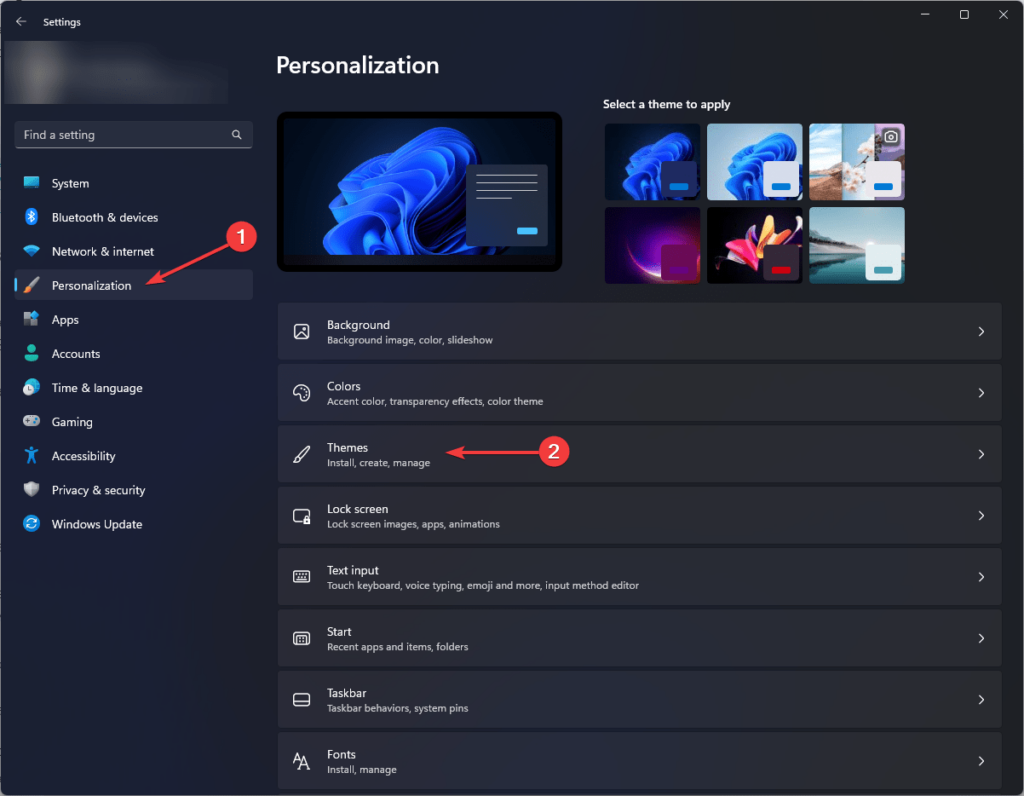
- Step 2: Go to Personalize and select Themes.
- Step 3: Go to Related settings and select the Sounds option.
- Step 4: On the following box, select the Sounds tab.
- Step 5: Go to the Notification section of the Program Events menu.
- Step 6: Choose a new sound from the drop-down option under Sounds.
- Step 7: To hear the preview, click Test.
- Step 8: To save the changes, click Apply, then OK.
Solution 4: Make use of the Registry Editor
- Step 1: Save and copy the path to the sound you wish to utilize.
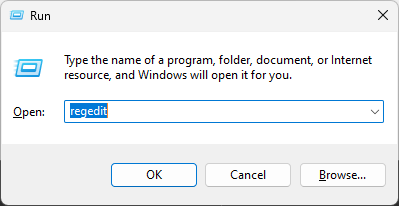
- Step 2: To launch the Run dialogue box, press Windows + R.
- Step 3: Enter regedit and press OK to launch the Registry Editor.
- Step 4: Follow this path: Computer\HKEY_CURRENT_USER\AppEvents\Schemes\Apps.Default\Notification.Default.Current
- Step 5: Find and double-click the Default to open the Properties dialogue box.
- Step 6: Paste the path to the sound file into the Value data field and click OK.
To save the changes, restart your computer.
How to Turn Off System Sounds in Windows 11?
To disable all noises in Windows 11, follow these steps:
- Step 1: Go to the Settings menu.
- Step 2: Choose Personalization.
- Step 3: On the right side, navigate to the Themes page.
- Step 4: Choose the Audio tab.
- Step 5: Go to the Sounds tab (if applicable).
- Step 6: Under the “Sound Scheme” section, use the drop-down menu to select the No Sounds option.
- Step 7: Choose the Apply option.
- Step 8: Choose the OK option.
When you finish the procedures, the system will no longer play any sound for any Windows 11 events.
How to Turn Off Startup Sounds on Windows 11
To turn off the startup sound, follow these steps:
- Step 1: Go to the Settings menu.
- Step 2: Choose Personalization.
- Step 3: On the right side, navigate to the Themes page.
- Step 4: Choose the Audio tab.
- Step 5: Go to the Sounds tab (if applicable).
- Step 6: Uncheck the Play Windows Startup Sound checkbox.
- Step 7: Choose the Apply option.
- Step 8: Choose the OK option.
When you finish the steps, the Windows 11 startup sound will no longer play when your machine powers up.
How to Make Your Own Sound Scheme on Windows 11
Follow these instructions to establish a sound scheme in Windows 11:
- Step 1: Go to the Settings menu.
- Step 2: Choose Personalization.
- Step 3: On the right side, navigate to the Themes page.
- Step 4: Choose the Audio tab.
- Step 5: Go to the Sounds tab (if applicable).
- Step 6: Choose the event to adjust the sound from the “Program Events” column.
- Step 7: Using the “Sounds” drop-down menu, select the new sound.
- Step 8: Repeat steps 6–7 to adjust the sounds of the system.
- Step 9: (Optional) Uncheck the option Play Windows Startup Sound.
- Step 10: Choose the Save As option.
- Step 11: Give the scheme a name.
- Step 12: Choose the OK option.
When you finish the procedures, the custom settings will be saved as a new Windows 11 sound scheme.
Why do Users Change the Notification Sounds in Windows 11?
People in Windows 11 can modify notification sounds for a variety of reasons, including:
- Personalization: By changing the notification sound, users can personalize their computer and make it feel more like them.
- Distinguish: Users can distinguish between different types of notifications by adjusting the notification sound. They can, for example, customize the sound for email notifications, chat notifications, and calendar reminders.
- Avoidance: Some people may find the default notification sounds irritating or bothersome, and would prefer to use a different sound that is more pleasant or less obtrusive.
Accessibility: Individuals with hearing issues may prefer to utilize a more audible or easier-to-hear notification sound.
For the sake of novelty or enjoyment, some people like exploring the numerous sounds available in Windows and may choose to change their notification sound.
What are the most common notification sounds in Windows 11?
Windows 11 includes several notifications sounds to pick from, including:
- Alert: This is Windows 11’s default notification sound, and it is a brief, crisp sound designed to capture your attention immediately.
- Bamboo: A softer, more natural-sounding choice that is similar to a bamboo wind chime.
- Chimes: A traditional notification sound that sounds like a set of chimes or bells ringing.
- Hiker: This can be a fun notification sound that sounds like someone blowing on a whistle as if calling out to a distant hiker.
- Popcorn: This is a more fun sound that sounds like popping popcorn.
- Ripples: This is a calm, peaceful sound that mimics the rippling of water in a pond.
- Wave: This is a more dramatic sound that sounds like a crashing wave and is intended to grab your attention right away.
These are just a few of the many notification sounds included with Windows 11. Users can also use their original sounds or purchase additional sound packs from the Microsoft Store.
Conclusion
Finally, Windows 11 is the most recent version of Microsoft’s Windows operating system, launched in 2021. It offers a redesigned Start menu, greater performance, new touch and pen functions, and a revised user interface, as well as various new features and enhancements over its predecessor, Windows 10.
Windows 11 also has improved security measures, including built-in security technologies like Windows Hello, Microsoft Defender, and secure boot. Furthermore, the new version of Windows integrates better with mobile devices and cloud services, allowing users to operate across numerous devices and platforms.
Windows 11 includes several notification sounds that can be tailored to the user’s preferences. To alter the notification sounds in Windows 11, go to the Control Panel’s Sound settings menu and then to the “Sounds” tab.
They can choose different sounds for each sort of notification, such as “Fluent” for less urgent notifications or “Urgent” for critical alerts, using this menu. Users can also mute specific sounds completely or build their own personalized notification sounds. Ultimately, personalizing notification sounds in Windows 11 is a simple and quick approach to improve the user experience and make the operating system more fun to use.


