A backup is incredibly important for you as it can preserve all of the important data that is on your system. This is a great way for you to protect your system against hardware failure and problems related to upgrades. There are also many malware problems that could happen to your system and backups could help prevent those.
If you are not placing a constant emphasis on backups, all of the precious data on your system that includes documents and pictures may get lost. You would have probably spent a lot of time uploading all of those things and it can be really discouraging to you when you lose all of them and are not able to save them.
If you want to get a backup on your Windows 10 PC, there are many ways in which you can do so. You will have the option of using third-party solutions to assist you with backing up your complete system. You can also copy all of your data to some sort of external drive or upload all of it to some cloud storage. If you are somebody who is disinterested in these methods or are not a fan of third-party tools in general, you can use the backup tool that is already available on the OS. We are excited to tell you about the various ways in which you can perform a backup on your Windows 10 PC.
Creating and restoring a backup on Windows 10 with the system image tool
You will be able to use the system image tool to create a complete backup. You can then place all of your data in some shared folder or external drive. It is advised to make use of storage that is easily removable. You will then be able to disconnect and place it wherever else you want to.
Also Read:- How to Disable your Laptop Touchpad on Windows 10 – Complete Guide
Please take a look at these steps to figure out how to create and restore a backup on Windows 10 using a system image tool:
- You will have to open Settings and then click on Update & Security which can be found under that.
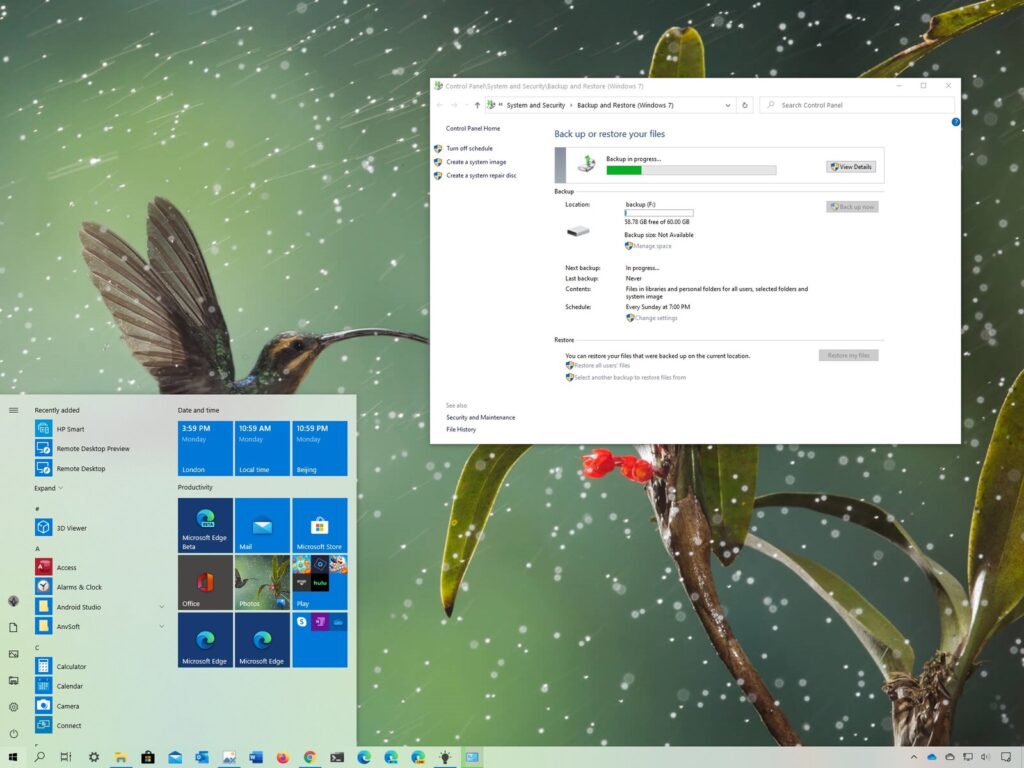
- You will then have to click Backup. There will be a certain section that will ask you whether you are looking for an older backup. Once you find this section, you will have to select the Go to Backup and Restore option.
- In the left pane, you should click the Create a system image option.
- There will be an option called On a hard disk. You can make use of this option to select the location where you want the complete backup to be exported.
- After you are done with this, you can select the Next button. You should then select one of the extra hard drives that you have so that they can be included in the complete backup.
- The Next button should then be clicked following which you can go for the Start backup button.
- You will get a prompt asking you to create the system repair disc. You can skip this step because most of the devices that are out there no longer have an optical drive.
- If you are in a situation where you have to restore your machine back to normal, you can employ an installation media(USB) so that the recovery environment can be accessed.
- The Close button should be clicked after the completion of this step.
- When you are done with this, an image of your whole system will be created. This image will have all of the things that you need including all of the data on your main hard drive and all of the other hard drives you chose.
- You will be able to continue working on whatever system you are using when the backup is taking place with the aid of the Shadow Copy feature.
- You will have the option to disconnect and keep your hard drive wherever you want to when the backup has been created. If the data that you have is highly important, you can keep it in some other kind of other physical location that you may be comfortable with.
- In case a hardware failure happens or you need your hard drive to be replaced for some reason, you can go ahead and make use of one of your backups to perform a recovery of your files and device.
- You will have to make a connection between your system and backup device. You will then have to connect your USB bootable drive to your PC and then start your computer.
- When you receive the prompt for the startup, you can tap any key on your keyboard to resume.
- In case your device does not start working in the setup wizard, you can go ahead and access the BIOS so that the order of the boot can be changed accordingly.
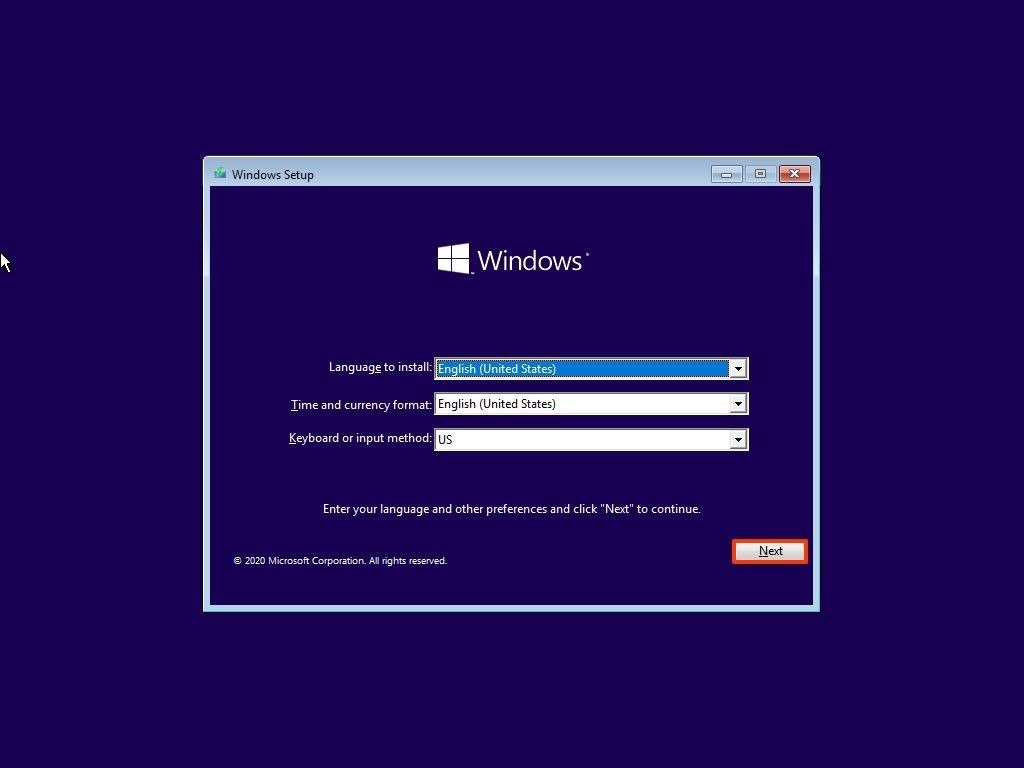
- You should click the Next button on the Windows Setup page.
- There will be an option for repairing your computer which you should select(can be found near the bottom of your screen).
- After clicking Troubleshoot, proceed with System Image Recovery.
- The Windows 10 option can then be chosen as the OS you want.
- Choose the option that allows you to use the most recent system image. In case you have many backups, go ahead with the select a system image option.
- Select the Next button and then choose the appropriate Format and other partitioning options. This is something optional that you can avoid doing if you do not want to.
- You should click the Next, Finish, and Yes buttons in this order.
- When you are done with all of this, the recovery of your data will start taking place on your Windows 10 PC.
The system image backup tool option is a great way for you to create a backup of your important data. We hope that you managed to get a much better idea of how you can keep your data secure from reading this article. Please feel free to give whatever thoughts you may have about the backup process in the comments section.


Thank you.