The recent operating system from Microsoft, Windows 10 is a phenomenal hit with more than half the people in the world using the operating system on their systems. The biggest hit with these operating systems is that they have wide adaptability in managing the actual number of users using a system. The supreme authority of handling all these users lies in the hands of the system administrator.
Now there is a common misconception that the first person to create a user account in the system is the administrator, but no. The actual administrator is disabled for security reasons. The actual administrator needs to be activated once you log-in to the system. Now, this is the same applied to all the versions of the Windows operating systems. The biggest appeal with this feature is that the administrator settings in windows offer the maximum level of protection to your system from potential non-users who might misuse your data.
Now, you might ask me the difference between the super-administrator and the built-in administrator account. The major difference is that you won’t get UAC prompts when you run applications in administrative mode with the super administrator.
Now I know that you would be all riled up to activate the administrator account in your very own systems. Before getting to that part, I’m just letting you know that the below-mentioned process is the same for all the versions of the Windows operating systems, i.e. it is the same for windows 7, 8, 8.1 and 10.
There are various ways in which you can activate the super administrator, there are the major three ways you can pull this off: The above can be done using,
- User Management Tool.
- Command Prompt.
- Group Policy.
Using the user management tool to activate the Super-Administrator:
Now, this is one of the most convenient ways of activating the administrator account. This method is easier than other methods. The added advantage is that this method is also shorter to complete.

Now all you must do is follow these steps:
- Go running -> and go to the control userpasswords2.
- Go to the advanced tab and under that select “Advanced User Management”.
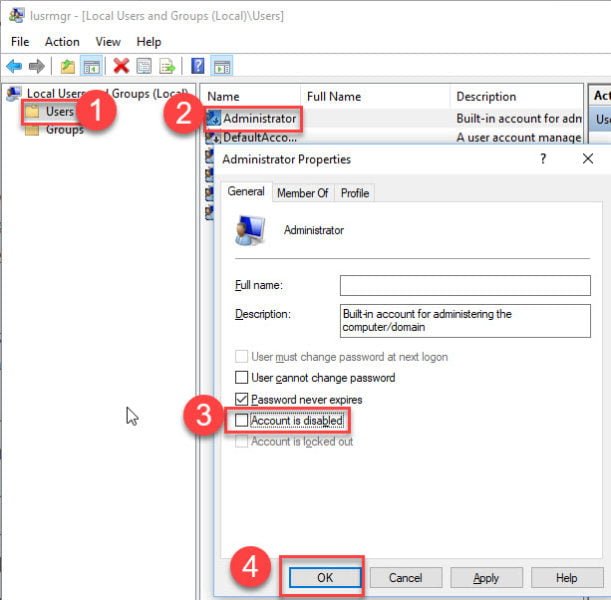
- Now once that you are under the user folder, you are granted access to all the users that are available on the system.
- On the administrator user, you need to right-click on it and go to the properties.
- In the properties window, you must look for the “account is disabled” option. Once you locate the option you need to uncheck it and click on OK.
You are now done with the process. Now you must make it a point that you secure the administrator account, you can do this by creating a new password. By default, the Administrator account doesn’t have a password.
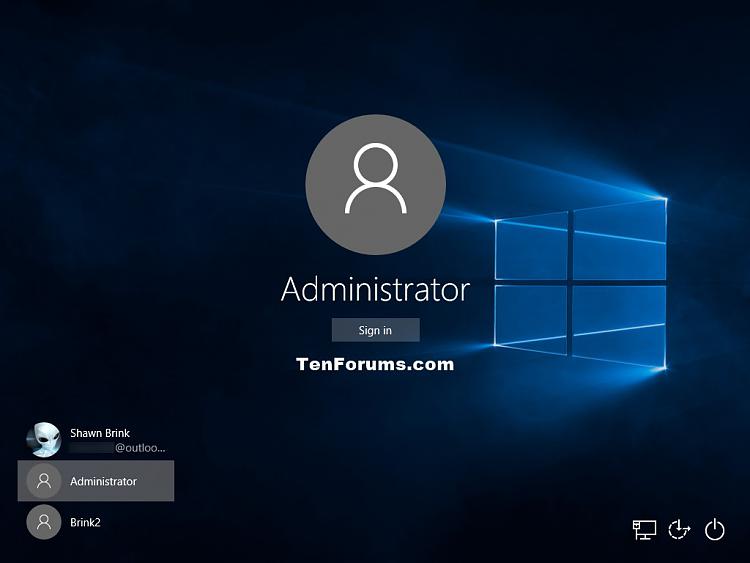
Now the next time you boot up the system, the administrator will appear, into which you can login with the password that you created. That’s one way of enabling the super-administrator mode in windows.
Using the command prompt method
Now, this method isn’t the conventional way of doing things. This involves enabling the command prompt dialogue box and enter the correct command to activate the administrator user. Caution is to be followed while typing in the command as there is a high probability that the command you type might be of the wrong format and might possibly activate and unwanted processes. The chances are one in a millennial but its best to move ahead with no risks involved. I wouldn’t personally suggest this method.

The steps to activate the super-administrator are as follows:
- Open the command prompt dialogue box as while you are in the default administrator mode and not the local user.
- Type in the following command net user administrator /active: yes and run the command. The above command would activate the super-administrator. Now you need to practice patience and caution when you type in the code. If the process throws up an error dialogue box, then it means you have opened the command prompt in the local user mode.
- Once that is done you need to protect the administrator account with a password. Again, open the command prompt and type in the following command net user administrator*
You need to log off the current user and once you get to the sign-in window, you can see the administrator account activated and thus login to the account with the password you created specifically for that account.
Enabling the Super-Administrator using the group policy
If you have the system administrator access or you are the system administrator, then enabling the default administrator account is quite simple. This method is exclusive to the system administrators and not the conventional user. The following steps will help you enable the default administrator account using the group policy.
- First thing is that you need to open the group policy editor. This can be done by Run –>gpedit.msc
- now you need to navigate through the below-mentioned pages accordingly: Computer configuration –> windows settings –> security settings –> Local policies –> Security options.
- In the right-hand side windowpane, you will find the Accounts: Administrator account status disabled. Click on that and enable the option as it will be disabled by default.
Once you have done that you have enabled the default administrator account as a system administrator.
The above methods are useful in different ways. If you are a normal user of a system, the first two methods would be your first preference. But in case you a system administrator, then the third optional method would be the right choice of proceeding with. This enabling the super- administrator account has its perks as you are given the added responsibility of managing all the users logged on to your system. You can also by default remove the users you don’t want to or the users that are no longer in use.
Thus, the above methods would help you in enabling the hidden administrator account in your system.


