Breaks are very much necessary during work time. One cannot work without taking a break as it is very difficult to focus or work for a long time. Especially when working on a computer, we have to take a short break as continuously staring at the computer screen can be stressful, and taking a break can be a good option. Most people take short breaks in between long hours of work and shutting down the computer and restarting it all over again can be a tedious process. So, it would be easy to put the computer in hibernate or sleep mode depending on the amount of time you prefer to take a break.
Hibernate is a great mode on most Modern computers. Well, the hibernate mode allows you to temporarily make your computer rests by saving the data on the RAM into the hard disk. So, by using the hibernate mode, you will be able to resume from where you left after a break as the data stored on the hard disk will be returned to the RAM and the processing of the data can be done. Well, now you might have a doubt that what’s the difference between hibernate mode and Sleep mode, you may say that both does the same tuning. So, here goes the explanation.
Recommended Post:- Asus Releases First Windows 11 Motherboard BIOS Update – Complete Guide
How the Hibernate Mode is different from Sleep Mode
Well, both hibernate and sleep mode in the computer is for putting the computer temporarily shut down without losing data that were in process. But the difference is, where the data goes once you use these modes. Well, when you use the sleep mode, the data in the RAM is kept in the RAM, so for this, the RAM needs to be powered up the whole time and the rest of the system will be switched off, but in hibernate mode, the data in the RAM is temporarily stored in the hard disk. As RAM is volatile memory and overloading it most of the time is not very good so the sleep mode can be used for a short period and the hibernate mode can be used for a long period. Another benefit of using the hibernate mode is it’s much efficient at conserving energy than the sleep mode.
So, with this said let’s move on to Windows 11. As we all know Windows 11 is in the spotlight as Microsoft has released the preview builds and the official version is about to release. There are many positive as well as controversial aspects discussed by enthusiasts and users. Well, with the release of the preview builds, users have been trying to identify and explore the features and how to use them on the OS as there might be a slight change in the accessibility of Windows 11 from Windows 10. So, this article is one such article where we are about to discuss how to enable the hibernate mode on Windows 11 so we can use it from the start menu. Hop on and learn the simple method with ease. Well, people familiar with the command prompt will feel the method to be simple but for those who are new to the command prompt, follow the method and you will be able to enable the hibernate mode with ease.
Command prompt is a simple terminal app native to Windows OS. all Windows OSes come with the command prompt and there are specific commands that can be used to operate and functionalize various aspects and features of Windows OS. So, using the command prompt we can do much more than using the settings or the control panel. Learning to use the command prompt will always come in handy
Method 1: Enable the Hibernate Mode on Windows 11 using Command Prompt
To enable the hibernate mode in Windows 11 follow the following steps:
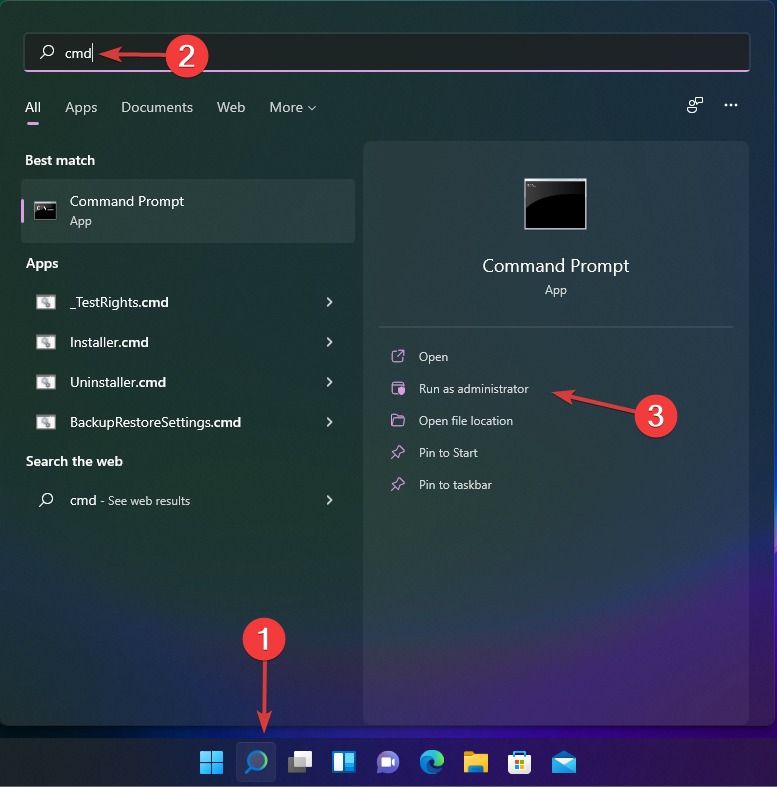
- Open the command prompt by searching for the command prompt in the search function and then right-click on the icon and select run as administrator.
- Now in the command prompt terminal, type in “powercfg.exe /hibernate on”
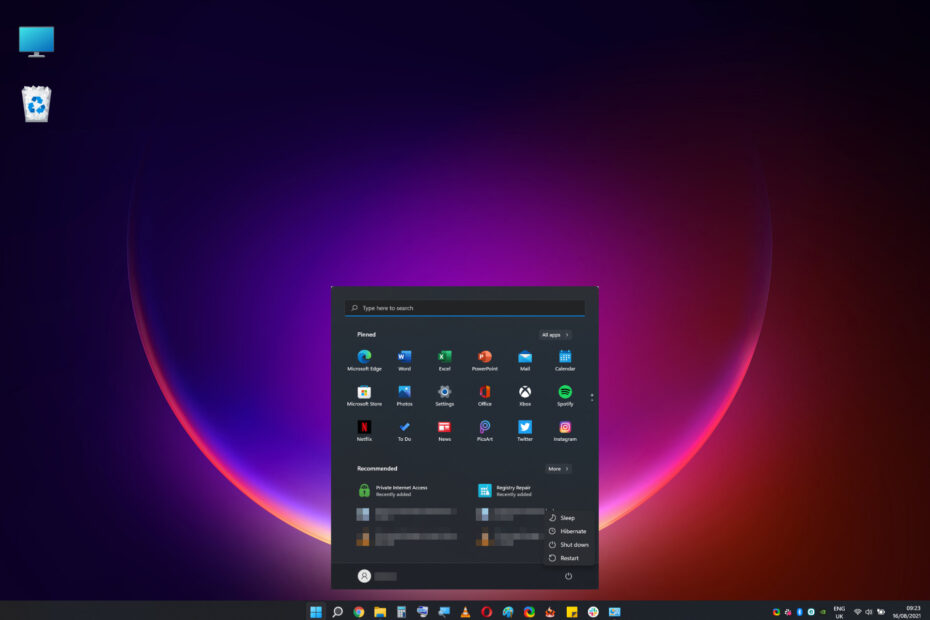
- Now, the hibernate mode will be enabled and you can use it from the start menu.
Enable Hibernate Mode using control panel
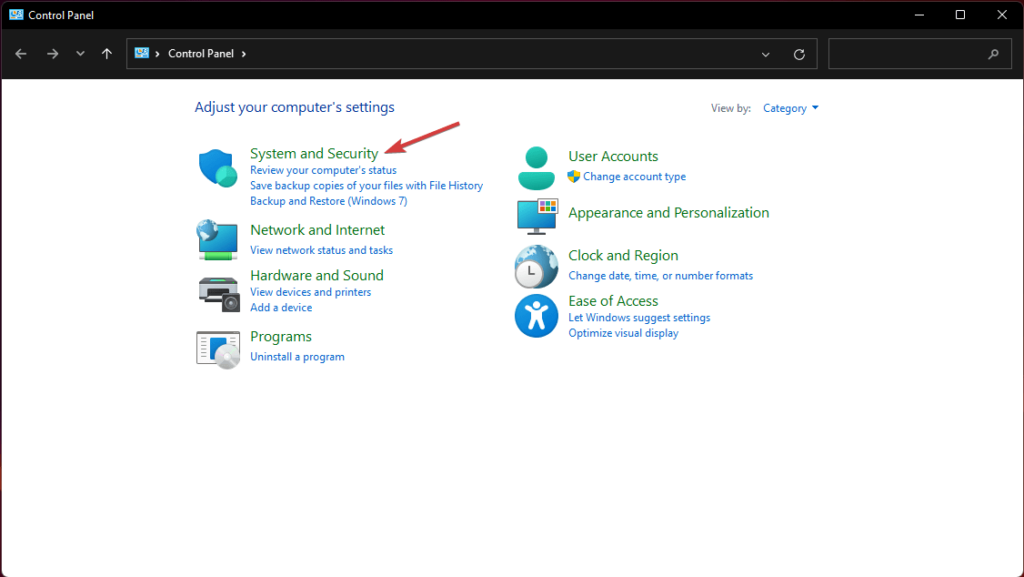
- To enable the hibernate mode, open the control panel be searching for the control panel in the search bar.
- Now, go to the system and security tab.
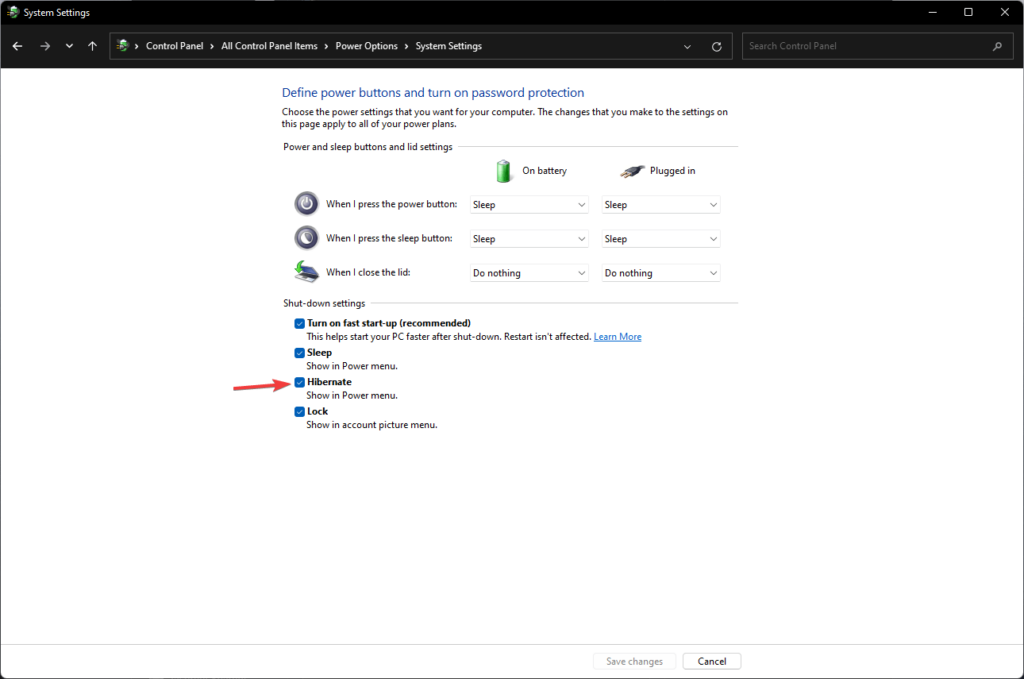
- Here, select the power options, select “Choose what the power button do” in the left windows tab.
- Now, click on the “Change Settings that are currently unavailable”.
- Now, toggle the button near the hibernate option to enable it.
- Once done, quit the control panel.
You have now enabled the hibernate mode on your Windows 11 computer. You can now use the feature with great ease as you will find the hibernate option in the start menu. As mentioned above, use the hibernate mode when you are going to not use the computer for long hours, and if you are not going to use your computer for very long, shut down the system as there is no power consumption.
Well, we have said a lot about the hibernate mode, just one more thing, the hibernate mode doesn’t work well with HDD as there are moving parts in the HDD but when using an SSD the hibernate mode is good.
Hope the information provided above was helpful and informative. Use the hibernate mode with ease.


