Microsoft is putting out the feature to uninstall programs with interdependencies, similar to how it did with the WinAppSDK-powered design of File Explorer on Windows 11 Insider Build 25300.
The capability, which was available in Build 25169 (July 2022) but deactivated in 25211 (September 2022), can be re-enabled in the newest Dev versions (25300) with a few registry modifications on ViVeTool, as discovered by Windows enthusiast @PhantomOnEarth. Applications with interdependencies cannot function without the assistance of another program. Games installed through Steam, for example, would not be able to run without the Steam app itself, and so forth.
Typically, those apps use a database to store information elsewhere, which affects how they function, compute, communicate, and so on. Nonetheless, it appears that you will be able to do so with this functionality, but we are yet unsure how that will work.
ViveTool is an open-source command-line program for enabling experimental but hidden Windows features. It is also available as a graphical user interface (GUI) form, which makes it much easier to enable or disable specific functions on Windows.
It enables you to test out newer and unannounced features on your stable or developer Windows releases, like the multi-tab capability in File Explorer or the restoration of the traditional Windows 11 context menu. Should you, nevertheless, employ ViVeTool? Let us investigate!
Recommended Post:- How to Get to Advanced System Settings on Windows 10 – Complete Guide
All About Windows 11
Microsoft’s latest operating system, Windows 11, was released in October 2021. It is the successor to Windows 10, which debuted in 2015. Windows 11 is a considerable advance over its predecessor, with new features and enhancements that improve the user experience.

- Design: The design of Windows 11 is one of the most visible improvements. It boasts a new, modern style that includes a centered Start menu, updated icons, and a customizable taskbar. The new design is cleaner and more basic, making it easier to use.
- Widgets: Widgets are a new feature included in Windows 11. It is a panel that appears on the left side of the screen and displays news, weather updates, and other pertinent information. Widgets can be configured to display only the information that users desire.
- Snap Groups and Snap Layouts: Snap Layouts, a new feature in Windows 11, allows users to easily organize windows on the screen. Another tool that allows users to combine numerous windows and snap them to a precise position on the screen is Snap Groups. These characteristics are especially handy for multitasking and aid in productivity.
- Performance: Windows 11 is intended to be faster and more efficient than Windows 10. It makes advantage of new technology to increase system performance, such as better memory management and improved power management. The operating system also includes a new function called Dynamic Refresh Rate, which adapts the display’s refresh rate based on the information presented. This function contributes to longer battery life on laptops and other mobile devices.
- Security: Microsoft prioritizes security, and Windows 11 offers several new technologies that improve system security. Windows Hello is one of these technologies, which allows users to log in to their computers using facial recognition or a fingerprint scanner. The operating system also includes enhanced internet security capabilities, such as stronger protection against phishing attempts and viruses.
Windows 11 is a considerable improvement over Windows 10, including new features and upgrades that improve the user experience. The new design is cleaner and more basic, making it easier to use. Snap Layouts and Snap Groups are two new features in Windows 11 that boost efficiency.
It combines Microsoft Teams, allowing users to communicate with coworkers and friends more easily. The operating system is quicker and more efficient than its predecessor, and it contains several additional security features to keep customers’ devices safe. Overall, Windows 11 is a suitable successor to Windows 10 and an excellent option for users seeking a modern and safe operating system.
What Is ViveTool and How Does It Function?
ViveTool is a third-party open-source C# library and console software that allows you to access previously unreleased functionalities on your Windows machine. It can also be used to restore or disable specific functionalities.
ViveTool identifies accessible features using feature IDs, which are part of Windows Feature Management, a program development technique. The feature IDs can then be used to enable or disable specific features on your Windows PC using the ViVeTool command line or Graphical program.
To remove the new search box and replace it with the original search icon, use the ViVeTool command-line software and enter the ViVetool /disable /id:39263329 command.
The feature ID id:39263329 in the preceding command instructs the ViVeTool and subsequent API call which features to activate on your Windows computer.
You may also use the ViveTool GUI version to locate and enable or disable features on your Windows machine.
ViVeTool GUI Download and Installation Guide
The ViveTool GUI is a derivative of the ViveTool command-line program. It is easier to use and eliminates the need to execute commands or remember them in the first place.
The graphical user interface version is available as an executable installation or as a portable version. This article will show you how to install and utilize ViVeTool GUI on Windows.
To get the ViVeTool GUI, perform the following steps mentioned below. Let us see.
- Step 1: Go to the GitHub website for the ViveTool GUI.
- Step 2: Get the most recent version of the Setup.exe file. If you want, you may also download a portable version.
- Step 3: Execute the setup file and leave the default options alone. To install the app, follow the on-screen instructions.
- Step 4: Now that the software has been installed, you may use it to locate and install previously unreleased features on your Windows machine. Here’s how to go about it.
- Step 5: Run the ViVeTool from the Start menu or a desktop shortcut.
- Step 6: Choose your Windows to build from the drop-down menu in the top-left corner. The Settings panel allows you to examine the build and version of Windows 11.
- Step 7: The ViVeTool GUI will now begin searching for all available features for the chosen build. This may take a few minutes, so please be patient as the list populates.
- Step 8: The ViVeTool Interface organizes the available functions into many groups. You can broaden the category and install the functionality. Alternatively, to find any feature, type its name into the search bar.
- Step 9: Choose the function you wish to enable or disable and then select Take Action from the drop-down menu.
- Step 10: Click Activate to enable the function and Deactivate to deactivate it. Wait for the success message to appear before clicking Close.
- Step 11: You may need to restart your computer to make the changes take effect.
- Step 12: To return the feature to its original condition, select it, click Take Action, and then pick Revert Feature to Default Settings.
How to Use the Command-Line Version of ViveTool?
ViVeTool’s original version is a command-line utility. While it provides identical functionality to the GUI version, it is a more efficient approach to quickly enable and disable Windows functions.
To enable any feature, however, you must enter the feature ID. The feature ID can be obtained from the Internet, such as Microsoft developer papers or the ViveTool GUI version.
You can use the ViVeTool command-line version to enable or disable features on your Windows machine after you have the feature ID. Here’s how to go about it.
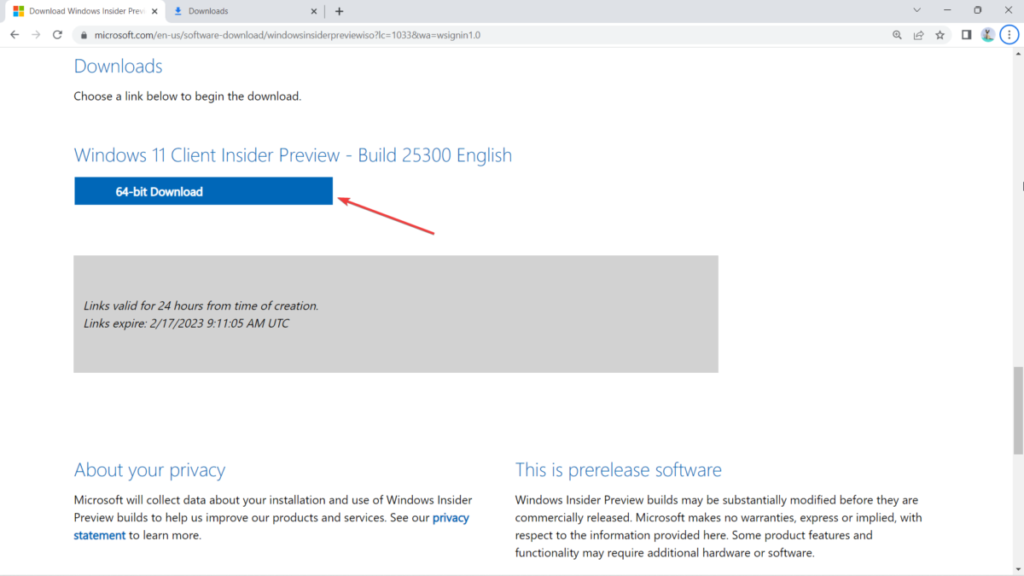
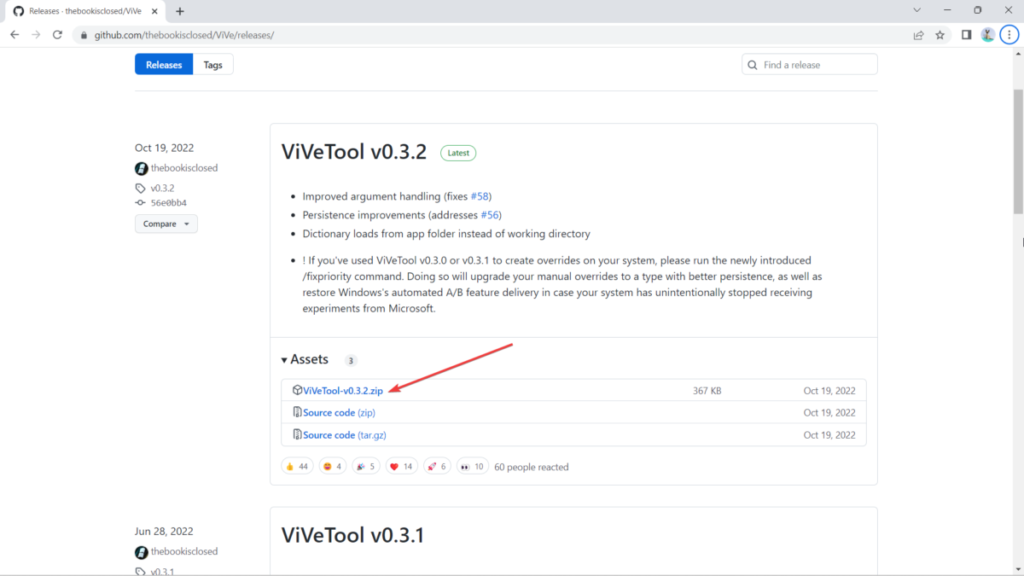
- Step 1: Go to the GitHub page for ViveTool.
- Step 2: Double-click the ViVeToo.xxx.zip file to save the latest version to your hard disc.
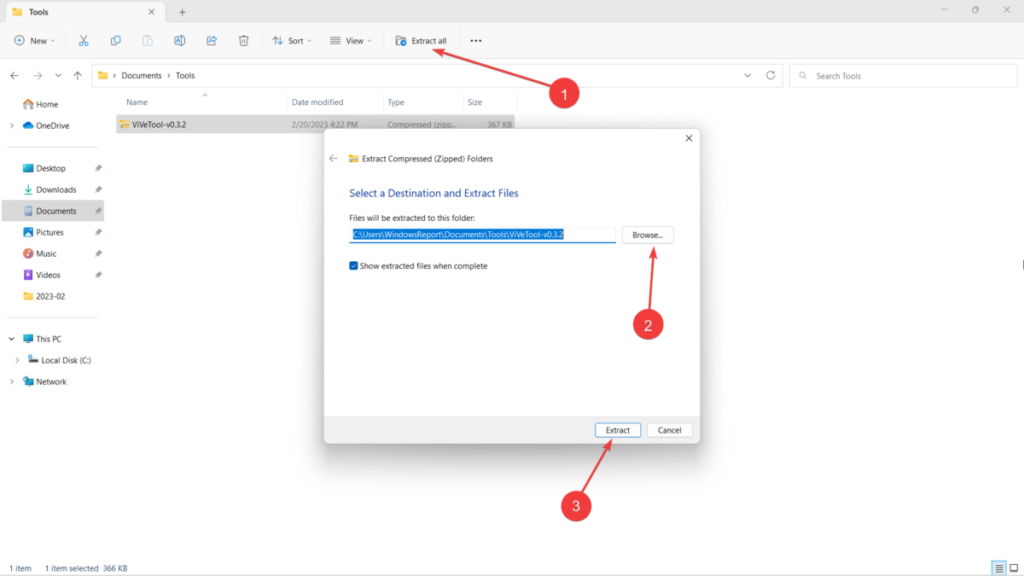
- Step 3: Choose Extract all from the menu that appears when you right-click on the Zip file. Choose a location and click Extract. Keep track of the extraction folder.
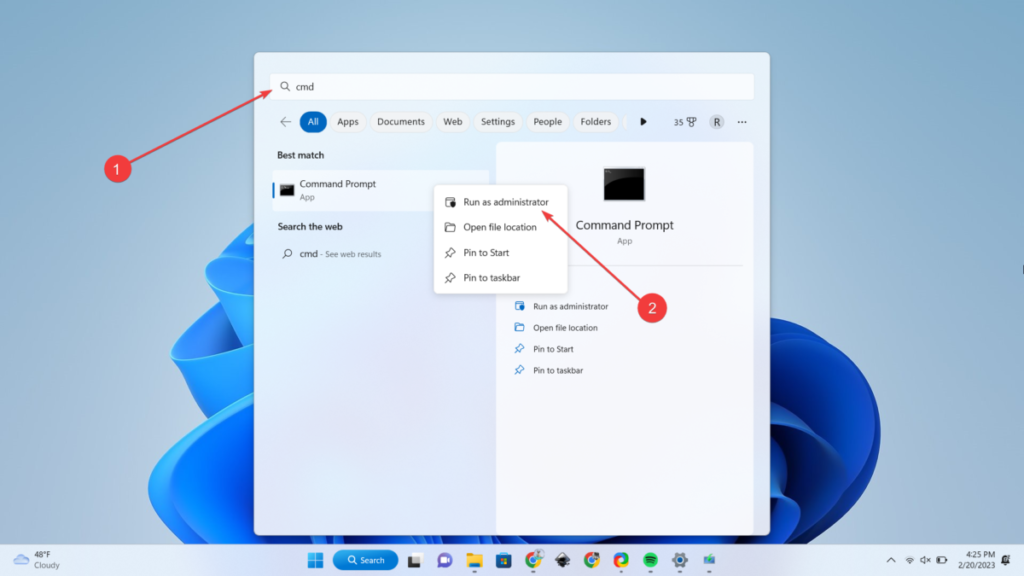
- Step 4: After that, press the Windows key and type cmd.
- Step 5: Choose Run as administrator from the context menu when you right-click on Command Prompt.
- Step 6: Change the directory in the Command Prompt to the ViVeTool extracted folder. To change the directory, enter the following command and press Enter: cd /d [ViveToolFolderPath]
- Step 7: For example, if you store the ViVeTool folder to C:\Users\username\Downloads\ViVeTool-v0.3.2, the full command will be as follows: cd /d C:\Users\username\Downloads\ViVeTool-v0.3.2
- Step 8: To enable a feature, type and click Enter the following command:
- Step 9: Replace the feature ID with the feature ID you want to enable in the preceding command.
ViveTool.exe /enable /id:featureID - Step 10: For example, the feature ID for enabling the tab feature in File Explorer is id:37634385. As a result, the whole command will be as follows:
ViveTool.exe /enable /id:37634385 - Step 11: If you want to disable a feature, the command will look like this:
ViveTool.exe /disable /id:featureID - Step 12: After executing the command, type exit and press Enter to close Command Prompt.
- Step 13: Restart your computer to have the modifications take effect. The changes should be apparent after restarting the computer.
Supported Commands for ViveTool
Aside from the /enable and /disable commands, ViVeTools supports a slew of other options for resetting custom feature settings, updating ViVeTool, and exporting and importing custom feature configurations.
- /enable: Enables a feature by specifying a feature ID.
- /disable: Turns off the functionality.
- /query: returns a list of all existing feature settings. You can use the command to see the ID of each feature, its condition, ID priority, and type.
- /addsub: This command adds a feature usage subscription.
- /notifyusage: This command initiates a feature usage subscription.
- /reset: clears custom customizations for a specific feature that you have enabled.
- /delsub: unsubscribes from a feature usage subscription.
- /import: This command imports custom feature configurations.
- /appupdate: searches for tool updates.
- /export: This command exports the custom feature configuration.
- /fullreset: This command clears any custom feature setups. This can assist you in disabling any new features that you have enabled.
What exactly is Windows Feature Store?
A “feature” in a modern Windows OS, according to Microsoft’s terminology, is a UI and/or UX modification, such as having the revised Open with a menu or the Task Manager entry in the taskbar context menu.
As previously stated, the Windows Feature Store manages the A/B feature experiment mechanism included in Windows 10 and beyond. This store (internally known as “Velocity”) is part of the mostly undocumented Windows Notification Facility (WNF), a kernel component that sends alerts to other kernel components, system services, and user-space applications.
Creating a modular architecture comprising diverse elements is essentially a method of designing a controlled rollout approach. For example, the Windows Insider Program is used to offer work-in-progress functionality to earlier versions, which are then incrementally patched and then enabled for all users once it passes the stability milestone. The kernel can seamlessly disable a feature if it includes a catastrophic error or has a security flaw.
Is it possible to avoid server-side A/B testing?
Keep in mind that both Insider and stable channel builds are typically supplied with a slew of “features” corresponding to latent new forthcoming functionalities. Aside from the controlled rollout, remotely organized A/B testing (also known as split testing) can assure continual improvement and quick feedback loops across many configurations. The Windows Feature Store protects the feature switch states, which protects the randomized experimentation process.
Thankfully, the data saved within the Windows Feature Store can be manipulated. Several clever developers have reverse-engineered Windows’ internal feature control APIs. You can bypass the server-side A/B testing entirely by using apps like Mach2 by Rafael Rivera or ViVeTool by Lucas (aka thebookisclosed) to gain access to the Windows Feature Store.
ViVeTool’s additional features
ViVeTool is the “Swiss army knife” of Windows feature control APIs. It may query the existing feature configurations of the underlying Windows build, import/export/reset custom configurations, and even help to find the last known good rollback system status, in addition to toggling the state of Windows features.
Open a Terminal window and execute the ViveTool program without any arguments to learn more. The program will display a list of all commands and their usage. This provides the ability to enable or disable a feature as well as list the existing feature configurations.
Is it safe to use ViVeTool?
ViVeTool does not automatically add new functionality. It simply toggles the existing functionality for your Windows system to enable or disable them. Nevertheless, because some features are experimental, enabling them may occasionally result in problems.
If you want to use ViVeTool regularly, look through the Windows data backup and recovery choices before following the procedures below. Use a virtual machine to test new features, and then add them to your daily driver if they are stable.
Why does enabling a feature in ViveTool to have no effect?
You might not be able to enable all of the options available in ViVeTool. Practically every hidden feature is OS-build-dependent. This means that if you use ViVeTool to activate a feature and the modifications do not take effect, it is most likely because the functionality is not supported by the Windows OS build version you are using.
In other cases, it could be because the feature state was set to Always Disabled or Enabled during compilation. Even if ViVeTool successfully executes your request, you are unlikely to see any significant changes because the feature may have lost its capacity to be toggled.
Conclusion
ViVeTool makes it simple to discover and test new experimental features before they are made available to the general public. It allows you to simply enable and disable various fun and unpleasant features whether you use the GUI or command-line version.
Nevertheless, many of these hidden functions may be problematic and cause system failure. Hence, before you experiment with ViVeTool, make a backup of your system.


