Windows OS is very versatile and a popular one, the OS is used by millions to run their computers and laptops. Windows stands out in the crowd as the OS provides the users with necessary and powerful features, the OS is stable and is being constantly updated to match the current tech trends. Windows 10 is the latest release of Windows OS and is deemed to be the final OS release but the OS receives updates and bug fixes from its developers to maintain the standards.

As mentioned above Windows OS has powerful and crucial features that makes it an ideal OS. there are many important features like shortcuts, intuitive user interface, system management tools, and much more. Even though Windows has many cool features some features of the OS can really be annoying and interrupt the user and one such feature is AutoRun. The AutoRun is a feature that lets the computer automatically open CDs DVDs, USB drives and external hard drives to open and run the AutoRun.inf file. In the absence of the AutoRun.inf file, the AuroRun feature will switch to autoplay mode where you will be displayed different options which you can perform on the CD, DVD or the USB drive like open files, play video or music, and much more.
The AutoRun feature can sometimes be annoying as new windows will pop up with the features on the screen and disrupt the current work you are doing by distracting you. You can disable the AutoRun feature so that you can work in peace. Here in this article, you will learn how to disable the AutoRun feature on your Windows 10 computer to work efficiently without getting distracted when using CD or a USB drive. With the feature disabled you won’t be getting any pop-ups and you have to manually open the device and access the files. The methods are pretty simple and easy to follow, so you will not be needing to perform tough operations.
Recommended Post:- Fixed: Skype Video lags behind Audio on Windows 10, 7 – Complete Guide
Here Is How You Can Disable The AutoRun Feature On A Windows 10 Computer:
Here are 3 methods that you can use to disable the AutoRun feature on your Windows 10 computer. Follow any one of the methods (whichever is easy for you) and disable the AutoRun feature.
Method 1: Disabling the Feature Using Registry Editor
- Registry editor is a pretty useful tool built into the Windows 10 OS. using the editor you can configure your computer as you wish, and there are procedures and methods that you can follow to configure your computer.
- Now, let’s see how to use the registry editor to disable the AutoRun feature:
- Open the Run command by pressing the Windows key and the R key on the keyboard.
- Now, type “Regedit” in the column.
- The registry editor will open and you need to navigate to this path “HKEY_CURRENT_USER\Software\Microsoft\Windows\CurrentVersion\Policies\Explorer”.
- Once you are in the above-mentioned path. Create a DWORD file in the right-side panel and name it “NoDriveTypeAutorun”.
- Now, in the Value data box type in “ff”.
- Once done press OK and exit the registry editor.

Here are some of the hexadecimal codes for disabling AutoRun for several devices:
- FF – disables AutoRun on all drives.
- 20 – disables AutoRun on CD-ROM drives.
- 4 – disables AutoRun on removable drives.
- 8 – disables AutoRun on fixed drives.
- 10 – disables AutoRun on network drives.
- 40 – disables AutoRun on RAM disks.
- 1 – disables AutoRun on unknown drives.
If you find registry editor to be difficult to use tool you can try out the following two methods.
Method 2: Disable AutoRun Feature With Group Policy
Group policy editor is a tool built into Windows 10 professional and enterprise versions, using which the group policy of the computer can be changed and customized. Group policy doesn’t work for Windows 10 home users as there is no group policy in Windows 10 home edition. For Windows 10 home users you can follow the next method which is very simple and doable.
- Open the Run command box, here type gpedit.msc and hit Ok.
- Now, the group policy will open in a new window.
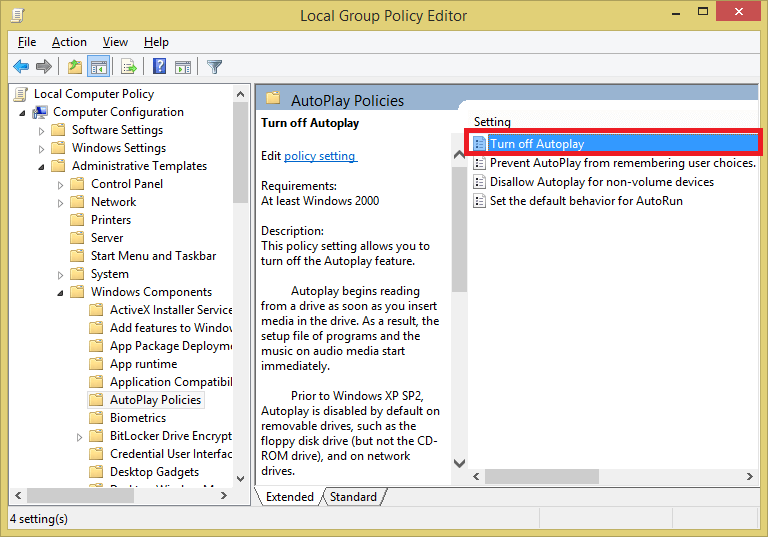
- Here, under the computer configuration tab, choose Windows components.
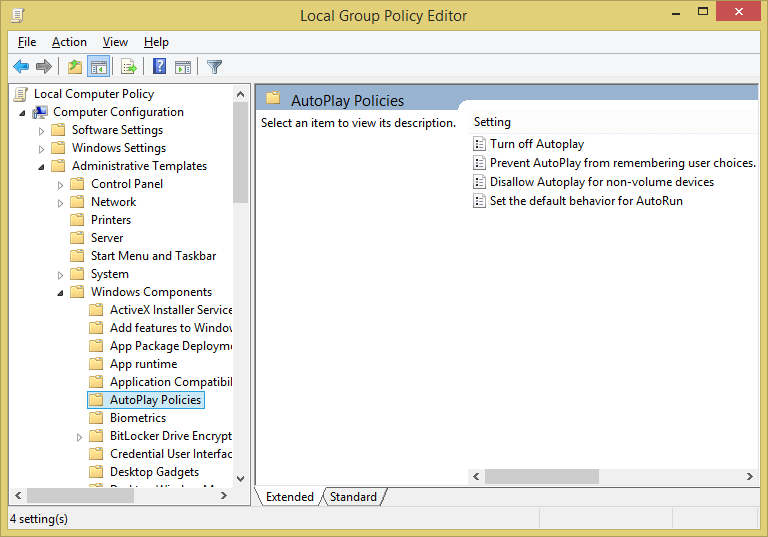
- Under the Windows components option choose AutoPlay policies.
- On the right windows pane, you will find the option “Turn off AutoPlay”.
- Disable the feature and you are done.
- This method only works on Windows 10 Pro and Windows 10 Enterprises edition.

Method 3: Disable AutoRun Using Settings Application
This method is the easiest one as there is no need for you to use any tool built which you might feel complicated but this method engages the settings application which has a good UI and is detailed enough to make things easier.
Follow the steps mentioned below to disable the AutoRun feature in Windows 10:
- Open the settings by searching for settings in the search bar.
- Once the settings application is open go to the devices option.
- Under the devices option find the AutoPlay options.
- In the AutoPlay settings, you can turn on and off the AutoPlay feature.
The last method will be the easiest one, so new computer users can use this one instead of confusing themselves with the registry editor and group policy editor.
Hope the information provided was useful and informative. Make use of the methods mentioned above to disable the AutoRun feature on Windows 10 computer.


