Snapshotting the screen is a very useful option on computers. With the option to snapshot pictures of the content on the screen, users can inevitably snap any content on the screen, Well, most of the smart devices that are released these days come with a separate option to take screenshots and if you have used an android device, you must have used the screenshot feature, but unfortunately, there is no shortcut method to capture still images on a Windows computer, so there are several methods that you can employ to capture still images on your Windows 10 and 11 computers.
A screenshot (also known as a screen capture) is a digital image captured from a display device while interacting with a computer program. Screenshots may be saved to files, sent via email, posted to websites, and printed. A screenshot may consist of individual frames (usually referred to as screenshots), or a single frame combined with additional information such as mouse cursor position, window title, etc. In case you didn’t know, screenshots do not actually store any data about your system, they just show what was displayed on your computer’s display at a certain time. Screenshots can be easily created using several software applications, including Microsoft Paint and GIMP.
Well, capturing still images of the content on the screen can be of great use students can take a snap of the content and use it as a reference instead of highlighting the content in a document, people can capture the screen and use it for documentation of any content for later use, the content snapped from the screen can be shared with ease on any social network as image files are small and easy to share across platforms, and moreover, you can easily print a screenshot file and there are many practical uses for this simple feature, so it is good that you learn how to capture still images of the content on the screen.
Recommended Post:- Fixed: Some Apps won’t Respond to Scaling Changes on Windows 10 & 11
Simple Methods to Capture Still Images of the Contents on a Windows 10 and 11 Computer’s Screen
So, here are some simple methods listed that you can use to Capture Still Images of the Contents on a Windows 10 and 11 Computer Screen. Follow along and learn the simple methods.
Method 1: Snip Screenshot Tool
Snip Tool is a free built-in program that lets you easily snip out selected portions of images without needing to copy them first. Just select what you want to cut, then drag it around until you have the shape you need. You can even add text, arrows, shapes, or frames if you want. When you’re done, just save it to your hard drive.
- To access the snipping tool on your Windows computer, open the search option using the shortcut Windows + S on the keyboard, and here, search for the snipping tool.
- Now, open the snipping tool from the search results.
- Once the snipping tool opens, you can find different options in the tool to capture snaps as you wish.
Method 2: Use the Built-In Snap Tool
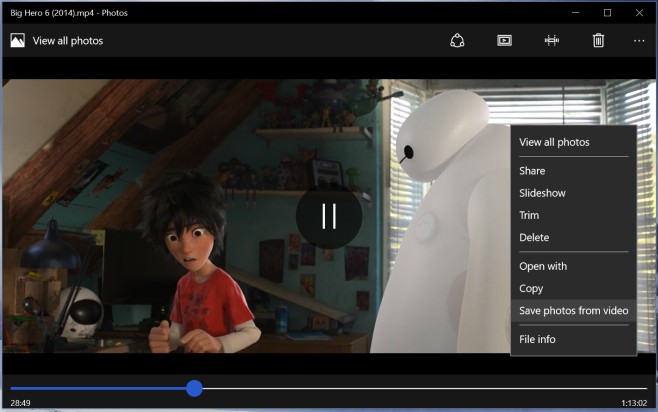
Most video players come with built-in snap features that allow you to capture a screenshot of the video frame by frame. The built-in snap tool is very simple to use and you can assess them via the menu that opens when you click the right mouse button. So, with the built-in snap tool, you can screenshot any frame of the video with ease, but one thing to note is that not all video players come with this tool, so you need to use or install video players that support the feature to be used.
Method 3: Third-Party Screen Capture Software
Screen capture software is software that captures a specific area of the screen and saves it as a file. In some cases, screen capture software may create an image of what was being displayed on the computer at the time the screenshot was taken. These images are often saved as JPG files, although they can also be saved as BMP, GIF, TIFF, and others. In addition to saving the image, screen capture software can also save information about the screen that was captured including mouse position and cursor movement. This information can then be imported back into the program used to take the screenshot, making it possible to move around the picture later without losing track of where things were on the screen. This means that if you take a screenshot of a web page, you could use it to return to exactly the same place later. Additionally, screenshots can also be printed out and shared.
Well, there are thousands of third-party screenshot tools available on the internet or on the Microsoft Stores. So, you get to choose which application will suit you, so you can install it on your computer and use it to capture still pictures of any content on your computer screen.
Method 4: Use the Print Screen Option on the Keyboard and Paint Tool to Save Screenshots
Well, the print screen key on the keyboard is by far the simplest way to capture screenshots as you can do it with ease by using the shortcut.
- To capture the screen using the print screen shortcut, find the shortcut on the keyboard and press it.
- Now, the screen will be captured and will be saved to the clipboard.
- Now, you need to use the paint tool to save the capture as an image.
- To do that open the paint tool, and here press the Windows + V key to paste the capture from the clipboard.
- Now, you can save the captured picture by using the save or save as an option in the paint tool in a location you prefer.
So, this is how you can easily capture still images of any content on your Windows 10 and 11 computer. Hope the information provided above was helpful and informative. Use these methods and capture any screen on your computer and save it as image files.


