
You open Task Manager to see why your PC feels like it’s wading through mud, and there it is — the Disk column glowing red at 100%. Meanwhile you’re not even doing anything heavy. I’ve hit this exact wall on a Windows 11 laptop that was perfectly fine the week before, and it’s maddening because the machine feels broken even though nothing’s actually wrong with the hardware.
Here’s the thing: 100 percent disk usage in Windows 11 is almost always a software or service issue, not a dying drive. A background service gets greedy, a driver misbehaves, or Windows Search decides to index everything at once. The good news? Most of these are a two-minute fix.
Below are 12 fixes, ordered from the quickest and safest to the more advanced. Work down the list and check Task Manager after each one — you’ll usually see the number drop before you reach the bottom.

Quick Answer: To fix 100 percent disk usage in Windows 11, open Task Manager and sort by the Disk column to find the culprit, then restart your PC. If it returns, disable the SysMain and Windows Search services in services.msc, run CHKDSK to repair disk errors, and update your storage drivers. These steps clear the vast majority of cases.
Why is my disk at 100% in Windows 11?
When your disk sits at 100% in Task Manager, it means the drive is completely saturated with read/write requests and can’t keep up — so everything else waits. It’s rarely about being out of storage space. The usual causes are:
- SysMain (SuperFetch) — a service that preloads apps but can overwork an older drive.
- Windows Search indexing — reindexing your files in a loop.
- The StorAHCI driver bug — a firmware/MSI-mode issue on some setups.
- Windows Update or antivirus running in the background.
- A slow or aging hard drive (HDD) that simply can’t handle modern Windows.
- Corrupted system files or malware.
Is 100% disk usage normal? For a few seconds during boot or a big update, yes. But if it stays there for minutes while your PC crawls, that’s the problem you’re fixing today.
12 Fixes for 100 Percent Disk Usage in Windows 11
Fix 1: Find the culprit in Task Manager
Before changing anything, see what’s actually hammering your disk.
Step 1: Press Ctrl + Shift + Esc to open Task Manager.
Step 2: On the Processes tab, click the Disk column header to sort by disk activity, highest first.
Step 3: Note the process at the top — that’s your target (often Service Host: SysMain, Windows Search, or Antimalware Service Executable).

Fix 2: Restart your PC (properly)
Not “shut down and turn on” — an actual restart clears stuck processes and cached tasks.
Step 1: Close what you can, then click Start > Power > Restart.
Step 2: After it boots, wait two minutes and recheck Task Manager.
Tip: A fresh Windows install or update indexes files for a while after restart. If the disk is high right after an update, give it 15–20 minutes before assuming there’s a problem.
Fix 3: Disable the SysMain (SuperFetch) service
SysMain is the single most common cause of sustained 100% disk usage on Windows 11.
Step 1: Press Windows + R, type services.msc, and press Enter.
Step 2: Scroll to SysMain, right-click it, and choose Stop.
Step 3: Right-click again → Properties → set Startup type to Disabled → OK.
Step 4: Recheck Task Manager — disk usage should drop below 20%.
Fix 4: Disable Windows Search (test it first)
If Windows Search is stuck reindexing, it can peg your disk. Try disabling it to confirm.
Step 1: In services.msc, find Windows Search.
Step 2: Right-click → Stop, then check if disk usage falls.
Step 3: If that fixed it, set Startup type to Disabled (or “Automatic (Delayed Start)” if you still want search).
Note: Disabling Windows Search means slower Start-menu search. If you rely on it, leave it enabled and move on to the next fix.
Fix 5: Run CHKDSK to repair disk errors
Bad sectors and file-system errors keep a drive busy retrying reads. CHKDSK fixes them.
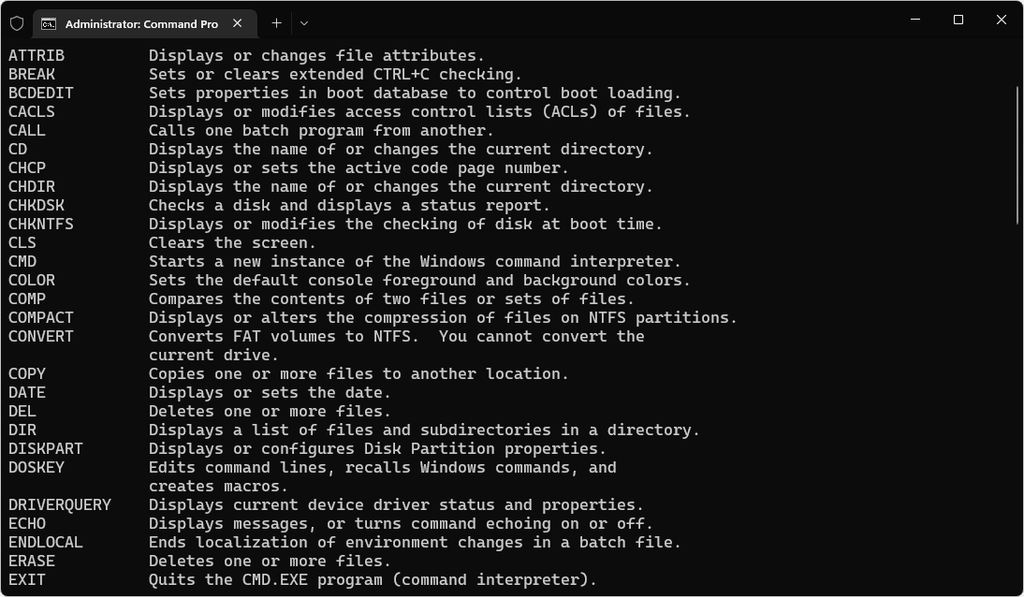
Step 1: Type cmd in Start, right-click Command Prompt, choose Run as administrator.
Step 2: Type chkdsk /f /r and press Enter.
Step 3: Type Y to schedule it on the next restart, then reboot and let it finish.
Fix 6: Run SFC and DISM to repair system files
Corrupted system files can drive constant disk activity. These two commands repair Windows itself.
Step 1: Open Command Prompt as administrator.
Step 2: Run sfc /scannow and let it complete.
Step 3: Then run DISM /Online /Cleanup-Image /RestoreHealth.
Step 4: Restart and recheck.
Fix 7: Update your storage drivers
Outdated or generic storage drivers are a frequent cause of high disk usage.
Step 1: Right-click Start > Device Manager.
Step 2: Expand Disk drives and Storage controllers.
Step 3: Right-click each device → Update driver → Search automatically.
Step 4: Also check Windows Update > Advanced options > Optional updates for driver updates.
Fix 8: Switch the StorAHCI driver out of MSI mode
Microsoft has confirmed a firmware bug where the inbox StorAHCI.sys driver causes 100% disk usage when Message Signaled Interrupt (MSI) mode is enabled. This one’s more advanced but fixes stubborn cases.
Step 1: In Device Manager, expand Storage controllers, right-click Standard SATA AHCI Controller → Properties.
Step 2: On the Driver tab, click Driver Details and confirm it uses storahci.sys.
Step 3: Go to the Details tab, pick Device instance path, and note the value.
Step 4: Open Registry Editor (regedit) and navigate to the controller’s Device Parameters\Interrupt Management\MessageSignaledInterruptProperties.
Step 5: Set MSISupported to 0, then restart.
Safety note: Back up your registry before editing (File > Export). If you’re not comfortable in the registry, skip this fix — the earlier ones solve most cases.
Fix 9: Disable unnecessary startup apps
Too many apps launching at boot can hammer the disk for minutes after login.
Step 1: Open Task Manager → Startup apps tab.
Step 2: Sort by Startup impact.
Step 3: Right-click anything you don’t need at boot → Disable.
Fix 10: Adjust virtual memory (pagefile)
A misconfigured pagefile can cause heavy disk thrashing. Resetting it to system-managed usually helps.
Step 1: Search View advanced system settings → Settings under Performance.
Step 2: Advanced tab → Change under Virtual memory.
Step 3: Check Automatically manage paging file size for all drives → OK → restart.
Fix 11: Scan for malware
Hidden malware and crypto-miners love to max out your disk. Rule it out.
Step 1: Open Windows Security > Virus & threat protection.
Step 2: Click Scan options > Full scan > Scan now.
Step 3: Remove anything it finds and restart.
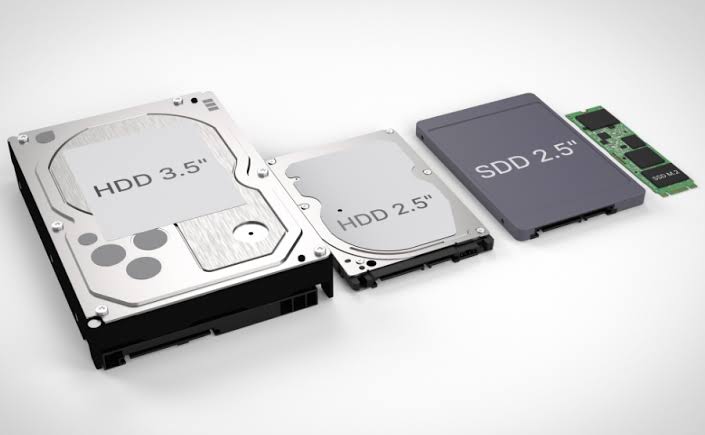
Fix 12: Upgrade from an HDD to an SSD
If your PC still has a mechanical hard drive, no software tweak fully fixes it — an old HDD just can’t keep up with Windows 11. This is the permanent fix.
Step 1: Check your drive type in Task Manager → Performance tab (it’ll say HDD or SSD).
Step 2: If it’s an HDD, cloning it to an SSD is the single biggest speed upgrade you can make.
Step 3: After the swap, disk usage and boot times drop dramatically.
Comparison: which fix to try first
| Fix | Difficulty | How often it works |
|---|---|---|
| Restart PC | Very easy | Quick temporary relief |
| Disable SysMain | Easy | Very high — top fix |
| Disable Windows Search | Easy | High |
| Run CHKDSK | Easy | Medium–high |
| SFC / DISM repair | Medium | Medium |
| Update storage drivers | Medium | Medium–high |
| StorAHCI MSI tweak | Advanced | High for that specific bug |
| Upgrade to SSD | Hardware | Permanent fix for old HDDs |
Frequently Asked Questions
Why is my disk at 100% in Task Manager when nothing is running?
A background service is usually to blame — most often SysMain (SuperFetch), Windows Search indexing, or Windows Update. Open Task Manager, sort by the Disk column, and disable the service that’s using the most disk.
Is it normal for disk usage to be at 100%?
Briefly, yes — during boot, a big update, or a file transfer. But if your disk stays at 100% for several minutes and your PC feels frozen, that’s not normal and the fixes above will bring it down.
How do I fix 100 percent disk usage in Windows 11 quickly?
The fastest reliable fix is disabling the SysMain service: press Windows + R, type services.msc, right-click SysMain, choose Stop, then set Startup type to Disabled. Restart and check Task Manager.
Does disabling SysMain slow down my PC?
No. SysMain is meant to speed up app loading by preloading data, but on many systems — especially those with SSDs — turning it off has no noticeable downside and stops the disk from being overworked.
Will Windows 11 fix 100% disk usage on its own?
Sometimes. If it’s caused by post-update indexing, it settles within 15–30 minutes. But issues like the StorAHCI driver bug or an aging HDD won’t fix themselves — you’ll need the steps above.
Can 100% disk usage damage my hard drive?
It won’t instantly damage a healthy drive, but constant maxed-out usage adds wear over time and points to an underlying problem. Fixing the cause protects both your drive and your data.
What if 100% disk usage happens on startup only?
That’s usually startup apps and post-boot indexing. Disable unnecessary startup apps in Task Manager, and give Windows a few minutes after login to finish background tasks before judging.
Final thoughts on fixing 100 percent disk usage in Windows 11
A disk pegged at 100% looks scary, but it’s one of the most fixable problems in Windows 11. In my experience, disabling SysMain alone clears it on the majority of machines, and a quick CHKDSK plus a driver update handles most of the rest. Work down the list, watch Task Manager after each step, and stop once your number drops back to normal. And if your PC is still on an old hard drive, an SSD upgrade is the one change that makes 100% disk usage a thing of the past.If your PC still feels sluggish after this, our guide on speeding up Windows covers more performance tweaks.