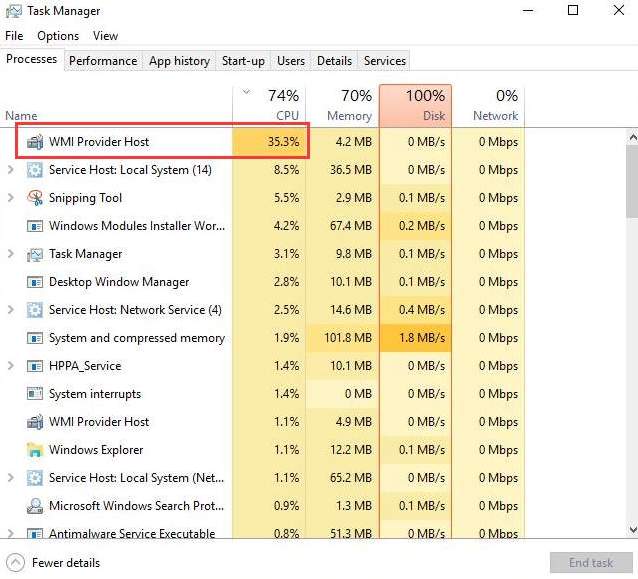
We all know Windows 10 is a highly recommended operating system. A common problem which users reported i.e. WMI provider host & High CPU usage. Although it is a system service, we can fix it and solve problems.
Solving the issue of WMI Provider Host High CPU Usage on Windows 10 brings no more complexities. As this software has lengthy steps of fixing the error, but WMI Provider Host High CPU usage on Windows 10 is worth downloading in the operating system. We have come up with the steps to Fix WMI Provider Host High CPU usage on Windows 10.
In this article, we will be directly moving on to the subject of fixing WMI provider host high CPU usage on the Windows 10 operating system and coming out of positives from it.
- Usage of High CPU means the PC cannot allocate memory for their new processes.
- The main cause of abnormal CPU usage is plenty of apps & system components.
- If the CPU consumes more power that means more apps are running at once. So, upgrading is needed.
- When the CPU is maxed out, then it’s a fan that will help it to be cooled down.
How do users fix WMI Provider Host high CPU usage on windows 10
Here we have come up with some powerful fixes that WMI provider host high CPU usage on Windows 10. We would suggest you carefully follow the below steps to avoid any failure in the process. To learn more about Sedlauncher.exe high CPU Usage, drop down to our ISO River page for the detailed insights.
Solving the issue of WMI Provider Host High CPU Usage on Windows 10 brings no more complexities. As this software has lengthy steps of fixing the error, but WMI Provider Host High CPU usage on Windows 10 is worth downloading in the operating system. We have come up with the steps to Fix WMI Provider Host High CPU usage on Windows 10.
Run system maintenance troubleshooting
- Click Windows key +R for opening the run dialog.
- Then enter msdt.exe – id maintenance diagnostic and then press the ‘Enter’ button.
- Now, a window has appeared named system maintenance. Then click on the Next button.
After successfully running the system maintenance tool, the user has to check, their problem is resolved or not.
Run system performance troubleshooter
- Press Windows Key +X for opening the menu.
- Select Admin Command Prompt from the existing list.
- After opening the command prompt enter msdt.exe / id.Performancediagnost. Enter to run it properly.
- After completion of this process, again the user has to check if the issues persist or not.
- Users can easily optimize their PC and improve its performance by running system performance troubleshooting.
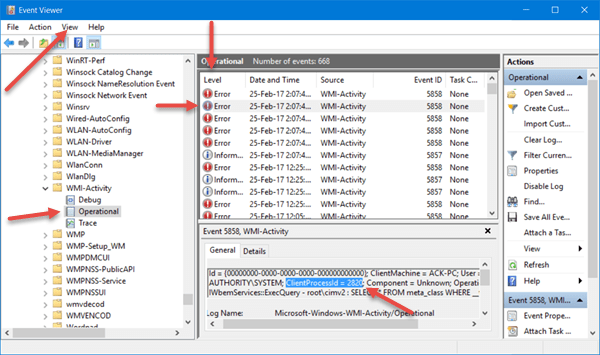
Event viewer
- Press Windows Key +X and click on the option Event viewer.
- Go to the ‘View’ menu, and then users have to check show analytic and Debug logs.
- The user needs to follow the following path: application and service log Microsoft windows WMI activity operational.
- Check all the errors and then note down all processed values.
By disabling HP software framework service
- Firstly, Windows key +R and then services .msc have to be pressed.
- Then the user has to click on the ‘Ok’ button.
- For opening its properties they have to double click on it.
- When it will open. To disable startup type and press the ” Stop” button.
- For changing settings press the apply & then Ok button.
After this process, the issue should be fixed. But one thing that has to disable i.e. HP windows Assistant Service because it can also create some problems. If users don’t have the HP devices, the user can skip this process.
User can remove Conduit search
- Click Ctrl +shift+ESC
- open task manager
- right-click on conduit search
- Click End task
- Click Windows key + 1 system
- Apps and features
- Appear all installed applications
- Conduit search
- Uninstall
- Restart PC
Users also restart associated services
Firstly, the user has to start the Command Prompt (administration). After that, the user has to run the following:
- net stop iphlpsvc
- net stop wscsvc
- net stop winmgmt
- net start winmgmt
- net start wscsvc
- net start iphlpsvc
Now, if the problem persists, it will be solved after restarting the device.
Perform a clean reboot
- To start with first Press Windows key + R to open a dialog box
- Type: msconfig press in the dialog box
- Press OK to continue
- This will help you open Prompt Command
- Hide all the Microsoft services
- Disable all Startup tab
- Open task manager to disable all startup application
- Repeat this step for all the available application
- Close task manager. Continue system configuration window
- Press Apply and OK.
- Restart the PC.
After performing these steps, users can easily remove any CPU related problems which are created by WMI Provider Host.
Uninstall Scorpion Saver
Another problem with WMI Provider Host is Scorpion Search. It was installed along with other applications for fixing this problem. Users must have to uninstall this from their PC. If the problem is not solved properly, then some other malware removal tool is required.
Fixed: WMI Provider Host high CPU usage on Windows 10
We hope that you are satisfied with the information we have delivered to you. If you are a Windows user and you still do not have Windows 10, then you should know about the WMI Provider Host high CPU usage in Windows 10 as it helps you run your operating system faster and more smoothly. Also, it is extremely handy and easy to function. Download Windows 10 ISO and keep your operating system up-to-date. If you have any queries about how to WMI Provider Host high CPU usage in Windows 10 you can drop down your concern in the comment section and we will get back with the solution in minimum time.