The use of VPN features has increased in recent days. In this digital era, people need to have good network security features to protect data breaches or other forms of cyber attack. Well, using a VPN is one good way to secure a connection. Using a VPN is one of the best ways to secure the network and access the internet without a barrier. Well, there are many applications for using VPNs and many users are becoming aware of the feature and are using it on a daily basis. Well, with VPN being so popular, Microsoft had built a VPN feature in their OS. So, recently Windows 11 users have reported the built-in VPN is not working. So, here are some simple methods, you can try to fix the issue.
VPN in Windows was first released for Windows 10 and with the release of Windows 11, Microsoft had put the feature into Windows 11, so users can use the feature for free. Well, the VPN offered in Window is free, unlike many third-party VPNs that have a subscription-based pan for the service. Well, the efficiency of this free VPN is not of a very high standard but it does the job of providing a bit of a secure network connection.
Well, a VPN just masks your IP address and the service provider provides you with a configured connection such that your IP address and your data is kept masked. Well, with the data being masked, your security is enhanced. Nobody can track your online presence and what you do online. Well, this is how a VPN works and you can employ these features with ease with the built-in VPN on Windows OS. But with the recent issues on Windows 11, users are unable to use the feature and if you are one of them, you can try some of these methods to fix the issue on your Windows 11 computer.
Recommended Post:- Windows 11: Features May do away with the Control Panel Completely
Simple ways to fix Windows 11 VPN Issue
So, here are some simple methods, you can try out to fix the VPN error on your computer. Follow along and fix the issue with ease.
Method 1: Manually Add a VPN and Connect Using it
- To manually add a VPN, open the settings application by searching for the settings application or by pressing the Windows key and the I key on the keyboard.
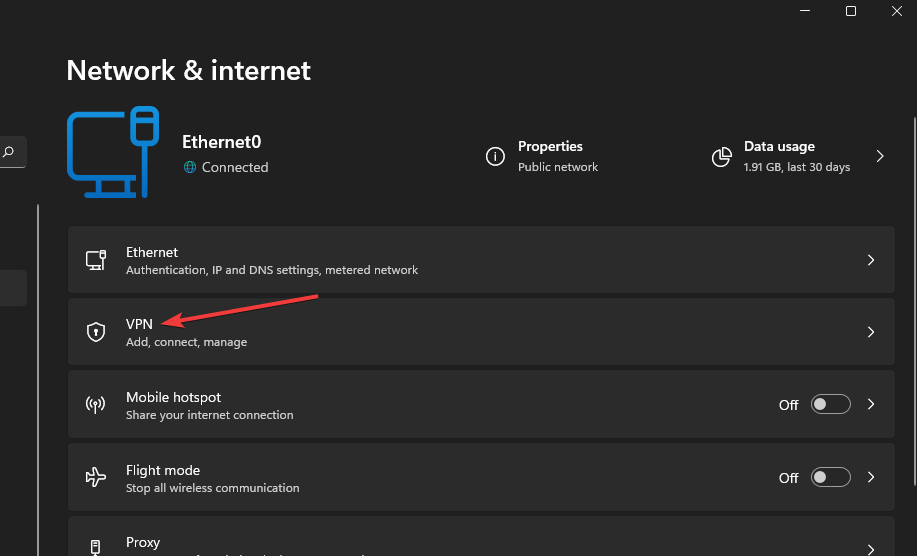
- Now, go to the network and internet tab.
- Here, find the VPN option and select it.
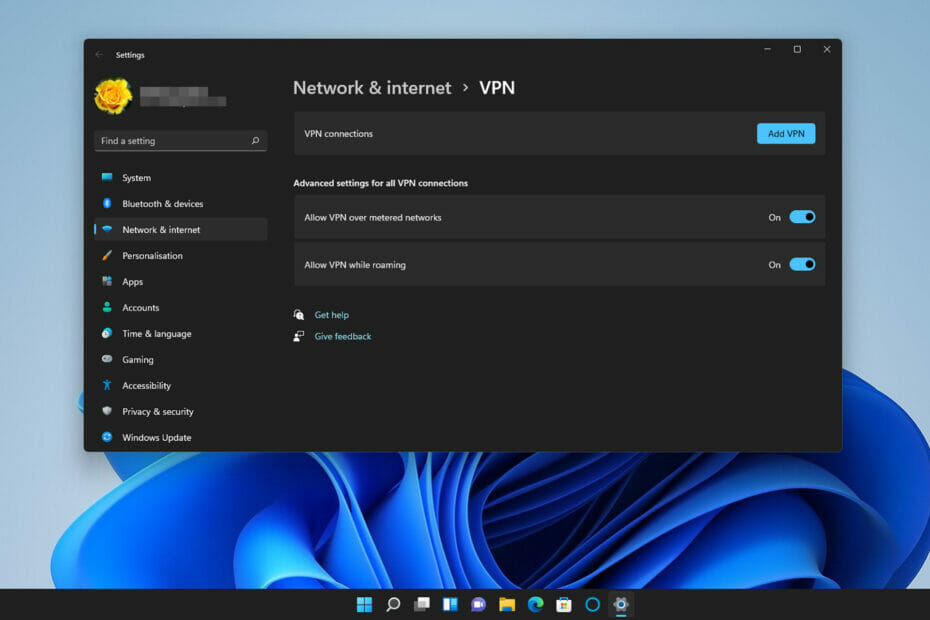
- Select add VPN opinion.
- Now, fill the VPN connection form and save it.
- Now select the connect option to try connecting to the VPN.
Method 2: Update the Computer
Updating the computer might help with fixing the issue and you can try this method to easily fix the issue.
- To update the computer, go to the update and security option in the settings app.
- Here, select the check for updates option to update the computer.
- If there is any update available the computer will automatically update the OS.
Method 3: Flush the DNS Using Command Prompt
- Open the search button and then search for the command prompt.
- Now, run the command prompt as an administrator.
- Here in the command prompt terminal, run the following commands one after the other:
ipconfig /release
ipconfig /flushdns
ipconfig /renew
netsh int IP reset
netsh Winsock reset
- Once done, close the command prompt and then restart the computer.
Method 4: Disable the Proxy Settings
- Open the settings application.
- Here go to the network and internet option.
- Here, select the proxy option.
- Now, if the use proxy server is enabled press the setup option.
- Now, turn on the Use proxy server option.
- Now, save the options and then exit the settings.
Method 5: Turn off the Firewall
- Open the control panel.
- Here, go to the system and security tab.
- Here, select the defender firewall option.
- Here, turn off the firewall feature.
- Click on the Ok button and then exit.
Well, if you have third-party antivirus software, you have to disable the antivirus firewall.
Method 6:
Reinstall the WAN Miniport Adapter:
- To reinstall the WAN Miniport adapter, open the device manager using the search function.
- Here in the device manager, find the WAN Miniport (IP) option under the network adapters and then right-click on it.
- Now, select the uninstall device option to uninstall.
- Once done, scan for hardware changes and the computer will automatically install the WAN Miniport.
Method 7: Reset Windows 11
- To reset Windows 11 OS, go to the settings application.
- Here go to the systems tab.
- Now, go to the recovery option.
- Here in the recovery tab, select the reset this PC option.
- Select the option to keep my files.
- Next, choose, cloud download or local reinstall option as per your preference.
- Now select next and run the reset.
Method 8: Disable the Internet Protocol Version 6
- To disable the IP version 6, go to the network connection using the search function.
- Here in the network connections tab, look for the view network connections option.
- Now, right-click the VPN network adapter and select the properties.
- Now, uncheck the Internet Protocol Version 6 checkbox to disable it.
- Click on Ok and then apply the save the changes.
Try a Third-Party VPN Instead
Well, if nothing works, try using any third-party VPN. well, there are hundreds of good VPN available, from which you can choose one and use on your Windows 11 computer.
Hope the information provided above was helpful and informative. These are some of the simple methods you can try to fix the VPN not working on Windows 11.