You might have got frustrated with the Windows Service Host SuperFetch, as it is constantly pop-up the screen and creates disturbance overwork. Do you want to remove the Windows Service Host Superfetch? Well, it is good to be more concerned about Windows Service Host Superfetch causing high disk usage on your PC.
Windows Service Host Superfetch has the ability to cause a huge disk usage that occupies your computer storage to 100%. There are several Windows users who are suffering from this disturbance. So this Windows Service Host Superfetch is needed to be removed. Let’s learn about Windows Service Host SuperFetch and study the procedure to disable it. To know more about System Thread Exception Not Handled Blue Screen Error, visit our ISO River page for the detailed insights.
Overview of Service Host SuperFetch
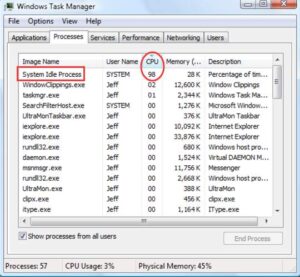
Windows Service Host SuperFetch can be usually seen as Svchost.exe in the task manager. This is placed exactly below to DLL (Dynamic Link Libraries) files. In the previous day, Microsoft had .exe files to manage the routines. DLL files are considered to be a big problem as the user is not allowed to directly open the exe file. For loading the file the shell is called svchost.exe.

Navigating Service Host: SuperFetch Windows 10
The user may not find Windows Service Host SuperFetch as it is hidden under the service host. It takes time to navigate Windows Service Host SuperFetch as it is somewhere hidden around the task manager. The user has to search for a lot of service hosts that are running in the background of your operating system.
There are several services that are split with usability and logic. It takes care of your RAM. However, this helps them preload the files for the user to have access to it. And that’s it takes extra time in loading the files. But Windows Service Host SuperFetch is still more of a trouble to the users.
So we have got several interesting methods to disable Windows Service Host SuperFetch. Though it might feel to you as a long lengthy process it’s worth it.
Effective Methods to Remove Windows Service Host SuperFetch
We have come up with several methods of removing Windows Service Host SuperFetch. All you have to do is carefully follow the below steps to remove Windows Service Host SuperFetch.
Disable Windows Service Host SuperFetch Using Command Prompt
- To start with, first, the user needs to Click on Trouble and then continue with Advanced Option to jump on the page of Command Prompt.
- Proceeding to the next, while the user jumps onto the Command Prompt a black screen will appear where the user needs to write the command net.exe and hit Enter to continue.
- Moving ahead, Type command “chkdsk.exe/f/r”, and type “Y” to confirm.
- Now the user needs to Restart the computer.
Well, this method might help you in removing Windows Service Host SuperFetch. If you are fetching the problem or stuck in between give one more attempt. In case of failure in the attempt, we have a second method to remove Windows Service Host SuperFetch.
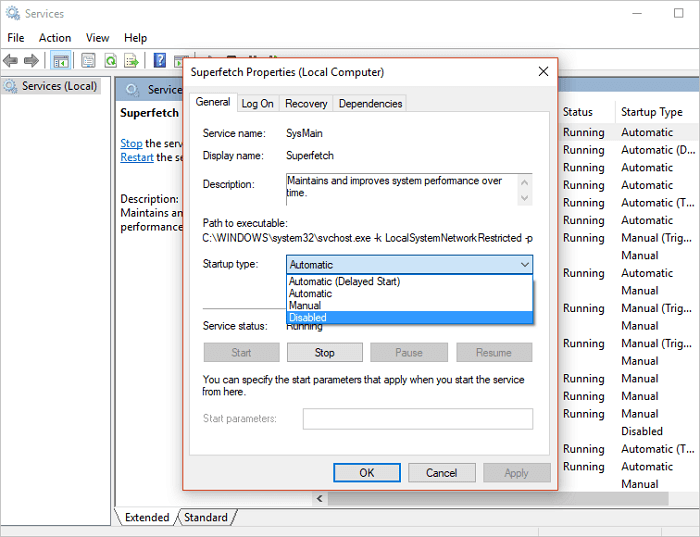
- Remove Windows Service Host SuperFetch with Run Command Service
- To open the command prompt, Press Windows + R key and type “services.msc”.
- Further, search for “Superfetch” > Right-click on it.
- To stop the Superfetch Service, Click Stop
- Select the Disable option.
This will stop running Windows Service Host SuperFetch in your operating system. If you find this method difficult, then we have some simple methods for you. Follow to loop onto the further methods.
Disable Windows Service Host SuperFetch in the registry
This step can be a lengthy one but it is easy to perform. Disabling Windows Service Host SuperFetch in the registry is more efficient. Let’s follow the below steps to remove Windows Service Host SuperFetch.
- To enter the Regedit command in the Windows 10, Press Windows + R and type HKEY_LOCAL_MACHINE-System-CurrentControlSet-Control-SessionManager-memory management. Then Select “PrefetchParameters”.
- To Disable Superfetch, Click OK.
- Click Apply to save changes.
This method will surely solve the issue and disable Windows Service Host SuperFetch. Still, you are coming up with some problems then you can drop down to our ISO River page and our team of experts will quickly get you released from the doubts.
We hope that you are satisfied with the information we have delivered to you. If you are coming across any error of Remove Windows Service Host SuperFetch, then you should know the method of Removing Windows Service Host SuperFetch. Learn about Remove Windows Service Host SuperFetch and keep your operating system up-to-date. If you have any queries regarding the Internet Download Manager Serial Key you can drop down your concern in the comment section and we will get back with the solution in minimum time.