Among all PC users, Windows 7 is one of the most popular operating systems. It is a Microsoft item that was first released in 2009. This is the world’s second-most useful operating system, right after Windows XP. Microsoft developed the upgraded concept with many improvements and a better user interface in response to XP’s severe problems.
The ISO file of Windows 7 Ultimate is easy to download only if users have a valid license key. The good news is that this article will help users if they don’t know how to download Windows 7 ISO. Users can easily find the best method for downloading a Windows 7 ISO file through this article in brief. Let’s get started!
Types of Windows 7
Microsoft removed the Windows 7 ISO file download page from its official website once Windows 7 support was discontinued. Consequently, utilizing the product key will not allow users to download the Windows 7 ISO file. In a similar vein, using the Microsoft Windows and Office ISO Download Tool won’t let users download the Windows 7 ISO.
Since there is no other way to download Windows 7 ISO without a product key, click the direct links instead. Following the user requirements, users can download an appropriate version of Windows 7.
Different editions of Windows 7 exist to accommodate diverse user needs. Each edition has unique qualities. After reading the concise introduction to various editions, users may decide which one to buy and get into the system.
Windows 7 Starter
It is a core edition that includes all essential components for fundamental computer operation. It was created for computers with 32-bit CPU architecture. While its basic functions are economical, it has tried to cover a few features. But it is not advisable for everyday use.
Windows 7 Home Basic
It is a solid option for basic home-level computing. The user may watch videos and listen to music on it because it has the feature to support multimedia. It does not, however, support the Aero theme or the Aero visual graphics.
Windows 7 Home Premium
This edition’s lovely Aero motif and clear glassy look support make it ideal for home entertainment. The edition is for the media center.
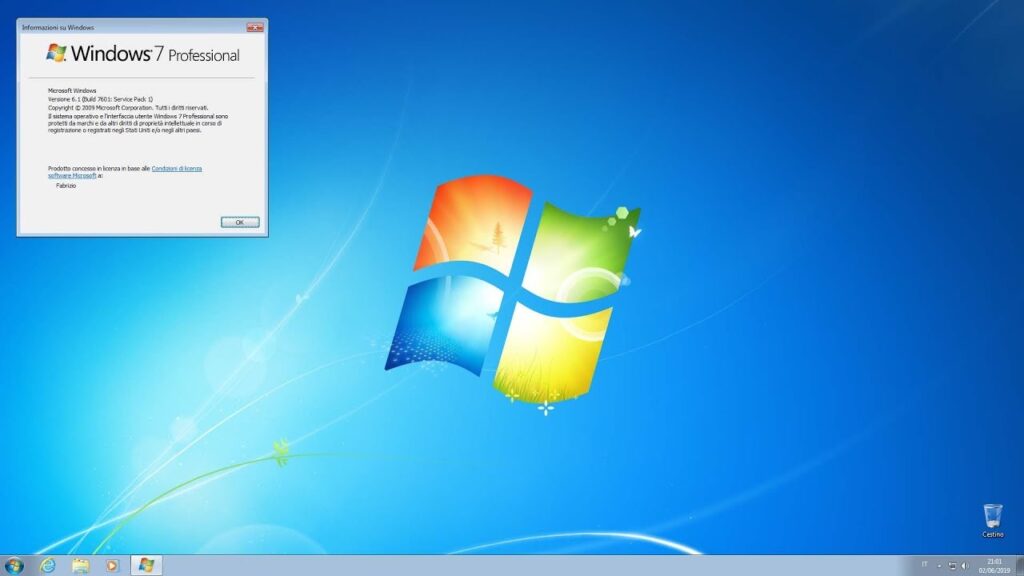
Windows 7 Professional
It is intended mostly for business owners and professionals. The majority of the features in this edition are suitable for small businesses. All premium features are present, including networking.
Windows 7 Enterprise
It is designed for big corporations, groups, and reputable local, national, and international industries. All of Windows 7 Pro’s features are present, along with more security features.
Windows 7 Ultimate
This is the best and most complete version of Windows, containing all features from earlier versions. This version of Windows 7 is suggested if users wish to enjoy it to its fullest. It has additional features compared to other Windows 7 editions, like HomeGroup, Jump lists, Snap, Windows search, Windows Taskbar, complete 64-bit, Windows XP mode, BitLocker drive encryption, Window Defender, Windows Firewall, etc.
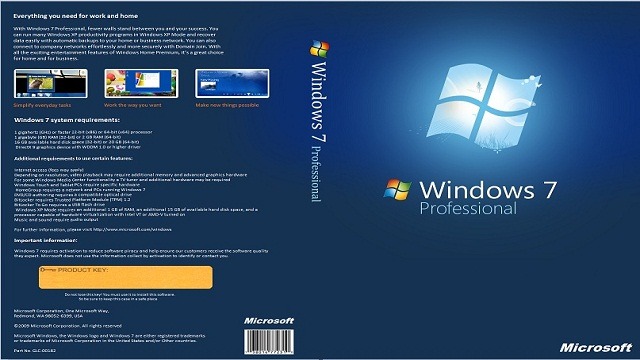
Minimum System Requirements to download and Install Windows 7 Professional ISO 32 and 64 bit for Free
With the reference announced by Microsoft in the following section users may find some of the basic system requirements mentioned to download and install Windows 7 Professional on the computer. If the user is installing Windows 7 Professional on the system then it is important to have a look at the system requirements. We agree, today most all computers are double these specifications but it is always to know the minimum specifications.
- Firstly, understand the processor speed should be more than 1GHz.
- The user should have a minimum of 1GB Ram to Install Windows 7 on 32 bit
- For installing 64-bit Windows 7 minimum of 2 GB of Ram is required.
- Users should have a minimum of 16 GB of free hard disk space on their system.
- Lastly, a DirectX 9 graphics device with a WDDM 1.0 or higher driver is required to download Windows 7 into the system.
How To Download Windows 7 Professional ISO 32 and 64 Bit for free
Users can download the ISO file of Windows 7 Professional easily and don’t worry it is one hundred percent legal and it can be done from the official website owned by Microsoft. But, one thing to remember after downloading the Windows 7 file however users will require an official product key to get registered and activate Windows 7 Professional in the system. And, if the user has the activation key then there are no issues. But, before downloading Windows 7 the users should make sure whether their system is 32-bit or 64-bit. Make sure one should check it and then download the file accordingly.
Recommended Post:- Download Windows 7 Black Edition ISO 32 / 64 Bit for free
For downloading Windows 7 Professional ISO files from Microsoft then follow the steps mentioned below. They are as follows:
Step 1: The first step is to go to the download page of Windows 7 from the browser. Users can use web browsers such as Google Chrome, Microsoft Edge, Brave, etc to download the Windows 7 iso file.
Step 2: On the screen, the users will be asked to provide the product key. So, after receiving this message enter the product key.
Step 3: After entering the product key, check it once, and then click on the “Verify” button on the box to proceed further.
Step 4: Once the user enters the product key and successfully gets it verified then they have to choose the language in which they wish to download the Windows 7 ISO file.
Step 5: Then, click on the confirm button.
Step 6: After this, the user will receive a download link for downloading the ISO file.
Step 7: In the next step, the user has to choose from a 32-bit download or 64-bit download file depending on the computer.
Note: The download links of Windows 7 ISO files are only active for 24 hours, hence the user should make sure that they download it in that specific time frame. Otherwise, the user has to repeat all the steps
Steps to create a bootable DVD/USB with Windows 7 Professional ISO file
Preparing a bootable USB is a compulsory step after successfully downloading the ISO image file from Microsoft windows. This will help you install Windows 7 directly from the Flash drive by constructing it as a bootable drive.
But the user has to make sure to have a minimum of 8GB USB flash drive and then make it bootable. Secondly, take a backup of all the information before starting the installation process. It is because while installing Windows 7 in the system it will delete all the data from the pen drive and some from the computer.
For Laptops
The Boot Menu key for some laptops are as follows:
- For ASUS the boot menu key is F8
- For DELL the boot menu key is F12
- For Acer the boot menu key is F12
- For Lenovo, the boot in three shortcuts keys are F8, F10 and F12
- For HP the boot menu key is F9
For Desktops
Similarly, for desktops, the boots are dependent on their Motherboards. The boot menu keys are as follows:
- For ASUS the boot menu key is F8
- For Gigabyte the boot menu key is F12
- For MSI the boot menu key is F11
- For Intel boot the boot menu key is F10
- For Biostar the boot menu key is F9
- For ASRock, there are two boot menu keys F8 and F11.
Before initiating the process of making Windows 7 Bootable USB, the users have to download and install a tool named Rufus tool. Users have to simply follow these steps.
Step 1: The first step after downloading the Rufus tool is to start the application.
Step 2: In the second step choose the drive where the user wants the bootable to be created and done.
Step 3: For identifying the newly downloaded ISO image file of Windows 7 the users have to go to the boot selection and then click on the “Select” button.
Step 4: A window with Format Options will be displayed on the screen which will showcase the volume label dialogue box while loading it.
Step 5: The user is free to provide any name they wish.
Step 6: In the next step click on the “START” button to start the bootable creation process.
Step 7: On the screen, the users will get a warning message about storing the data on the flash drive.
Step 8: Click on the “OK” button to continue the process.
Note: Users make sure that the speed of the flash drive and the hard disc will be calculated based on the time taken to complete the entire process.
When the entire process gets completed a ready notification will be displayed. This notification showcases that the job is done. After getting the notification the users can unplug the USB disc and continue the process of installing Windows 7. It is the easiest and quick method of burning any Windows-based application to a USB.
Steps to Install Windows 7 Professional from Installation DVD/USB
After successfully creating a bootable version of Windows 7 USB/DVD by following the steps mentioned above it is necessary to restart the computer and boot it from the bootable USB flash drive or DVD.
Now, users can choose from two options for configuring the boot order. Firstly, the users can get this task completed through the BIOS menu otherwise by hitting the shortcut key from the boot menu. The keys are varied depending upon the desktop and laptop manufacturers. In the above section, we have mentioned the shortcut keys.
For starting the Windows 7 ISO download with bootable DVD/USB one has to follow the steps mentioned below. They are as follows:
Step 1: Once the user inserts the bootable flash drive into the system’s USB port the primary step is to restart the device.
Step 2: In the second step the user has to boot from the USB flash drive and on the screen, the Windows booting logo will be displayed in a few seconds.
Step 3: After the files successfully get loaded the Windows installation process will be shown on the screen.
Step 4: In the next step, the user has to choose the language, time zone, and keyboard technique.
Step 5: After completing these above-mentioned steps click on the “Next” button on the page displayed on the screen.
Step 6: For proceeding with the Windows 7 installation the user has to click on the “Install Now” button displayed in the center.
Step 7: Once done the user will be directed toward the next page where a checkbox will be shown which says “I accept the licensing terms and conditions.”
Step 8: Now, click on the “Next” button and continue with the installation process.
Step 9: On the screen, the user has to choose from two installation options. The first one is “Upgrade” and the second option is “Custom (advanced).
Step 10: In the next step click on the “Next” option to get forwarded to the next step where the user has to select the partition on which they want to install Windows 7 operating system.
Step 11: Now, it’s time to sit back and relax and let Windows 7 ISO get installed on the computer. On the screen, the user will see the installation progress.
Note: The installation time will be calculated depending on the storage amount and the available space along with the speed of the flash drive. Partitions on the Solid-state-drives (SSDs) will perform quickly while installing the operating system. The computer will restart a few times throughout the process which is a common practice while installing. But, don’t get stressed out or worry about it.
Step 12: Once the installation process gets completed the user will be asked to provide a username for the account and a suitable name for their machine.
Step 13: After filling in the information and setting a password for the user account click on the “Next” button on the screen.
Note: The users can set a clue to their password so that if they forget then there is a hint to remember.
Step 14: If the user already has a Windows 10 product key, input it into the Windows 7 setup. If the user doesn’t have a Windows 10 product key otherwise click on the “I don’t have the key” or choose the “Do this later” option.
Step 15: Users need to choose among the options for updating their preferences. The first option will “Use Recommended settings” and it should be used when the user is not sure about the changes.
Step 16: In this step, the user has to select a time zone and the date in the following section. Now, choose the time zone for the location they are and then click on the “Next” button.
After the user has completed this step then they have successfully installed Windows 7 from a Windows 7 ISO file without facing any issues.
If the users face any problem while installing Windows 7 and are at risk of losing their data then they can contact the technical support team for a professional and reliable data recovery service and get instant support.
Steps to recover deleted or lost data on Windows 7 Professional Quickly
Users while installing Windows 7 on their computers and because of any issues the files get deleted and applications because of incorrect operations such as choosing cleaning install, which will erase all the data. We suggest the users try data recovery software to recover the data easily.
Why Do People Still Prefer Windows 7 Professional
- More User-Friendly: Microsoft’s Windows 7 is the most user-friendly version of windows. T is widely agreed by many people. If we compare it with Microsoft’s Windows XP then XP had a storage limitation and its operating system was not that functionally efficient. Simultaneously, if we compare Windows 7 with the new version then let’s consider Windows 8 which is an updated operating system but it was not popular because of its complexity.
Many people complained because of its whole new design, which was filled with various things that were inspired by other operating systems running in the industry.
Let us now compare Windows 7 with Windows 10 which is the second most popular Windows version launched by Microsoft. In Windows 10 users can get rid of several unused things which were in Windows 8. But this windows operating system is very heavy if we compare it with Windows 7.
Also, Windows 10 will occupy a lot of system space and resources compared to Windows 7 or any other version of it. It is because of animations that are available in Windows 10. Users have the option to switch off the animations manually in Windows 10 but disabling it will lose its entire features and looks.
- Speed: As we mentioned earlier in the above section of the article Windows 7 is very lightweight and it is the most functional windows version. It utilizes fewer system resources which will get most of the system. Users can run Windows 7 on a 2GB ram desktop and laptop. Users will achieve good performance. But, it is not possible in Windows 10. Windows 10 operating system requires more resources than Windows 7 and simultaneously it has some issues regarding memory management.
- Easy And Simple: We all agree that beauty changes from eye to eye. If we see a very simple Operating System it is often boring. But, Windows 7 has not failed to impress its users. However, Windows 7 is the only Operating system available that is easy and simple to use by all people. And till today there is no replacement for Windows 7 if we talk in terms related to simplicity.
- The Absent Bloatware: Bloatware refers to all of the Microsoft programs that come pre-installed with Windows 10. The use of any Microsoft software other than Skype is quite uncommon, and there aren’t even many people who use those programs regularly. If users wonder what is wrong with these applications, the reason is that even in the background, they keep using up resources from your computer.
Additional features of the Windows 7 Professional operating system
- Microsoft Windows has a greater synchronization between the user and the system which provides us with the benefits of using conventional tools like touch screen and voice recognition.
- Windows 7 requires less space and as a result, it requires less kernel
- Microsoft Windows 7 is available in both 32-bit and 64-bit architecture.
- Lastly, Microsoft’s Windows 7 is energy efficient and saves energy by using fewer machine components.
Conclusion
Although Microsoft 2022 launched Windows 11, people still use Windows 7 on their systems because it is very convenient to use and there are several important features. But many people still don’t know how to download Windows 7 iso 32 and 64-bit. We believe this article is informative for you.
FAQs for Windows 7 Professional ISO files
- How can a user get a free copy of Windows 7 ISO?
To download the Windows 7 ISO file, open the browser and navigate to Microsoft’s Windows 7 download website.
Step 1: Enter the product key to verify on the Go to Windows 7 download page.
Step 2: Next, decide in which language the user wants the Windows 7 ISO to download.
Step 3: After that, a link to download the Windows 7 ISO file will be provided. Depending on the computer, select a 32- or 64-bit download.
- Is 32-bit Windows 7 available?
Yes, users can download a 64-bit or 32-bit image file of Windows 7.
- How can Windows 7 be downloaded to a USB?
Rufus is a trustworthy program for producing bootable media, and it allows the user to write ISO images into USB devices.
Step 1: Download and launch Rufus.
Step 2: Decide which USB drive is likely to convert into a bootable one.
Step 3: To choose the downloaded Windows 7 ISO image, click “SELECT.”
Step 4: Format the USB device before starting the process of making it bootable.
- Can a user switch from Windows 7’s 32-bit to 64-bit versions?
To see if the user can upgrade Windows 7 from 32-bit to 64-bit, check to see if the processor you are using is an x64 or x32 model.
Press the Start button, then select Computer > Properties from the menu. Check out the system type.