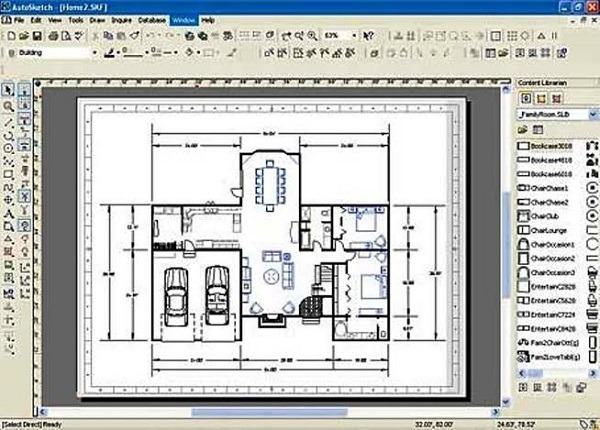
AutoSketch is a drawing program that was created by Autodesk. It is used to draw 2D vectors. The 2D drawings that are created by the user can be printed to scale and saved in the AutoCAD file format. Using this amazing program, students can practise their Computer-Aided design(CAD) techniques in a very cheap way.
They can also produce their drawing files in the native AutoCAD file formats and use them to display their skill level with CAD to their fellow employees.
The latest version of AutoSketch is AutoSketch version 10 which was released in 2008. There were many changes made to all the previous versions to get to this version. AutoSketch has been discontinued since 2016 and AutoDesk no longer supports the program.
Features of AutoSketch
The user can read through these features so that they will be able to know more about AutoSketch before using it:

Efficient drawing
There are many tools available under AutoSketch that will help users draw much more efficiently than before. It is very easy to copy and move entities between different drawings. It is important to be able to produce excellent work in as efficient a way as possible.
Accurate drawing
Locating points by snapping can help users get accurate dimensions for their drawings. Drawing accurately will show the user’s level of skill and attention to detail.
Viewing drawings
The user can view many of their drawings simultaneously by creating extra windows and they can also zoom in to see their work closely. It is important that the user gets to analyze their drawings properly so they can make the required changes.
Modifying drawings
There are many editing tools available that can help users effectively modify their drawings. There are many options like mirroring, rotating, and scaling that are available to modify the drawings. These options can be used to have a wonderful time adding new concepts to drawings that have been created.
Using standard symbols
Symbols from the Content Librarian can be inserted wherever the user may need them. Users can also modify the symbols that exist or create their own ones if they wish. Having a personalized touch to the symbols is sure to make users happy.
Creating dimensions and text
The user can customize dimensions and revise text if they need to as well. There are many standard dimensioning types available for the user.
Installing, registering, repairing, and uninstalling AutoSketch
These are the steps that have to be followed in order to install, register, repair, and uninstall AutoSketch:
Installation
- The user will have to insert their AutoSketch CD into their CD-ROM drive.
- They will then have to closely follow the instructions that will be displayed to them on screen.
- If the installation process does not begin on the insertion of the CD into the drive, it may mean that Autorun may not have been turned on in their system.
- If the user wants to install AutoSketch when Autorun has been turned off, they will have to insert their AutoSketch CD into their CD-ROM drive like before.
- They should then proceed to their Start menu(if they are using Windows) and select the Run option.
- When the Run dialogue box appears to them, they should enter the following: #Setup.exe. They should then click OK.
- The user should then follow the instructions that are displayed to them carefully.
- They can now proceed to the registration step.
Registration
- In order to register AutoSketch, the user will have to go to the Start menu and then select the All Programs option.
- They must then go to the AutoSketch Product Registration wizard and select the Register Now option, and then click the Next button.
- The user should then carefully follow the instructions that are displayed to them.
Repairing
- In case the user ends up deleting or modifying any files that may have been required by AutoSketch, it may not end up working properly.
- In this case, the user can try to repair AutoSketch. In order to do this, the user must go to the Control Panel and select the Add or Remove Programs option.
- They must then navigate through the previous option to find the AutoSketch Release 10 option, following which they must select the Change option.
- They must then go to the Setup wizard and choose the Repair option following which Next should be clicked.
- They can complete the Repair process by selecting the Finish button on the Ready to Repair the Application page.
- The user is advised to restart their system in case they are asked to.
Uninstallation
- The user must understand that if they uninstall AutoSketch, all of its components will be completely removed from their system.
- They should also know that uninstalling it will not cause their pre-existing drawing files to get deleted.
- In order to uninstall AutoSketch, the user should go to the Control Panel and select the Add or Remove Programs option.
- They will then have to select the AutoSketch Release 10 option and select the Remove option.
- They will have to click yes in the message box that will be displayed to them in order to complete the removal process.
- The user can restart their system if they receive a prompt to do so.
We hope that you found the information in this article to be useful to you. We had a wonderful time preparing it for you and we hope you enjoyed reading it. AutoSketch is a great program that will definitely help you create many excellent CAD drawings. These will also be of good use to you in your professional career if this is what you specialize in. Please share this article with anybody whom you may think needs it. If you have anything to discuss with us about the content that we have delivered to you, please feel free to reach out to us in the comments section below.


to dobry program do rysowania.