WinPE is the Windows preinstalled environment is a mini version of the Windows OS. WinPE is one of the best deployment and recovery OS developed by Microsoft .the tools are very precise and can come in handy at times. Having a copy of the WinPE can prove to be beneficial as they can provide you with ultimate features for customizing the actual OS. get a copy of the ISO of the WinPE and make a bootable disk with it to keep it handy.
In this article, we will discuss the WinPE its benefits and finally will discuss the method for creating a bootable disk for the Windows 7 WinPE. Go through the article to get more idea about the WinPE and learn how it can be of use to you.
Windows OS is one of the best OSes out there that is used by millions of people to run their computers. The OS has been provided by Microsoft and is being undertaken by Microsoft. The OS offers extensive features to benefit the users and improve the usability of the computer. There have been 17 major OS versions released by Microsoft, right from the start. The Windows OS is a user interface-based OS that provides the liberty of using a graphical user interface to the users. The UI is very intuitive and provides a full-fledged utility to the users. The OS mainly focuses on user experience and with each update, the OS is made to evolve to provide the best experience and the features that match the current trends. With such high standards, Windows OSes have been ruling the computer world. Windows 10 is the latest OS released by Microsoft and is currently being used to run millions of computers.
The Windows 7 OS is one of the successful OS released by Microsoft in the year 2009. At the time of the release, this OS got lots of attention as this was one of the best OSes ever released and had much-improved features and capabilities, compared to the previous releases. The OS is still being used by many users even though it has been officially discontinued by Microsoft, such is the craze for this OS. The OS provides the most modern features that can still be used for running any modern computer. The OS is highly stable and features the Aero themes for the UI. There are certain problems in using the Windows 7 OS is it is officially not supported anymore by Microsoft and the OS will not receive any updates and the user will have to use the features that are already there and most third-party software requires you to have a Windows 10 OS. These problems can be pretty easily rectified by using an older version of the third-party application and the OS needs no update as it is complete and can be used efficiently.
Recommended Post:- Keep or Enable the Metro UI in Windows 10
Features of WinPE
- Storage control.
- Networking tools.
- Setting up automatic recovery tools.
- Data recovery and management.
- Modification of the Windows OS while the OS is not running.
- Recovering data from unbootable devices.
- Adding custom shell or GUI for automation purposes.
- Security tools.
Here is how you Can Create Windows 7 WinPE Bootable USB Driver
Follow the steps mentioned below to create the bootable USB drive for Windows 7 WinPE.

- You need to have an internet connection and need a Pendrive to create the Bootable USB drive.
- First, you need to download the Windows 7 AIK ISO from the official Microsoft website.
- Now, use a good zip tool to extract the files, place the files in a folder and name it appropriately. Make sure that you keep note of the folder name and the location of the folder as the information will be needed for you to create the bootable disk.
- From the folder, start the application “StartCD.exe.
- Select the Windows 7 AIK setup option from the list.
- The AIK will be installed on your computer.
- Now, from the Start menu, open the Deployment tool command.
- You will need to enter some commands oi the prompt.
- Enter the following commands in the tool command.
- copype amd64 c:\WinPE_amd64
- copy c:\WinPE_amd64\winpe.wim c:\WinPE_amd64\iso\sources\boot.wim (use amdx86 for a 32bit computer)
- Now, insert the USB drive into the USB socket of the computer.
- Open the run command and run the diskpart command.
- In the diskpart command window, input the following command to format the USB drive and make a partition to make the USB ready.
- Type list disk and select the disk from the list by entering select disk (disk number).
- Now, enter the command “clean” to clean the disk completely.
- Now, enter the command “create primary partition” and “active”.
- Now, enter “format fs=ntfs quick label=WinPE_amd64”.
- Next, enter “assign and “exit”.
- Your disk has been formatted and is ready to use.
- Now, enter “xcopy c:\WinPE_amd64\iso\*.* E:\ /. Change the value of “E” to the corresponding letter provided to the disk.
- This command will copy the WinPE files to the Pendrive.
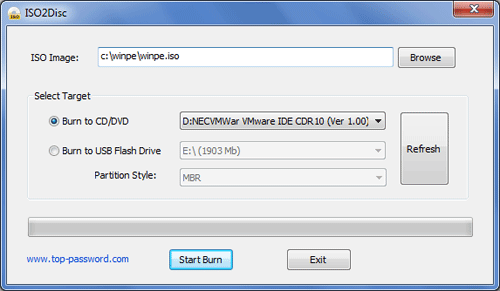
- If you want the ISO file to be created on the Pendrive, you can use this command “oscdimg -n -bc:\winpe_amd64\etfsboot.com c:\winpe_amd64\iso c:\winpe.iso”
- Once done, you are good to go and can use the USB drive to install the WinPE on any computer.
Follow the steps mentioned above precisely to successfully create a Windows 7 WinPE bootable disk. A 4 GB Pendrive will be good for the creation of the bootable disk.
Hope the information provided above was useful and informative, make use of the steps provided above and create a bootable disk for Windows 7 WinPE. Keep the WinPE on your computer to use it when needed. You would be able to comprehend the benefits of having such awesome utility OS on your computer.